📌 Love these ideas? Follow us on Pinterest for daily home decor inspiration! Follow @SeasonalHomeMagic →
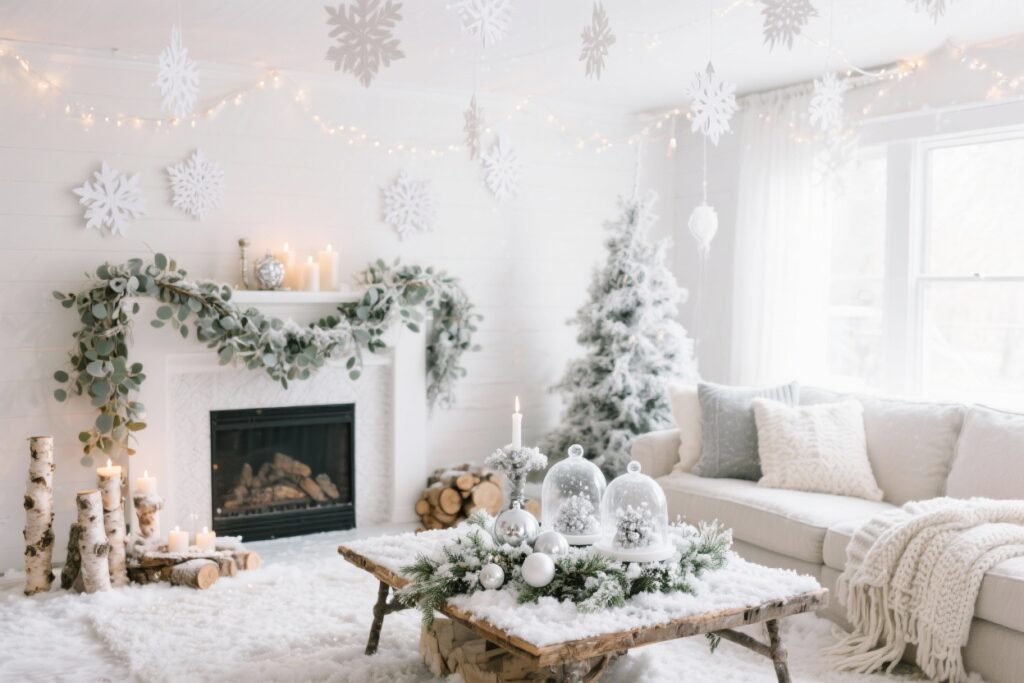
Ready to turn your place into a cozy snow globe—minus the freezing temps? These 10 DIY winter wonderland decorations are easy, affordable, and ridiculously pretty. We’re talking shimmer, texture, and that soft, magical glow that makes everyone ask, “Wait, did you hire a stylist?” FYI: No fancy tools required—just creativity and a little glitter.
1. Frosted Branch Forest (Zero-Dollar Showstopper)
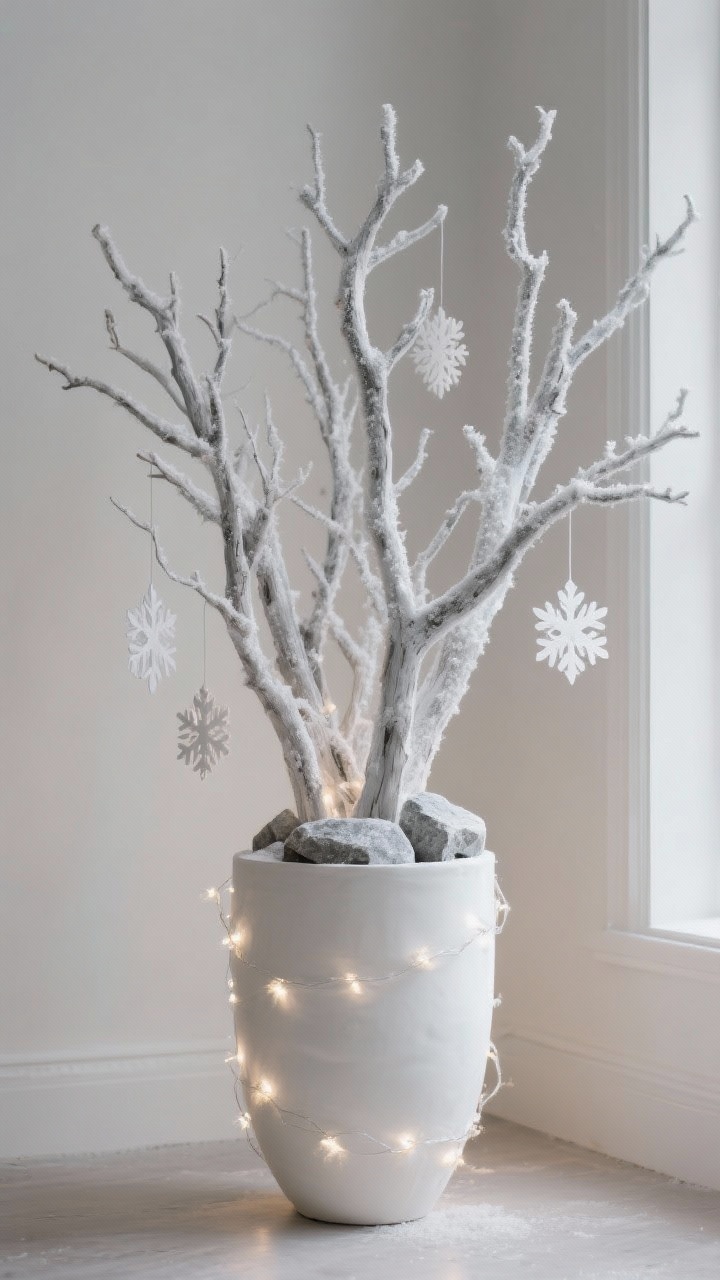
If you have access to a yard, a park, or basically a sidewalk, you’ve got materials. Grab a few fallen branches, give them a spa day, and turn them into a sculptural winter vignette.
How To Do It
- Clean and dry: Brush off dirt and let branches dry completely.
- Paint: Spray with matte white or pale gray for a frosted base.
- Glaze: Mist with a clear gloss or dust with Epsom salt + Mod Podge for icy texture.
- Arrange: Cluster in a ceramic urn, tall vase, or basket filled with rocks for stability.
- Glow: Wrap with warm-white fairy lights and add a few hanging paper snowflakes.
Style tip: Keep it monochrome. White branches + warm lights = instant winter magic that looks expensive (it’s not).
2. Snowy Candle Jars With Cozy Glow

These are the little mood-setters that make a room feel like a calm winter cabin. They’re quick, charming, and reusable.
Materials
- Clean glass jars (mason, salsa, jam—raid your recycling)
- Mod Podge or tacky glue
- Epsom salt or granulated sugar for “snow”
- Twine, ribbon, or lace
- Battery tea lights or LED candles
Steps
- Brush glue around the jar’s lower half.
- Roll in Epsom salt for a frosty texture.
- Tie twine or ribbon around the neck; tuck in a sprig of pine or a tiny bell.
- Add a tea light and bask in the glow.
Pro move: Stagger 5–7 jars in different sizes down your dining table. It’s the easiest centerpiece ever.
3. Paper Snowflake Garland That Doesn’t Look Like Kindergarten
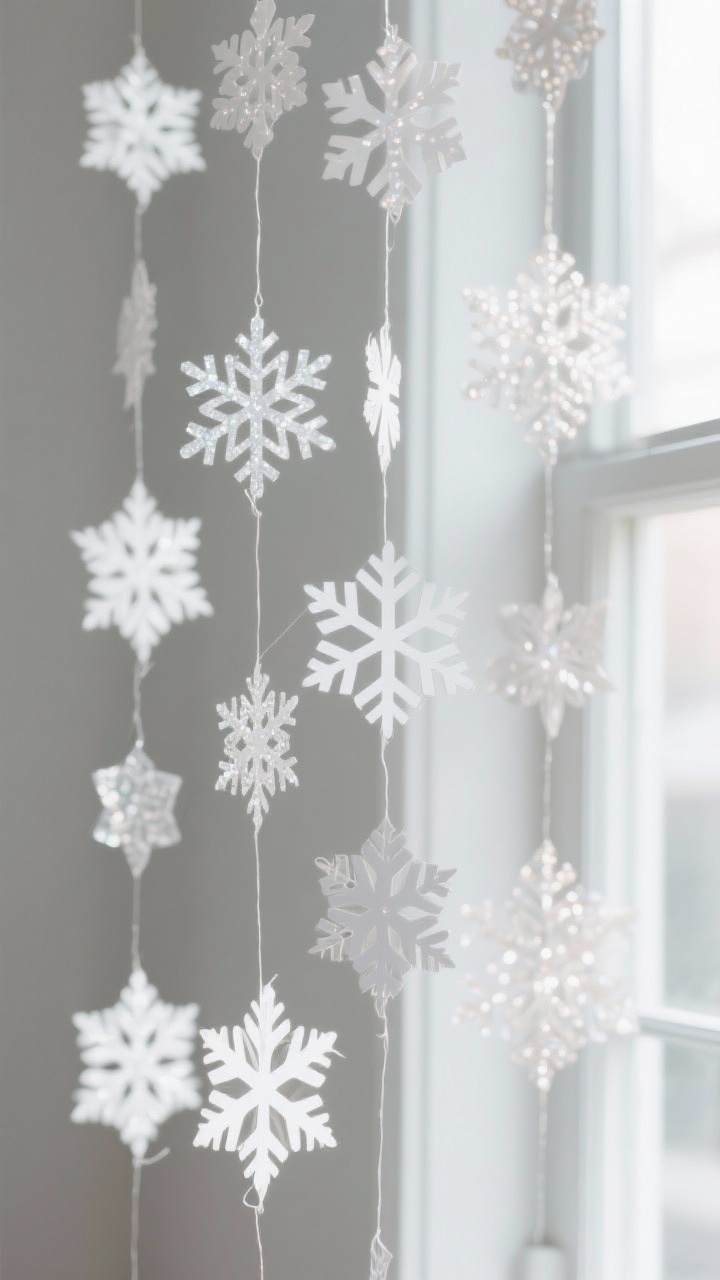
Hear me out: paper snowflakes, but chic. Think crisp white cardstock, elegant shapes, and clean lines. No crumpled printer paper energy here.
Make It Elevated
- Templates: Use symmetrical templates for sophisticated cuts (search “Scandinavian snowflake templates”).
- Paper choice: Thick white or pearlized cardstock looks luxe, or mix in vellum for transparency.
- Assembly: Thread with invisible nylon or thin white thread; create vertical strands or a garland.
- Placement: Drape across a window, entryway, or along the mantle for soft, floating movement.
FYI: Iron flat between books overnight for crisp, gallery-level flakes.
4. Winter Terrariums With Faux Snow
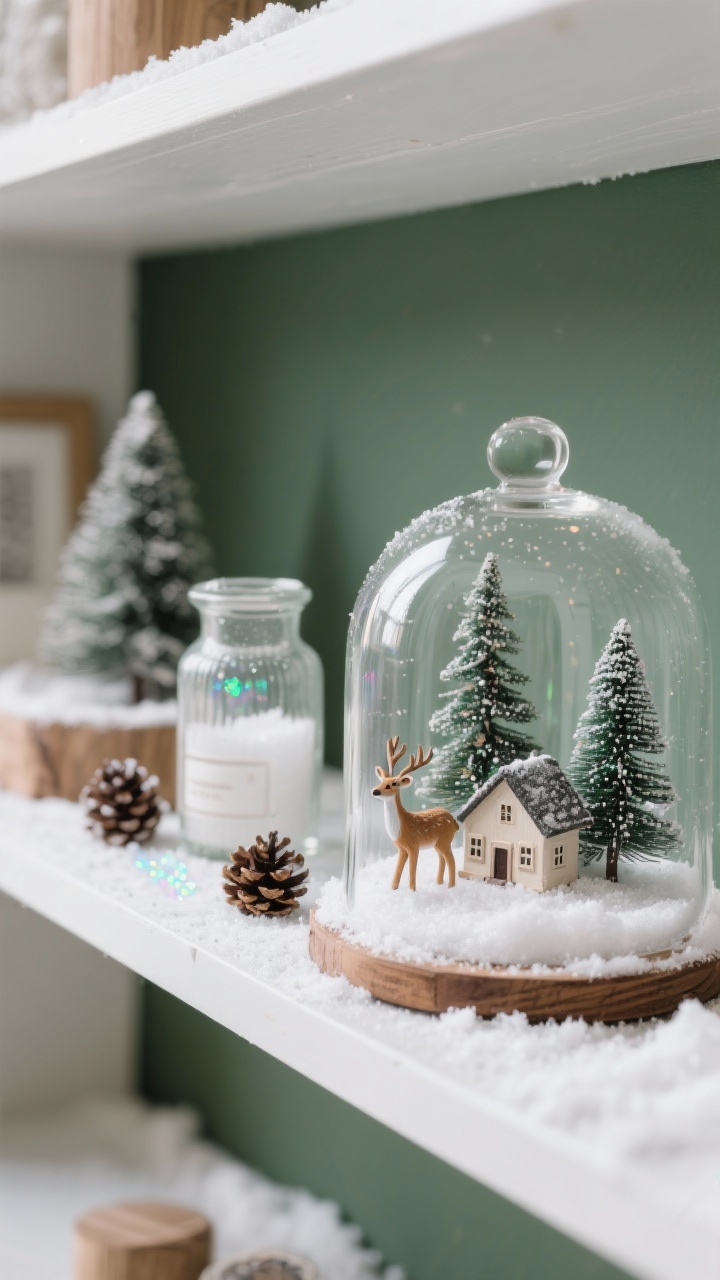
Mini “snow globe” vibes without the mess. Terrariums are stylish, customizable, and look fancy on shelves, coffee tables, or as centerpieces.
What You’ll Need
- Glass cloches, apothecary jars, or hurricanes
- Faux snow or kosher salt
- Mini trees, tiny houses, deer figurines, or bottlebrush trees
- Pinecones, moss, or a sprinkle of glitter (optional)
Build It
- Pour a thin base of faux snow.
- Anchor trees and figurines; bury bases slightly for realism.
- Add a subtle sparkle with iridescent glitter—lightly, not disco ball heavy.
Design tip: Stick to a simple palette—white, wood, and forest green. It’ll feel collected, not chaotic.
5. Knit-Inspired Textures (No Needles Required)

Want that cozy sweater vibe without actual knitting? You can fake it with texture tricks that scream winter.
Ideas To Try
- Cable “sweater” vases: Wrap vases or jars with old cable-knit sleeves. Secure with hot glue or double-sided tape.
- Chunky pillow hack: Put a large knit blanket inside a pillow cover for a plush, overstuffed look.
- Faux knit stockings: Use a hot-glue gun to draw “cable” patterns on felt, then paint in a knit color for texture.
Color palette: Cream, oatmeal, gray, and winter white. That monochrome mix feels elevated and calm.
6. Glitter-Dipped Pinecones (But Make Them Grown-Up)
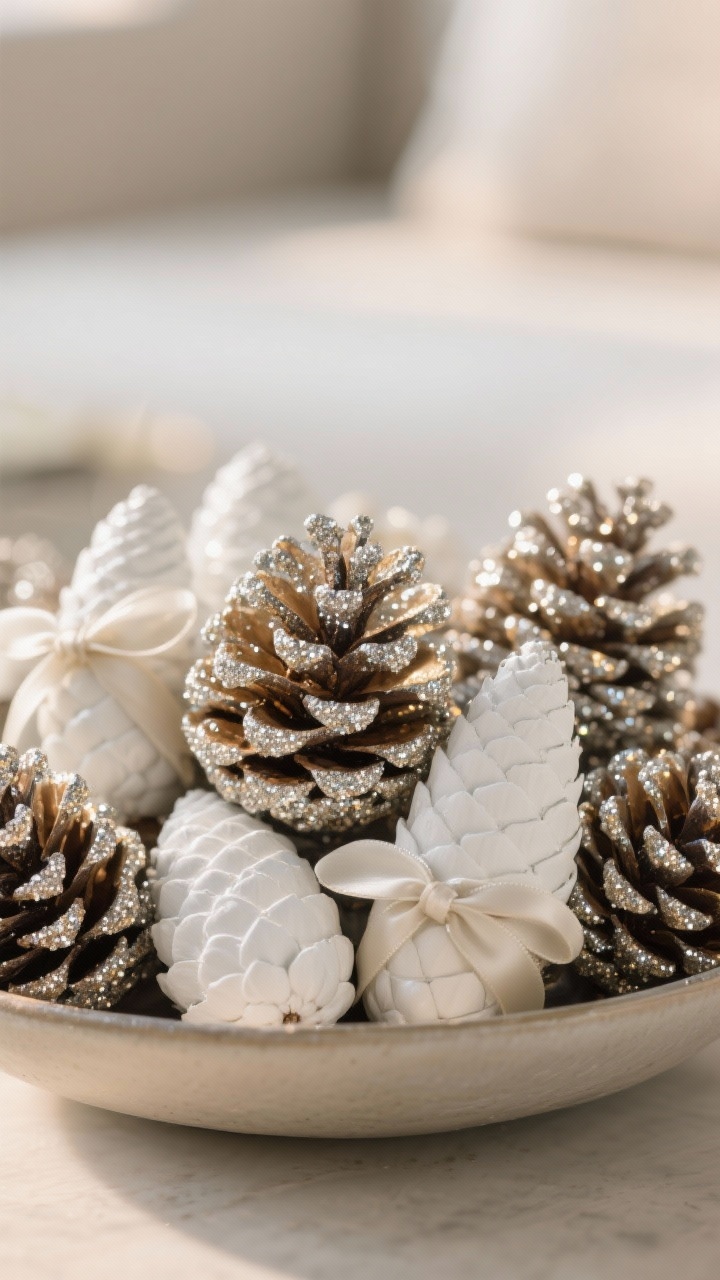
Pinecones are classic winter decor, and they’re basically free. Let’s give them the sparkle treatment without going full glitter bomb.
Method
- Prep: Bake pinecones at low temp (200°F/95°C for 30 minutes) to clean and open them fully.
- Dip: Brush tips with Mod Podge; dip into fine champagne or silver glitter (avoid primary colors).
- Finish: Tie with satin ribbon and hang on branches, pile in bowls, or wire onto wreaths.
Pro tip: Mix in a few painted matte-white pinecones for contrast. It keeps the look calm and modern, IMO.
7. Snowy Windows With Removable Magic
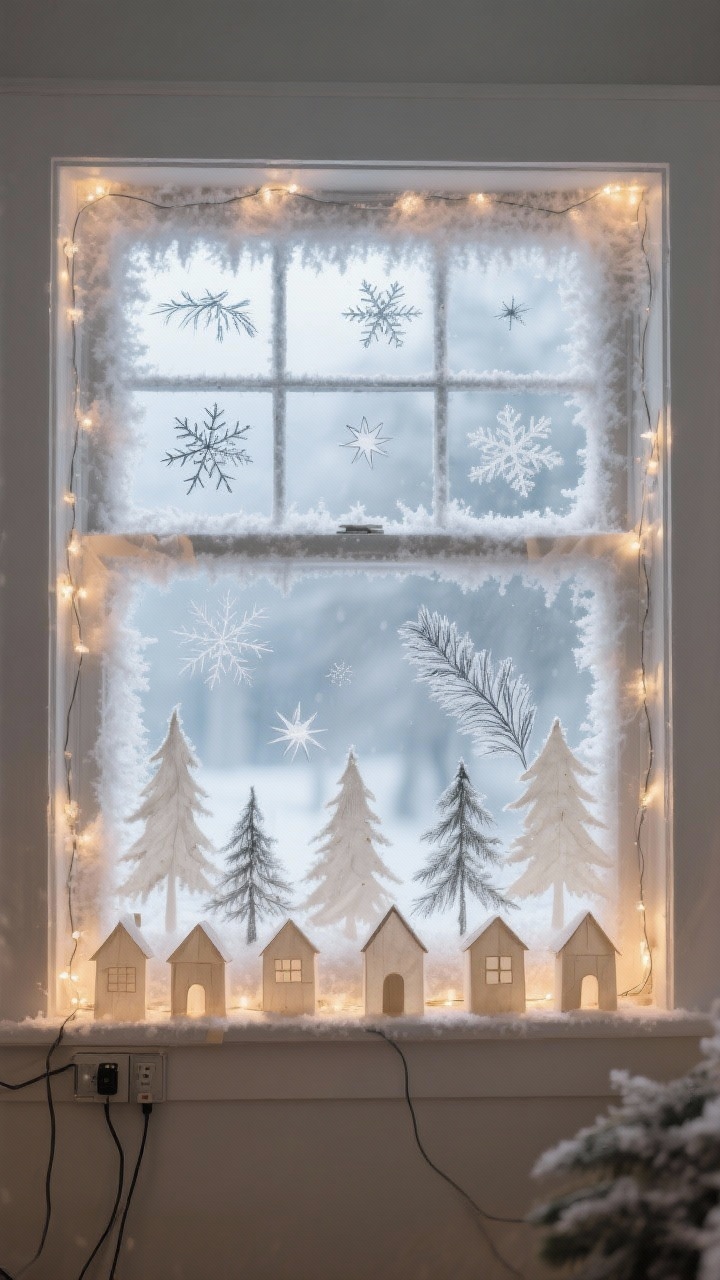
Windows are free real estate for winter decor. Go for frosty edges and soft silhouettes that look dreamy from inside and out.
Three Easy Techniques
- Epsom frost spray: Mix 1 cup hot water + 1 cup Epsom salt + a few drops dish soap. Spray edges of windows; crystals dry frosty.
- Chalk pen art: Draw delicate snowflakes, starbursts, or pine branches. Wipes off with water later.
- Vellum cutouts: Tape vellum trees or houses along the bottom of windows; backlight with string lights for a silhouette scene.
Safety check: Keep any cords or lights away from direct moisture. Battery-operated is your friend.
8. Nordic Paper Stars (Statement Ceiling Moment)
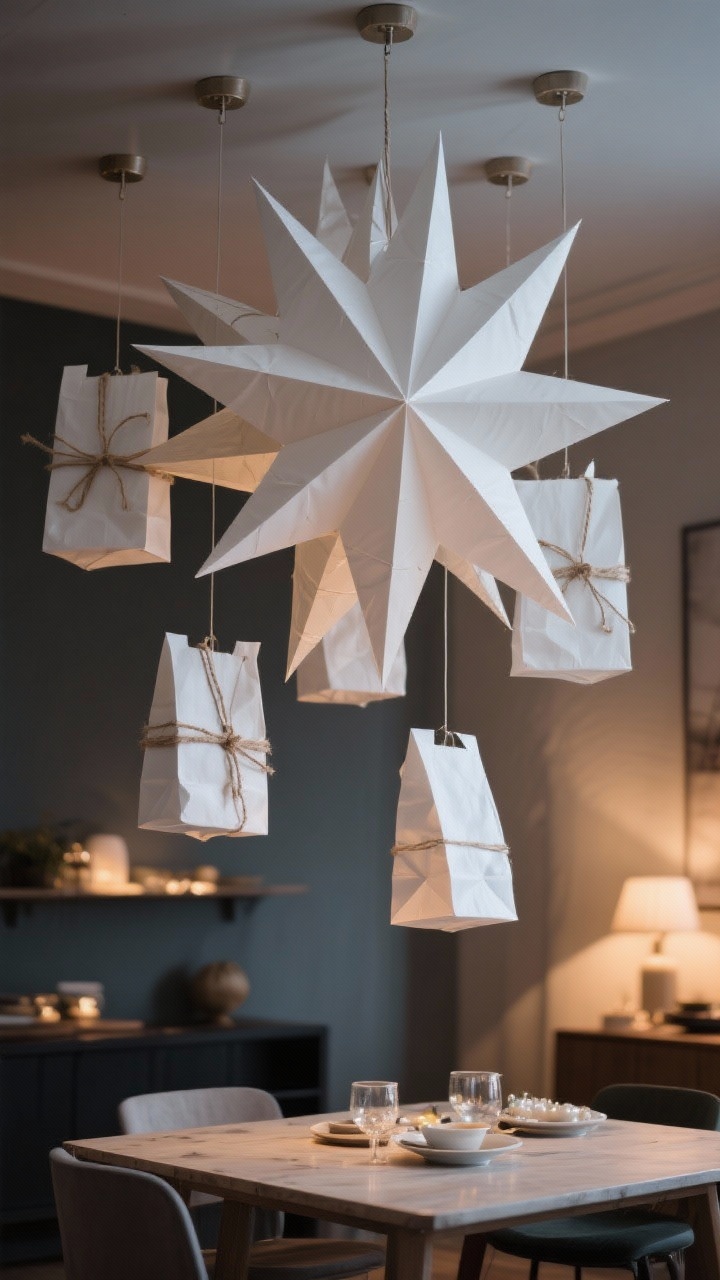
Those big, sculptural paper stars you see all over Scandinavian Pinterest? They’re easier than they look and bring instant drama.
How To Craft
- Supplies: Paper lunch bags or parchment paper bags, glue stick, scissors, twine.
- Stack 7–9 bags: Glue them in a stack, then cut a V or curve at the top to shape petals.
- Open and tie: Fan the stack into a star; secure with twine. Use command hooks to hang at different heights.
- Optional: Spray lightly with matte white or pearl spray for a luxe finish.
Placement: Over dining tables, in windows, or in a staggered cluster in a corner. It’s a whole vibe.
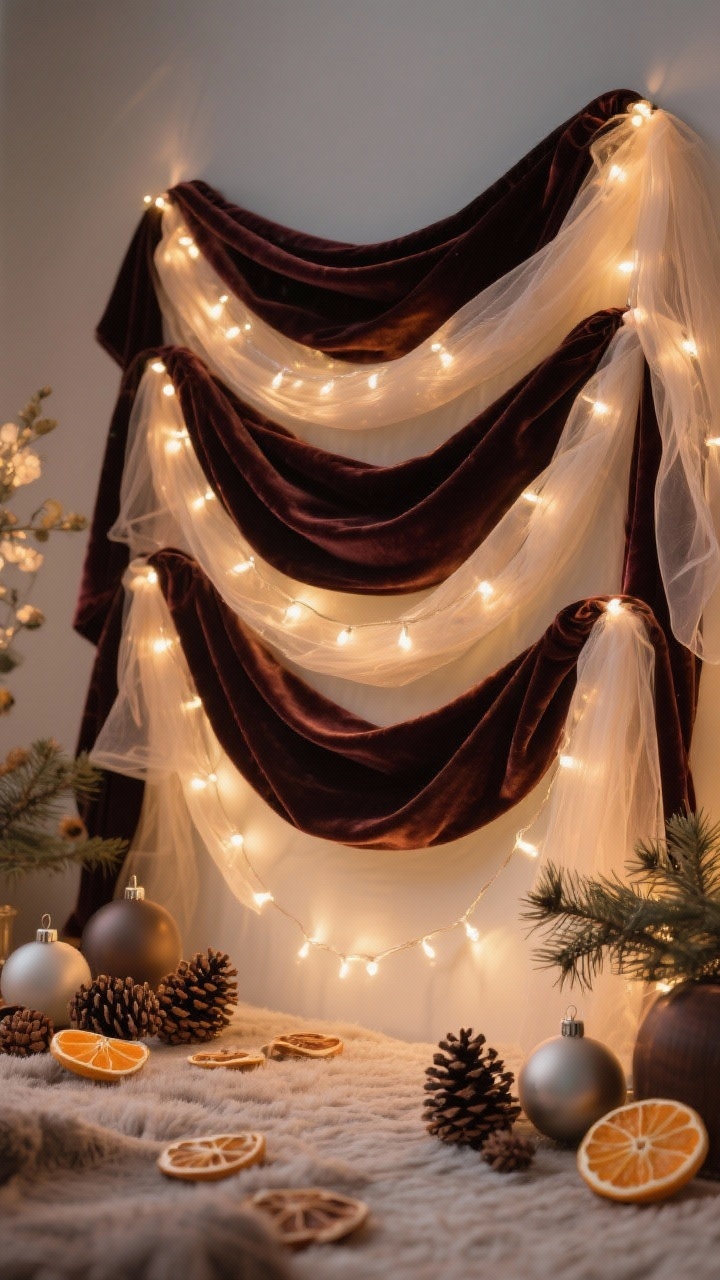
9. Evergreen Garland Glow-Up (Mantle, Staircase, Anywhere)

Garlands are the backbone of winter decor. Store-bought or foraged, they get a major upgrade with texture, layers, and smart lighting.
Layer Like A Stylist
- Base: Start with a faux or real evergreen garland for structure.
- Add texture: Tuck in eucalyptus, cedar sprays, or juniper for variation.
- Depth: Weave in ribbon—velvet or gauze—in 2.5–3 inch width. Let it billow naturally.
- Light it right: Use warm-white micro lights on thin wire; snake them through for an even glow.
- Finishing touches: Nestle in pinecones, matte ornaments, or dried oranges for color and character.
Pro tip: If it’s on a staircase, secure every 12–18 inches with floral wire so it survives the holiday stampede.
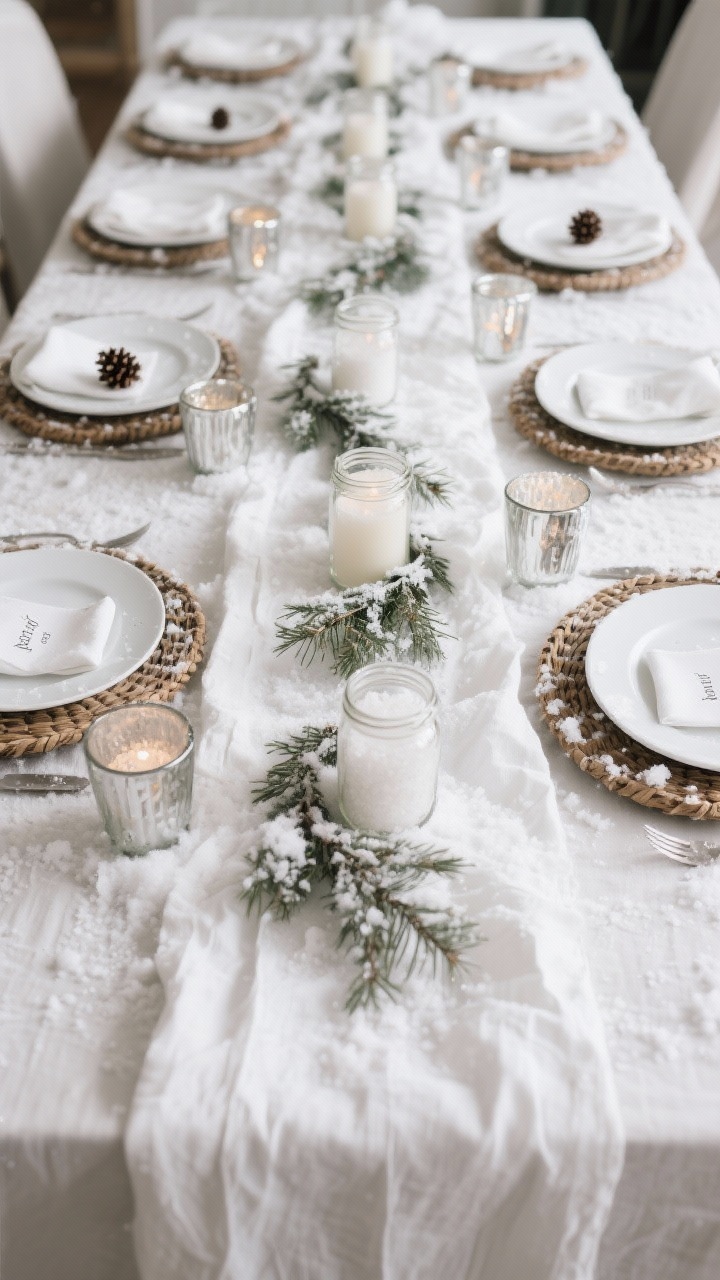
10. Snow-Dusted Tablescape You Can Eat Around
Let’s pull it all together. A calm, wintry table feels magical without getting in the way of, you know, the actual dinner.
Build The Look
- Runner: Use raw linen or a gauzy white fabric for a soft base. No ironing needed—crinkle is chic here.
- Center: Line up snowy candle jars and sprinkle faux snow lightly down the middle.
- Greenery: Add short cedar sprigs along the runner for softness and scent.
- Place settings: Layer a white plate on a woven charger; tuck a mini pinecone or name card into a napkin ring.
- Shimmer: Add a few mercury glass votives for that reflective glow.
Practical tip: Keep centerpieces under 10 inches tall so guests can actually make eye contact. Radical concept, I know.
Bonus Flavor Touch
- Garnish cocktails with a rosemary sprig and a sugared cranberry. Tiny detail, big impact.
Conclusion
See? A full-on winter wonderland doesn’t require a snow machine or a designer budget. Mix shimmering accents, layered textures, and lots of warm light, and your space will feel like a cozy escape from the chill. Pick two or three projects to start, pour some cocoa (or wine, no judgment), and let the crafting begin. Your home’s about to be the place everyone wants to hibernate.