📌 Love these ideas? Follow us on Pinterest for daily home decor inspiration! Follow @SeasonalHomeMagic →
Put the glitter down for one sec—we’re about to level up your Valentine’s Day decor using the simplest MVP: paper. It’s cheap, it’s customizable, and it looks ridiculously good when you know a few tricks. Whether you’re planning a cozy date night at home or hosting a full-on Galentine’s bash, these ideas are cute, quick, and very DIY-able.
1. Flirty Folded Heart Garlands (The Classic Glow-Up)
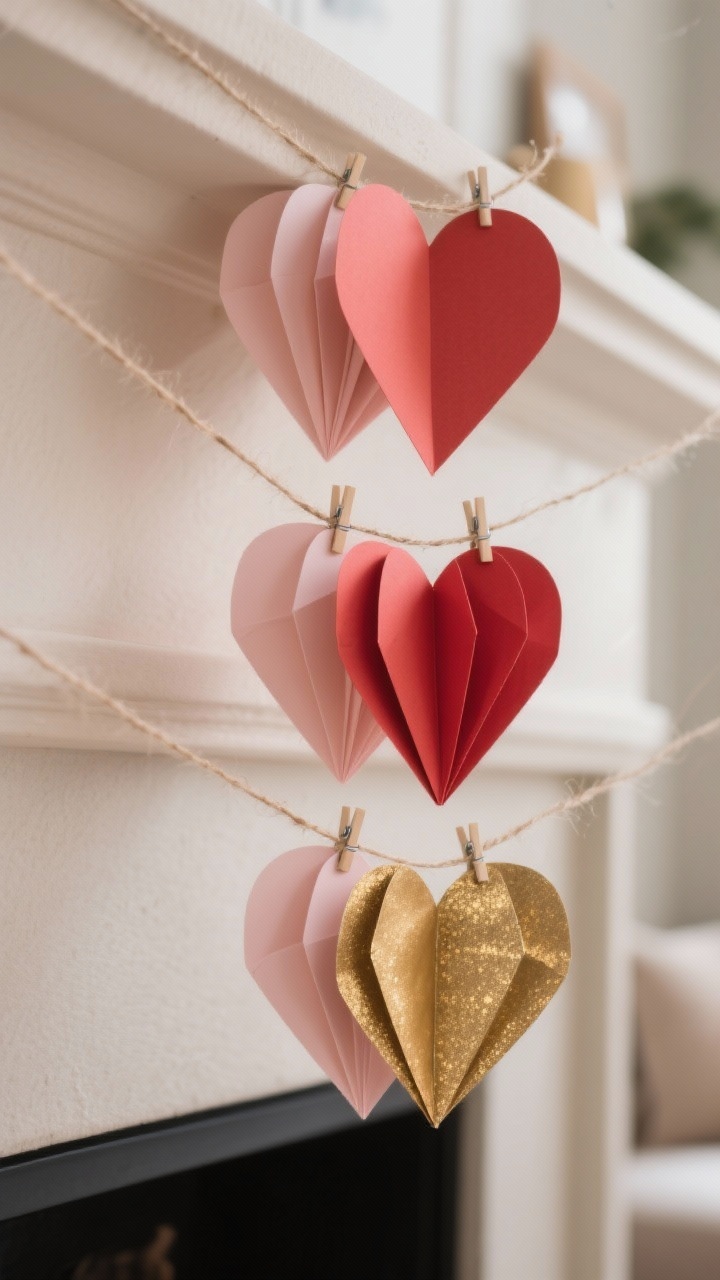
There’s a reason heart garlands are everywhere: they’re adorable and stupidly easy. But let’s elevate them. Instead of flat hearts, make 3D folded hearts that actually pop off the string.
A few years ago I tried a similar folded heart garland and was surprised how much depth it added compared to flat paper hearts. It instantly made the space feel more intentional without being overdone.
How To Make It
- Cut hearts in pairs from double-sided cardstock (two identical for each 3D heart).
- Fold each heart down the middle and glue one half to the half of another, leaving the last sides open—so it creates a fan effect.
- String them on twine or fishing line, spacing them out for airy balance.
Pro Tips
- Mix shades: blush, cherry red, dusty rose, and a few metallic gold hearts for sparkle.
- Hang across your mantle, over a headboard, or zig-zag them down a hallway.
- Use tiny micro clothespins for adjustable spacing (and to save your sanity).
2. Conversation Heart Banner With Sass
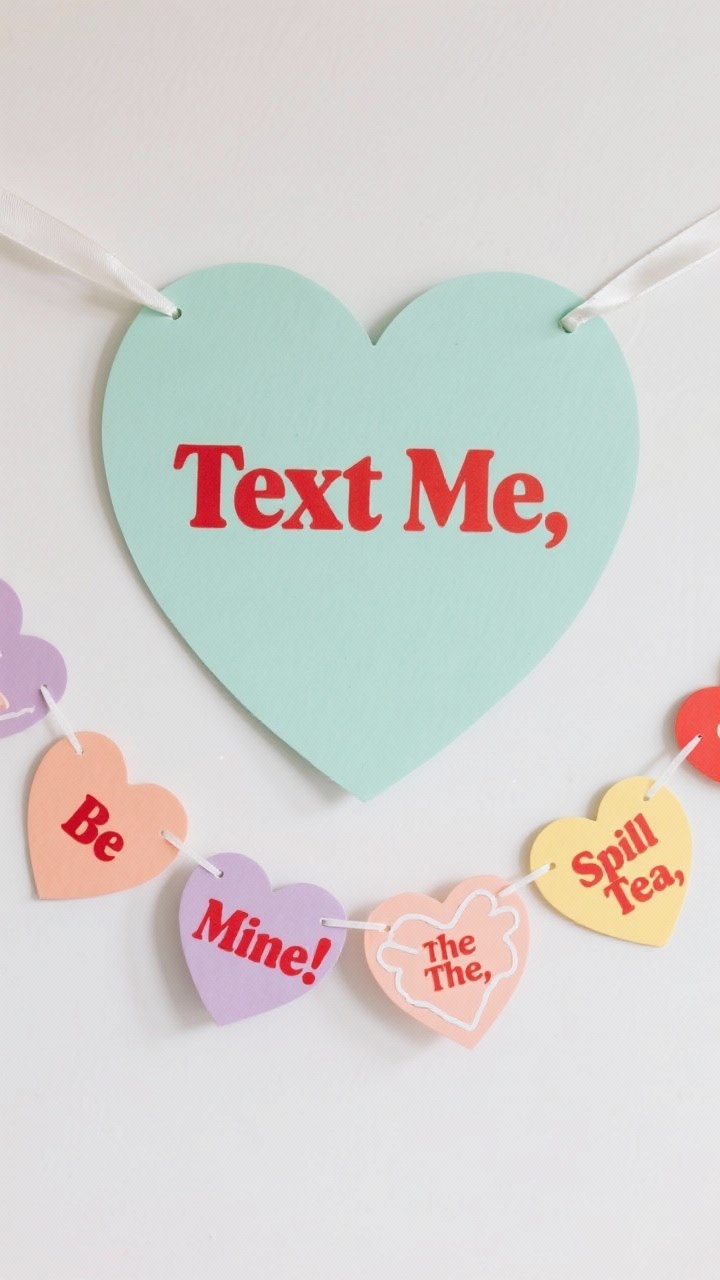
Remember those chalky candies we all pretend to like? Recreate them in paper and make the messages actually cute. Think “Text Me,” “Be Mine,” “Spill The Tea,” and maybe a spicy one for fun.
How To Make It
- Use pastel cardstock (mint, peach, lavender, yellow) and cut oversized hearts.
- Letter with red vinyl, sticker letters, or a paint pen for that crisp candy look.
- Punch holes at the top corners, then string on satin ribbon for a polished finish.
Pro Tips
- Outline hearts with a white gel pen for that sugary edge.
- Mix sizes for visual rhythm—big center heart, smaller ones trailing out.
- FYI: Add names for place settings or hang individual hearts on bedroom doors.
3. Paper Peony Bouquet That Won’t Wilt

Fresh flowers are lovely…but paper peonies look luxe and last forever. Pop them in a ceramic vase, tuck them onto shelves, or build a mini bouquet for the coffee table.
How To Make It
- Use crepe paper (extra fine for delicate petals, heavy for structure).
- Cut petal shapes in graduated sizes; stretch slightly to cup them.
- Wrap around a floral wire “stem” topped with a small crepe ball center; secure with floral tape.
Pro Tips
- Blend shades of pink for a realistic look—blush outside, deeper pink inside.
- Dust edges with soft pastel chalk for depth (game-changer).
- Finish with paper leaves and a satin ribbon bow for a gift-ready vibe.
4. Shadowbox Love Notes (Museum-Worthy, Promise)

Turn flat paper into a tiny art gallery. A paper shadowbox lets you layer hearts, arrows, and sweet notes for a dimensional look that feels intentional and chic.
How To Make It
- Grab a simple shadowbox frame (white or black). Cut a background from textured paper.
- Create layers: stitched paper hearts, small envelopes with notes inside, paper doilies, and glittery arrows.
- Use foam adhesive squares to pop elements forward at different depths.
Pro Tips
- Keep the palette tight: blush, ivory, gold. It reads high-end.
- Slide a handwritten note in one mini envelope—subtle and romantic.
- Perfect for entry tables or as a pair flanking your TV console.
5. Cupid’s Paper Arrow Bouquet
Arrows aren’t just for archers—they make adorable decor when grouped like a bouquet in a vase. It’s giving Cupid-core, in the best way.
How To Make It
- Use wooden skewers or dowels as stems. Wrap with gold or red washi tape.
- Cut arrowheads and feathered fletching from glitter paper or vellum.
- Glue pieces on both sides for a polished finish; fan them in a tall vase.
Pro Tips
- Mix paper textures: matte arrowheads with metallic fletching.
- Cluster 7–9 arrows for fullness—odd numbers look more natural.
- Add a simple tag: “Love Struck” or your initials for a subtle personalized touch.
6. Window Hearts That Catch The Light
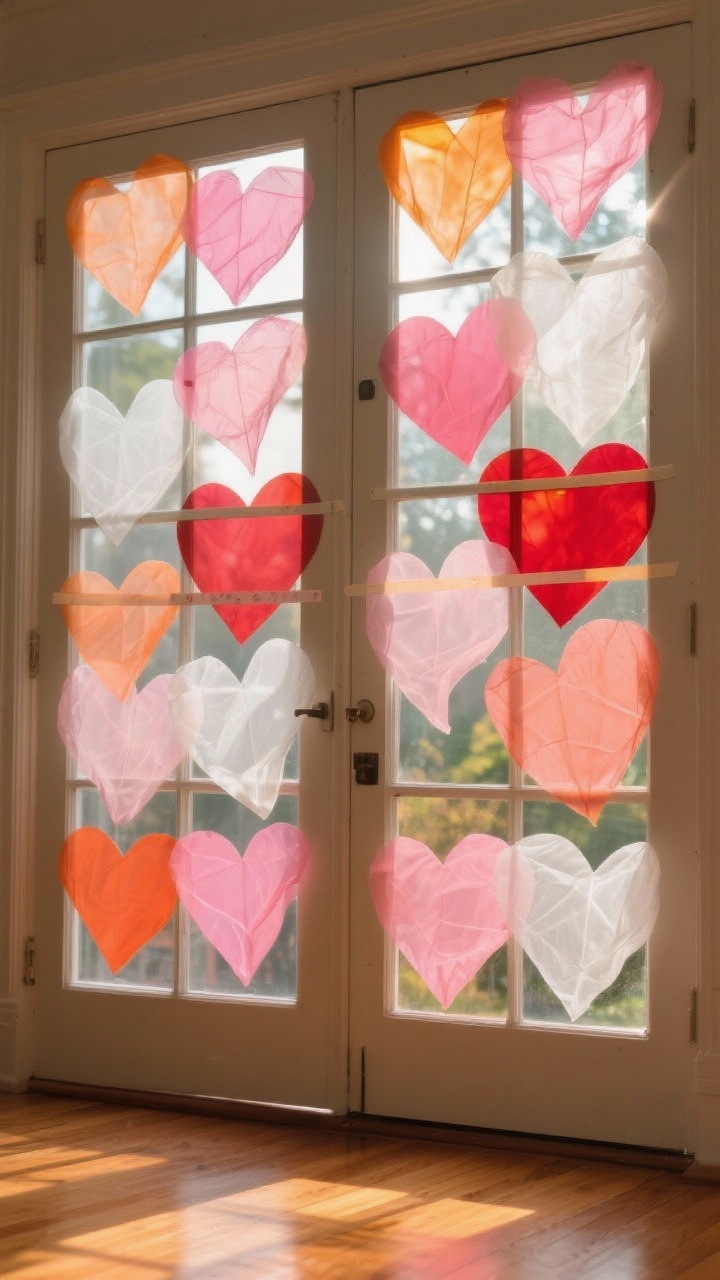
Want a quick, high-impact moment? Layer translucent tissue or vellum hearts on your windows and let the sun do the styling. The glow is unreal during golden hour.
This idea works especially well in winter when natural light is limited. I have seen similar window decor completely change the mood of a room during late afternoons.
How To Make It
- Cut hearts in varying sizes from pinks, reds, and soft oranges.
- Stick with removable washi tape or photo-friendly gel dots.
- Overlap them to create new shades, almost like stained glass.
Pro Tips
- Frame the center window with a denser cluster for a focal point.
- Add a few white vellum hearts for that dreamy, frosted look.
- IMO, this looks best on big windows or glass doors—instant mood.
7. Love Letter Paper Chains (Nostalgic, But Make It Cute)
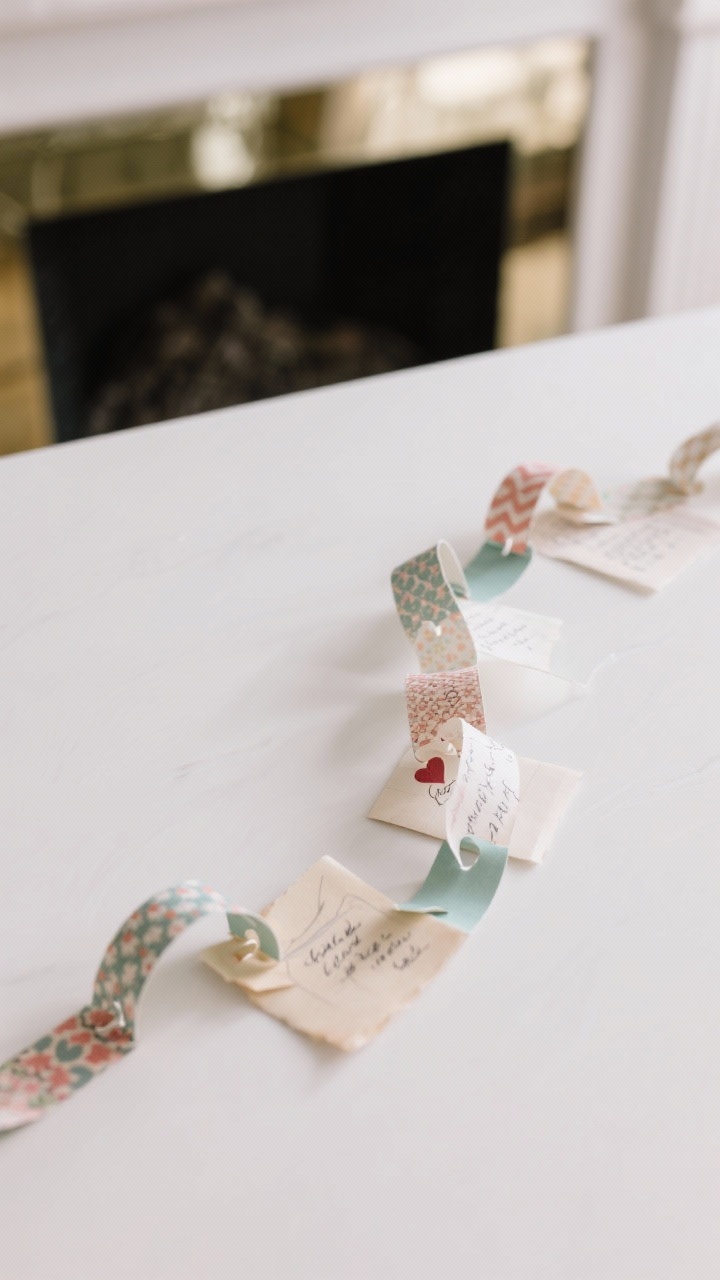
Paper chains, but not the grade-school kind. Use pretty patterns and add sweet phrases to each link for a chain that doubles as a conversation starter.
How To Make It
- Cut 1-inch strips from scrapbooking paper or printed “love letter” designs.
- Write a tiny note, memory, or inside joke on each strip.
- Staple or glue into loops, linking as you go. Drape on the mantle or around a mirror.
Pro Tips
- Alternate solids and patterns for rhythm.
- Use vellum strips between opaque papers for lightness.
- Make a mini version for shelf styling or around a tiered tray.
8. Origami Hearts As Table Confetti (And Place Cards)
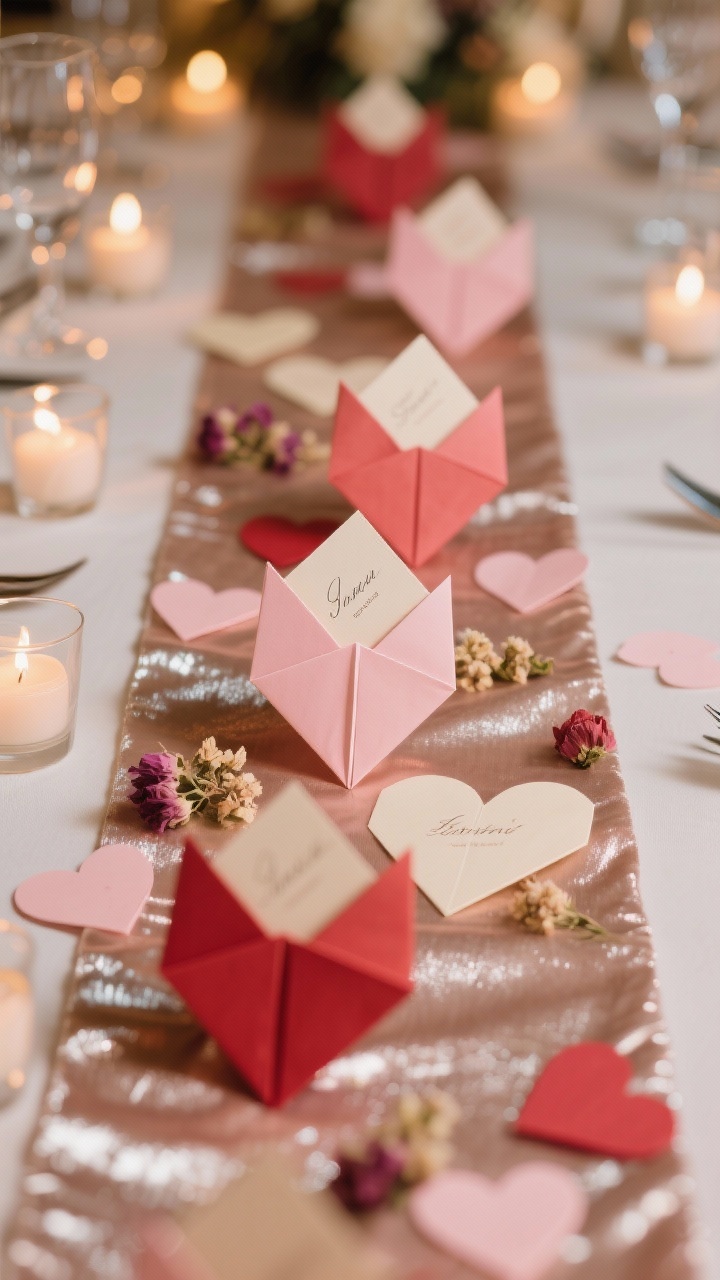
Flat confetti can be messy. Instead, fold small origami hearts that sit upright and double as place cards or scatter decor. Minimal clean-up, major style points.
How To Make It
- Use 3-inch squares of origami paper; fold into hearts with a pocket on the back.
- Tuck a small note or tiny dried flower into the pocket.
- Write guests’ names with a fine liner to turn them into place cards.
Pro Tips
- Mix matte and pearlescent papers for depth.
- Arrange along a runner, then add tea lights for sparkle.
- Save extras in a bowl for a cute coffee table accent.
9. Giant Paper Rosettes For Photo-Ready Walls
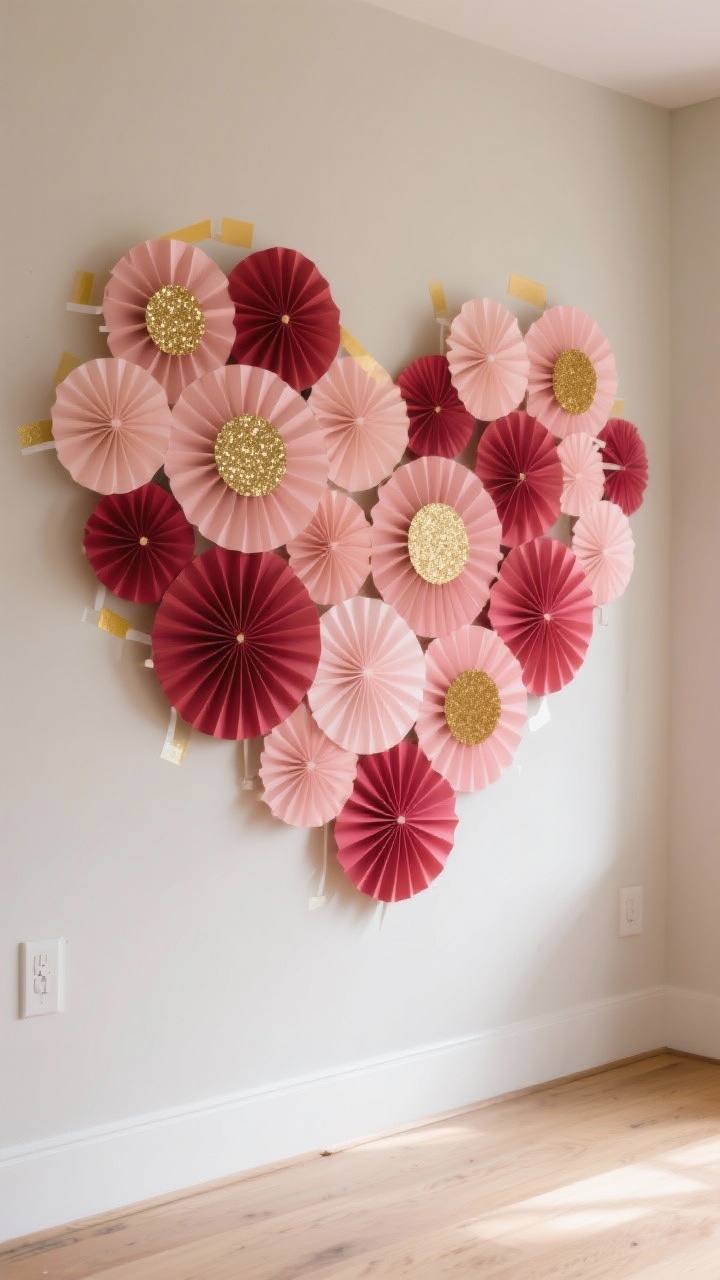
Hosting a Galentine’s or a cozy dinner? Build a statement wall using oversized paper rosettes layered in a heart-shaped cluster. It’s the perfect selfie station.
How To Make It
- Accordion-fold long strips of cardstock; join ends to form circles.
- Press flat and secure with a small circle on the back and front.
- Make multiple sizes in coordinating colors; add glitter or foil centers.
Pro Tips
- Map a soft heart outline on the wall with painter’s tape, then fill with rosettes.
- Use Command strips for damage-free removal.
- Layer rosettes slightly overlap for a lush, boutique-party vibe.
10. Mini Envelope Garland With Hidden Surprises
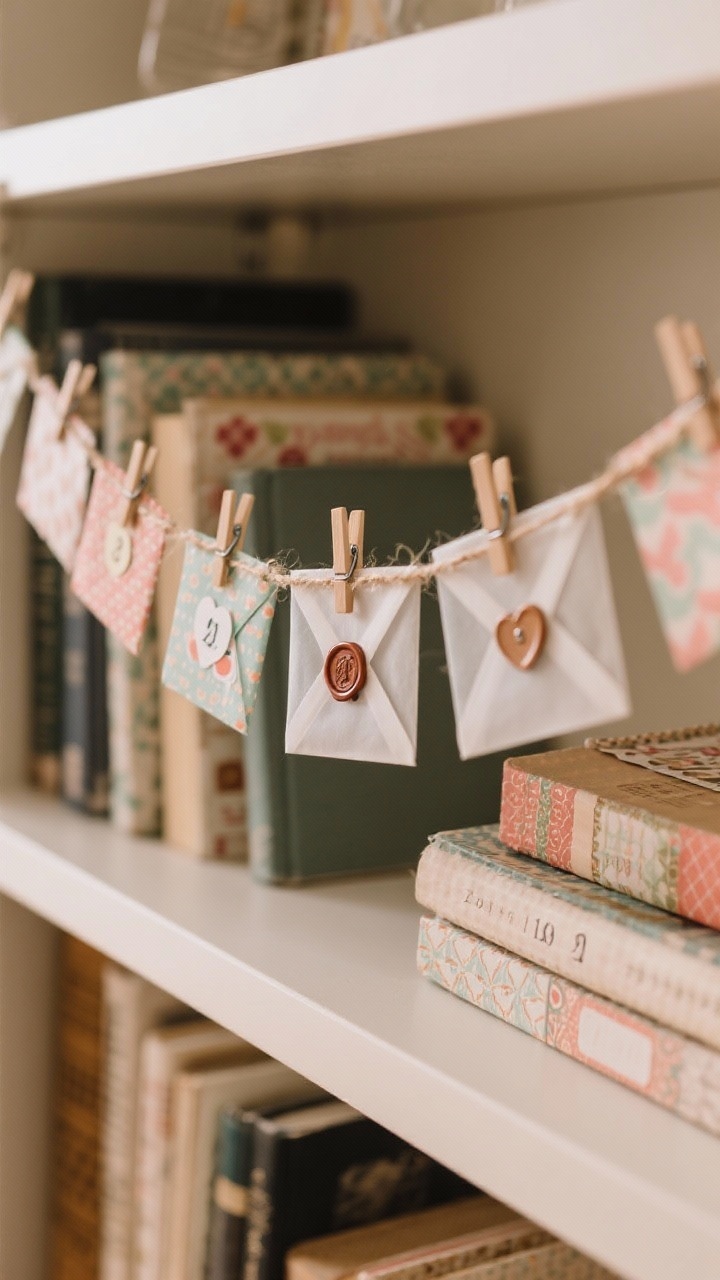
Think of this as a love-letter advent. String tiny envelopes across a doorway or shelf and tuck a note, prompt, or treat into each one. Cute, interactive, and very giftable.
Interactive decorations like this always feel more personal. In the past these kinds of small surprises made Valentine’s decor feel warmer and more memorable.
How To Make It
- Cut and fold mini envelopes from patterned scrapbook paper or use a punch board.
- Seal with stickers, wax seals, or heart-shaped brads.
- Clip to twine with mini clothespins; add numbered tags if you want a countdown.
Pro Tips
- Fill with date ideas, compliments, or candy hearts (if you must).
- Alternate vellum envelopes for a peek-a-boo moment.
- Hang low on a bookshelf or around the bed frame for extra charm.
Quick Supplies Checklist
- Cardstock, crepe paper, tissue, vellum
- Twine, ribbon, washi tape, glue gun, foam squares
- Scissors, craft knife, hole punch, floral wire/tape
- Metallic/gel pens, sticker letters, glitter paper
- Command strips, mini clothespins, skewers/dowels
Styling Ideas To Pull It All Together
- Pick a palette: Blush + Cranberry + Gold or Pastel Rainbow. Consistency = polished.
- Balance bold and airy: pair giant rosettes with delicate window hearts.
- Create a flow: entry garland → living room bouquet → dining tabletop origami hearts.
Ready to make your place feel like a rom-com set? Grab your scissors, queue a cute playlist, and try a couple of these super cute paper Valentines Day decorations. They’re budget-friendly, totally customizable, and guaranteed to make February feel fabulous. And yes, you can brag on Instagram—your craft game deserves it.
FAQ
1. What are paper Valentines Day decorations?
2. Are paper Valentines Day decorations easy to make at home?
3. What paper works best for Valentine’s Day decorations?
4. Can paper Valentines Day decorations look stylish and not childish?
5. How long do paper Valentines Day decorations last?
6. Are paper decorations safe for small spaces or apartments?
If these Valentine’s decorating ideas inspired you, you’ll find even more romantic decor ideas in my other Valentine’s Day posts!
- 9 Farmhouse Valentine Decor Ideas That Feel Cozy and Natural
- 10 Valentines Day Luxurious Decor Ideas for an Elegant Home
- 13 Vintage Valentines Decorations That Feel Romantic and Timeless
- 11 Rustic Farmhouse Valentine Decor With French Charm
- 12 Valentines Party Decor Ideas That Feel Stylish and Cozy