📌 Love these ideas? Follow us on Pinterest for daily home decor inspiration! Follow @SeasonalHomeMagic →
Ever opened your camper closet and thought, “Where did all this stuff come from?” You’re not alone! Closets in campers are notoriously small, and keeping them organized can feel like solving a 3D puzzle. But with a few smart hacks and creative storage ideas, you can turn that cramped nook into a well-ordered wardrobe. In this list, we’ll explore 18 practical and stylish camper closet storage ideas that make packing, living, and traveling easier—and way tidier.
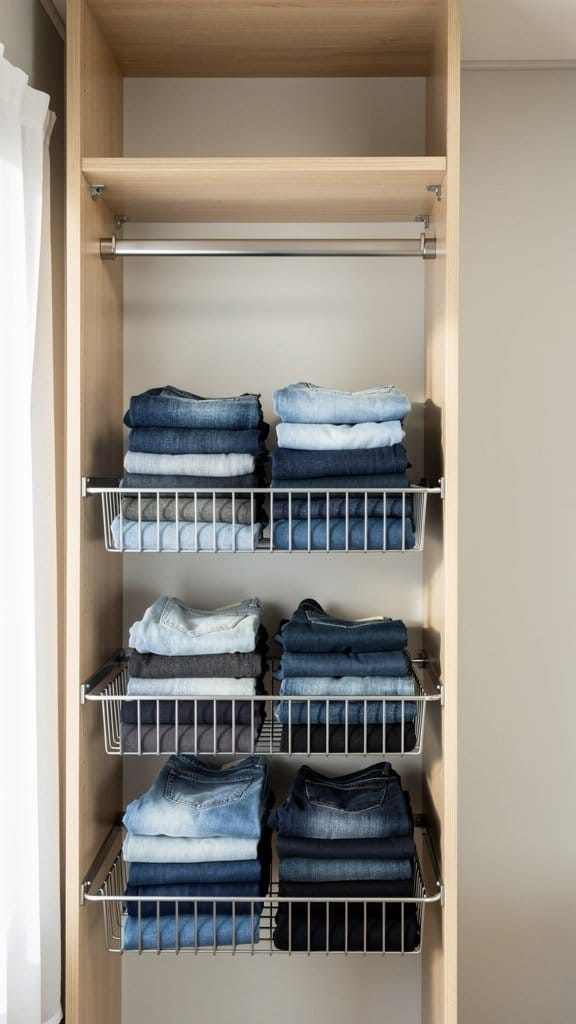
1. Use Adjustable Shelving for Custom Space
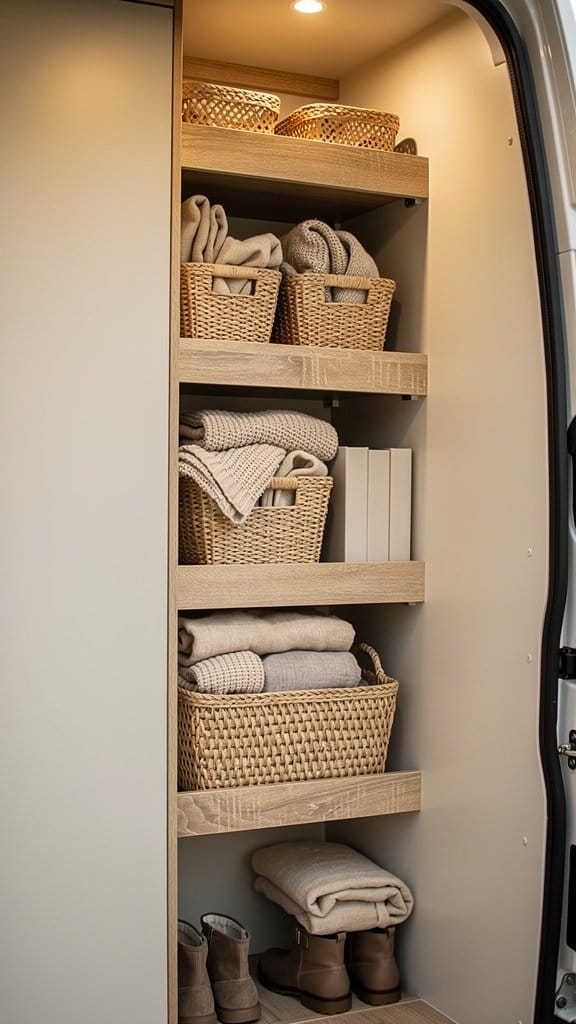
Fixed shelves are fine in a home, but when you’re dealing with variable storage needs in a camper, adjustable shelving is a game changer. You can modify shelf heights to fit everything from shoes to sweaters.
Layout Suggestions
- Opt for lightweight aluminum or wood laminate shelves for easy trimming and durability.
- Align shelf hooks with a track system so you can reposition as needed.
- Add small bins or baskets to keep folded items from sliding around while driving.
Adjustable systems help you adapt your closet as your wardrobe or travel season changes—perfect for long-haul adventurers or weekend explorers alike.
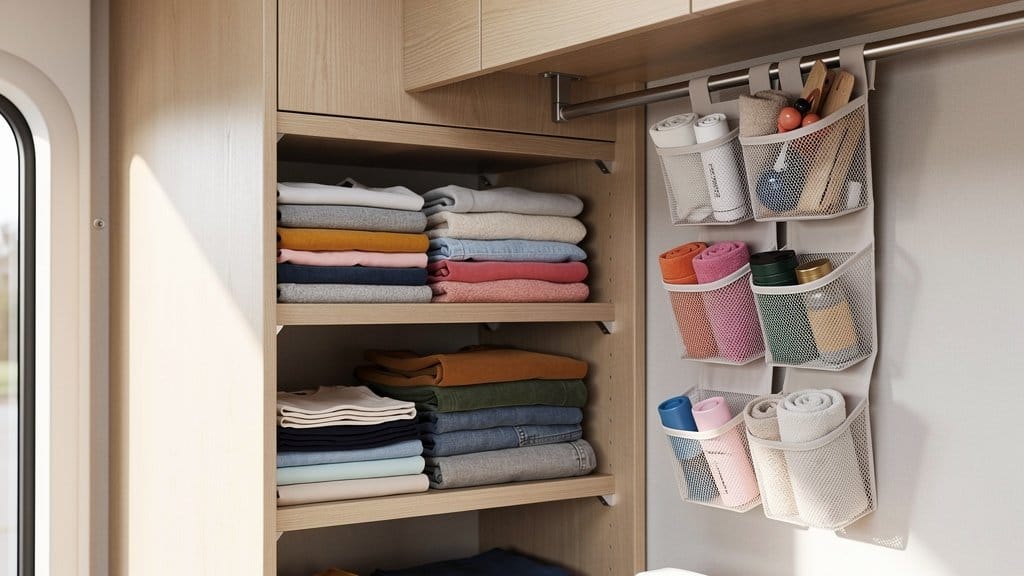
2. Install Hanging Organizers for Vertical Efficiency
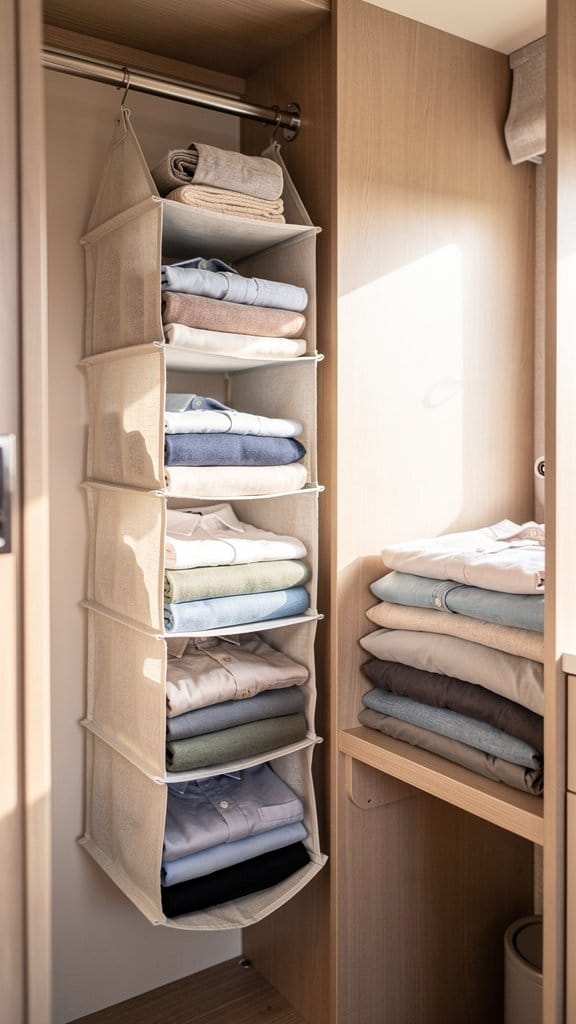
When your closet footprint is tiny, think vertically! Hanging organizers use dead vertical space and often fold flat when not in use.
Small Space Tricks
- Choose fabric organizers with compartments sized for socks, underwear, or rolled tees.
- Velcro versions attach easily to rods without tools.
- Pick neutral tones to match your camper’s interior for a cohesive look.
These soft-sided wonders add instant order without taking up precious floor space—IMO, this trick works especially well in compact travel trailers.
3. Add Over-the-Door Racks
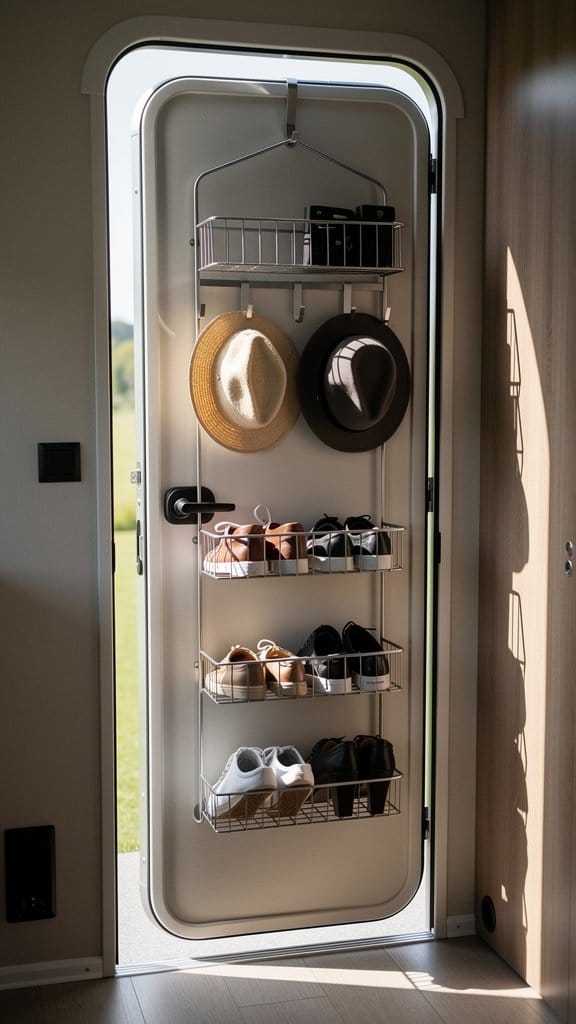
Closet doors (or even bathroom doors) can double as handy storage real estate. Over-the-door racks offer places for shoes, hats, or accessories.
Style Notes
- Look for racks with hooks that fit snugly without damaging the door.
- Try mesh or clear pocket designs so you can see contents instantly.
- Mix in smaller hook versions for bags or scarves.
Over-the-door storage is an easy install, doesn’t require drilling, and instantly adds valuable vertical space in tight quarters.
4. Use Bins and Baskets With Labels
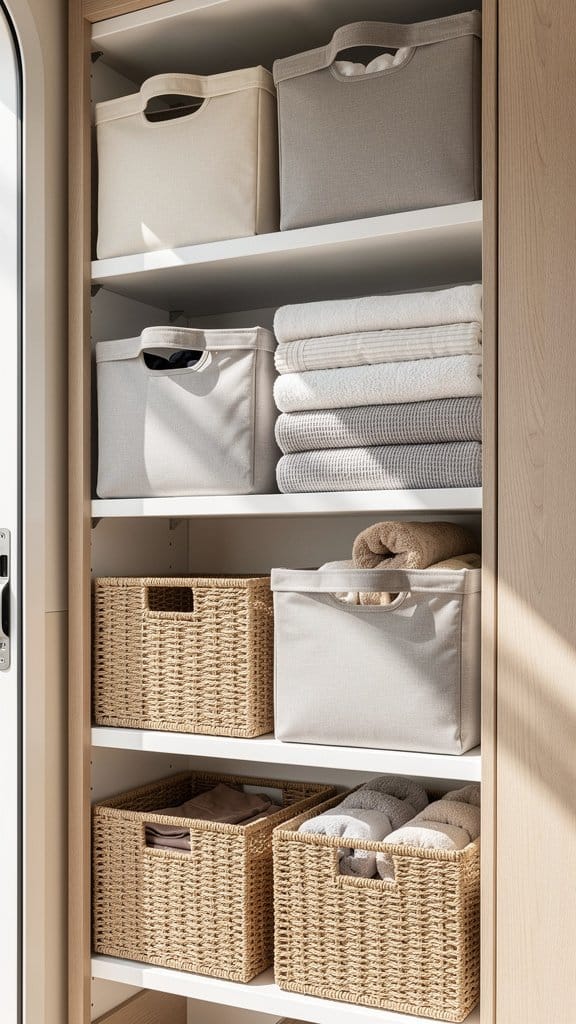
Baskets and bins aren’t just cute—they keep chaos contained. In a camper closet, labels make all the difference, especially when you’re quickly grabbing gear on travel days.
Decorating Details
- Fabric bins add a soft texture that blends nicely with cozy camper interiors.
- Stick-on chalkboard labels allow easy relabeling as your contents change.
- Group bins by category: “Warm Layers,” “Beach Gear,” or “Laundry.”
Labeled storage saves time hunting through piles and brings a mini-homey feel even on the road.
5. Install a Tension Rod for Double Hanging Space
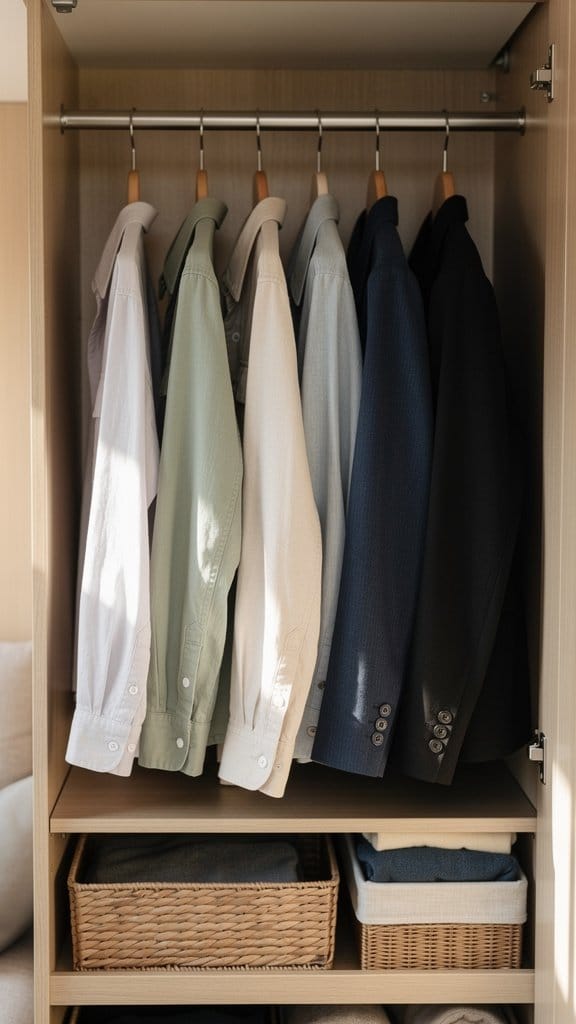
A simple tension rod can instantly double your hanging area, especially for shorter garments. Think shirts above, pants below—organized bliss in a small space.
Key Design Elements
- Use rubber-tipped rods to prevent slipping while driving.
- Measure before installing to ensure clearance for hanging items.
- Combine with slimline hangers for maximum capacity.
This mini-upgrade can make your compact closet feel twice its size—no tools, no fuss.
6. Try Collapsible Storage Cubes
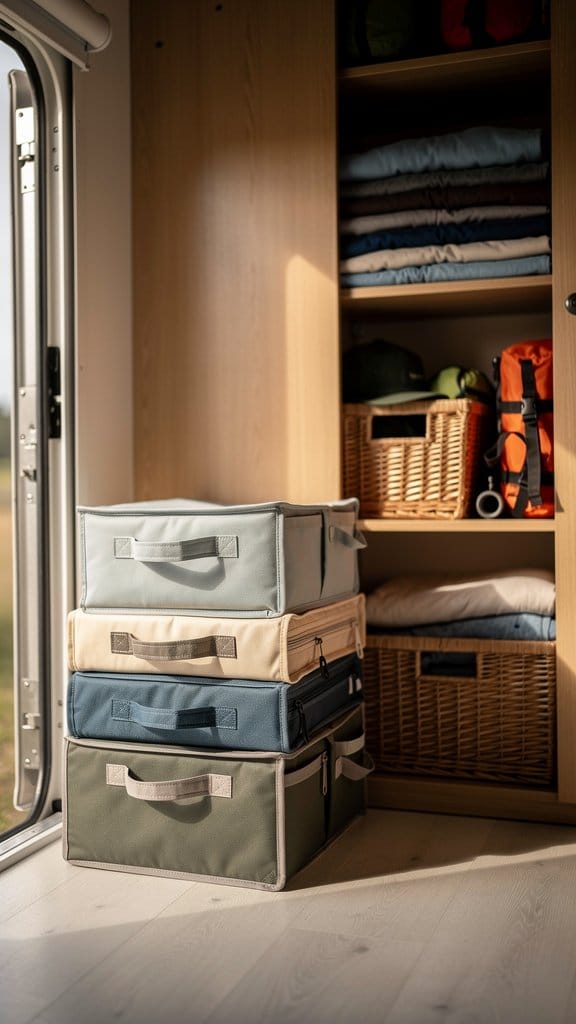
Collapsible cubes are MVPs for camper living. They hold everything from shoes to toiletries, and when not in use, they fold completely flat.
Materials To Try
- Canvas cubes are sturdy yet flexible for uneven surfaces.
- Plastic or waterproof fabric cubes work well for damp spaces.
- Choose neutral or patterned fabric to match your camper’s vibe.
Lightweight and portable, these cubes are awesome for switching between packing and unpacking modes—perfect for seasonal travelers.
7. Use a Closet Drawer System
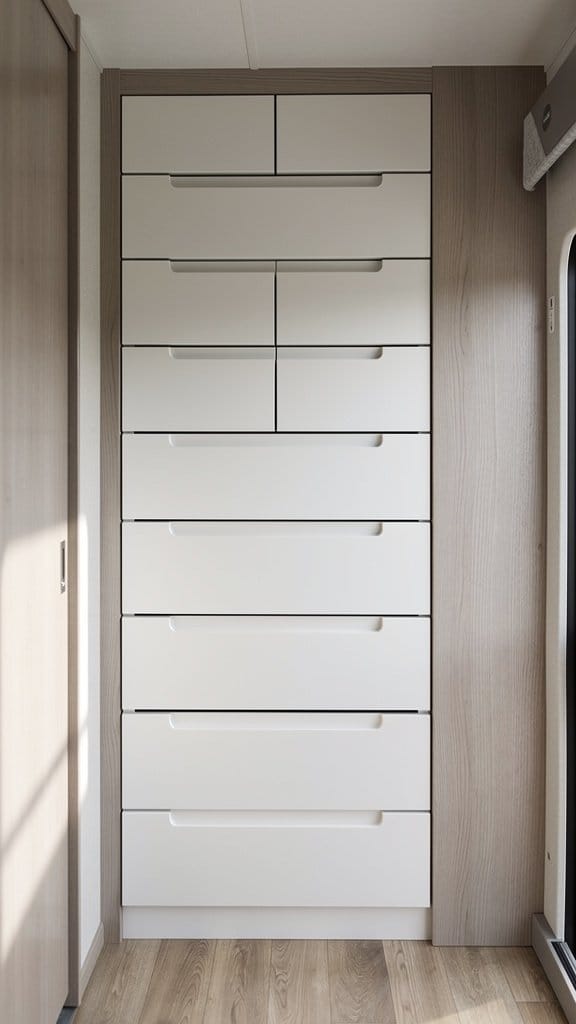
If you prefer drawers over shelves, modular closet drawer systems keep everything neatly contained. You can stack them vertically to mimic a built-in dresser.
Layout Suggestions
- Look for plastic systems with smooth glides for easy opening.
- Add felt liners so things don’t shift while driving.
- Choose a transparent design for quick visibility.
Portable drawers help you keep folded clothing crisp and accessible—plus, they’re easy to reposition if you reconfigure your layout later.
8. Install Hooks and Pegboards
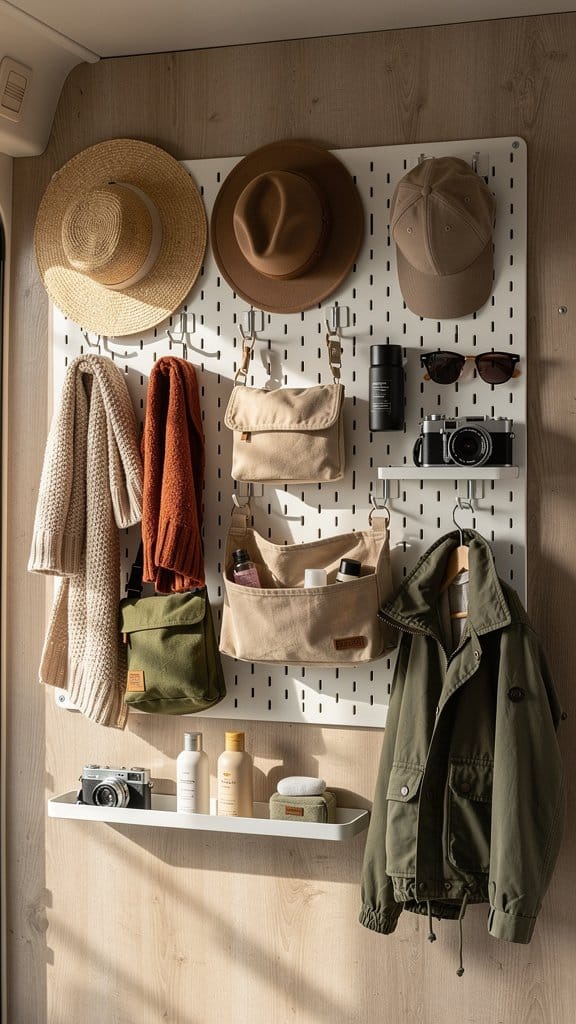
Hooks and pegboards aren’t just for garages—they’re excellent for maximizing awkward closet corners. Hang hats, belts, and accessories in easy reach.
Small Space Tricks
- Use adhesive hooks for lightweight items; screw-mounted ones for heavier gear.
- Pegboards can be cut to fit inside closet doors or narrow walls.
- Paint pegboards to match your camper color palette for a polished look.
Once you start hanging things vertically, you realize how much hidden space you actually have. It’s organized magic.
9. Add a Slide-Out Shoe Organizer
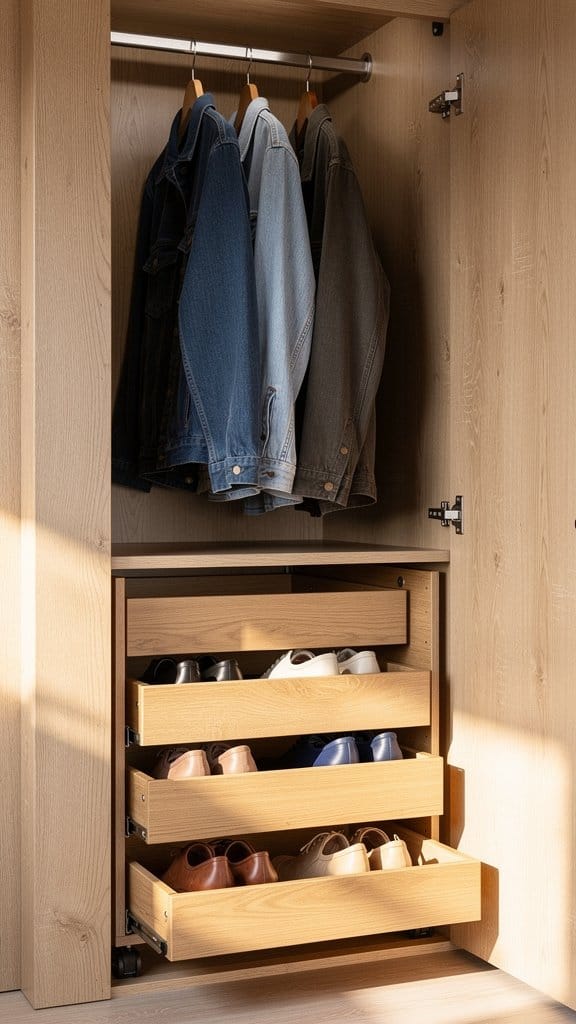
Shoes can eat up floor space fast. A pull-out shoe rack or drawer keeps them tidy and off the main walkway.
Key Design Elements
- Measure carefully to fit the depth of your closet or under-bed area.
- Use lightweight metal or plastic tracks for smooth rolling action.
- Arrange shoes heel-to-toe to maximize capacity.
You’ll love the ease of sliding out your collection instead of digging under piles. Plus, no more runaway flip-flops!
10. Use Vacuum-Sealed Bags for Seasonal Clothes
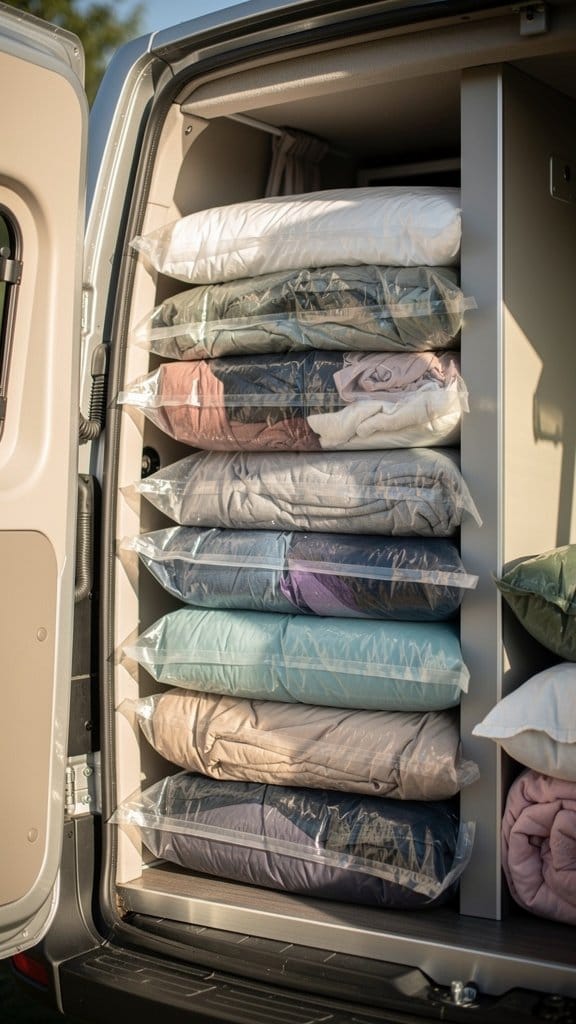
When traveling through different climates, vacuum bags compress bulky clothing like jackets or blankets. They keep items clean and compact.
Materials To Try
- Choose heavy-duty zip bags with double seals.
- Label each bag clearly (“Winter Gear,” “Extra Bedding”).
- Store them under the bed or on the closet floor.
Vacuum-sealed storage is perfect for long trips—you’ll free up precious closet inches instantly.
11. Install Lighting in Your Closet
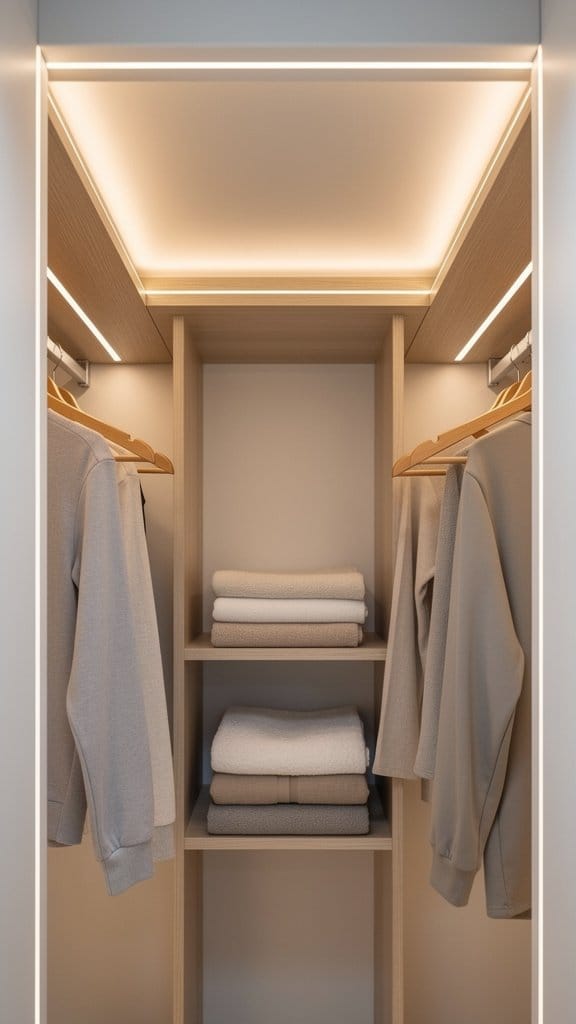
Lighting might not sound like storage, but hear me out—being able to see everything prevents messy rummaging. Small LED lights or motion-sensor strips do wonders.
Decorating Details
- Use battery-operated stick-on puck lights for quick installation.
- Try warm white lighting for a cozy glow.
- Add motion sensors so lights switch on automatically.
Bright closets feel bigger and more polished, and you’ll never again confuse navy for black before an early hike.
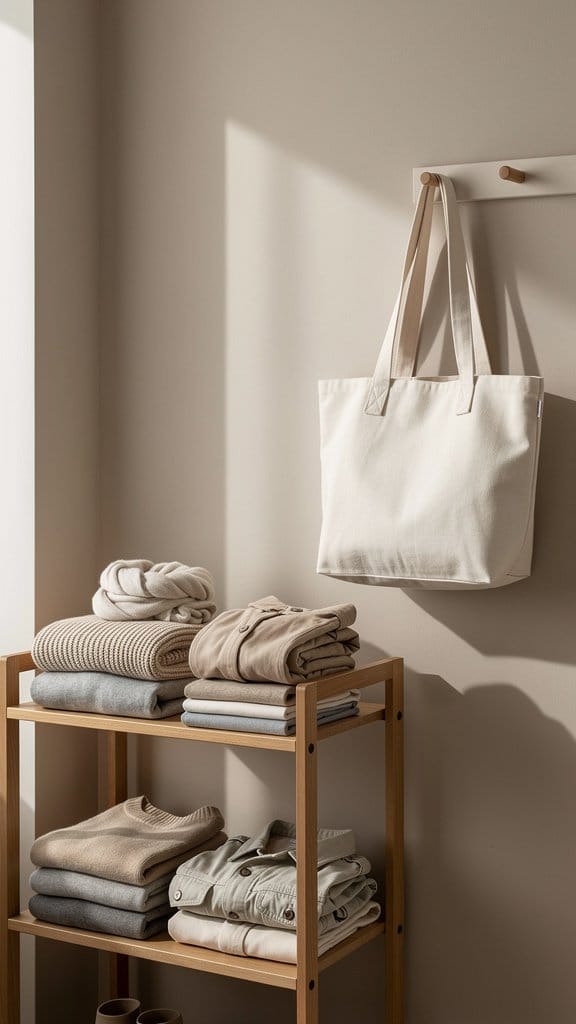
12. Hang a Vertical Laundry Bag
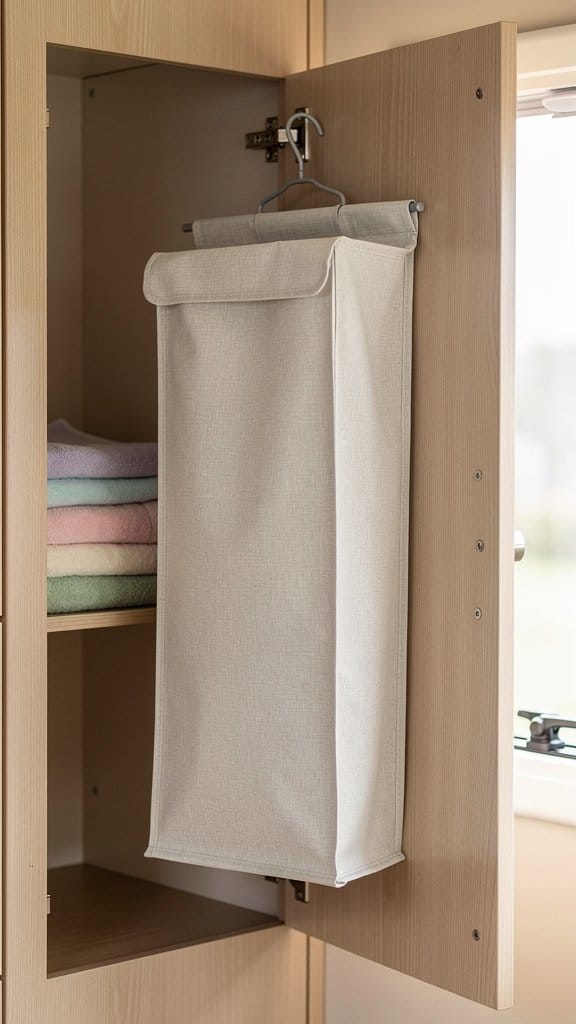
Dirty clothes pile up fast in a camper, and a hanging laundry bag keeps them off the floor. Choose one that attaches to the inside of a closet door or wall.
Style Notes
- Mesh bags allow airflow to avoid odors.
- Pick foldable styles that tuck away between wash days.
- Neutral or gray tones hide fingerprints and dirt.
It keeps your living area neater, and you won’t trip over piles of clothes during those tight morning routines.
13. Create Dividers for Shelves
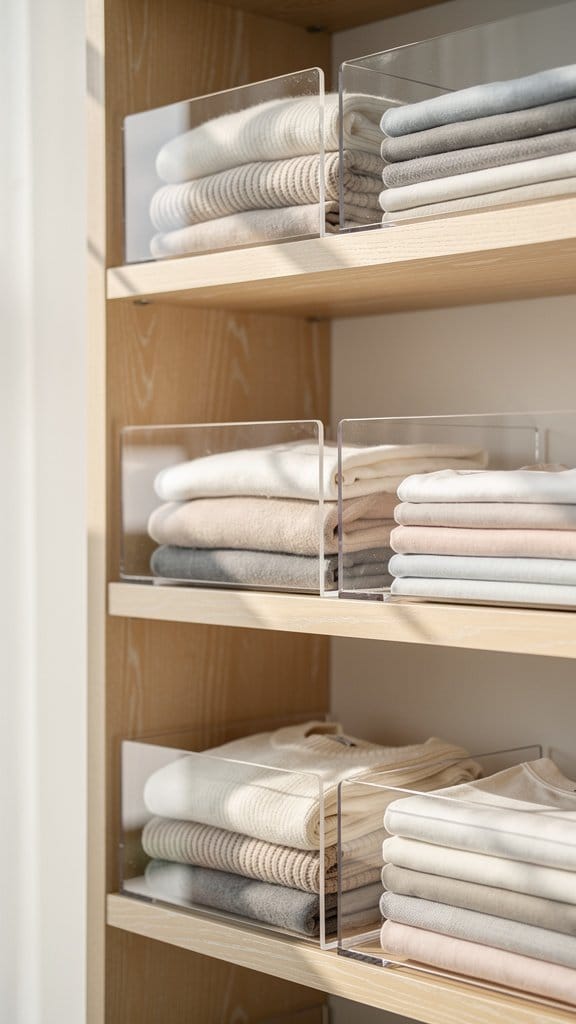
Dividers help keep folded stacks from toppling over when you hit the road. They’re lifesavers for sweaters, towels, and linens.
Key Design Elements
- Choose adjustable acrylic or plastic dividers for different fabrics.
- Add anti-slip grips underneath to keep them secure.
- Measure before installing to keep edges flush with shelves.
IMO, shelf dividers make your camper closet feel boutique-level organized—no more domino effect when grabbing one shirt.
14. Optimize Under-Hanging Space
Even with hanging clothes, you’ll likely have unused space underneath. Add bins, baskets, or shallow drawers to capture every inch.
Layout Suggestions
- Use rolling bins for easy access even in narrow aisles.
- Opt for clear plastic or woven baskets to match your decor.
- Reserve this space for shoes or accessories you use daily.
Using under-hanging areas smartly helps you double your effective closet volume without adding clutter.
15. Add a Fold-Down Ironing Board
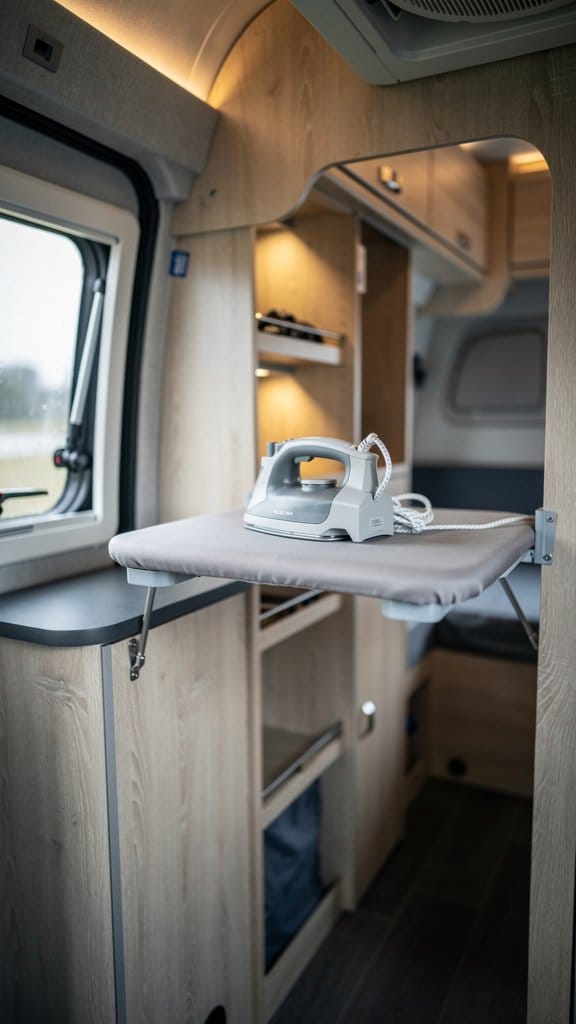
Wrinkles happen, even on the road. A fold-down or wall-mounted ironing board keeps things tidy and space-efficient.
Materials To Try
- Pick compact boards that fold flat and stow into a niche.
- Use magnetic or Velcro straps to keep them in place during transit.
- Match surface colors with existing cabinetry for seamless integration.
This small upgrade makes prepping outfits easier—and it impresses guests when they see how cleverly you use space!
16. Try a Curtain Instead of Doors
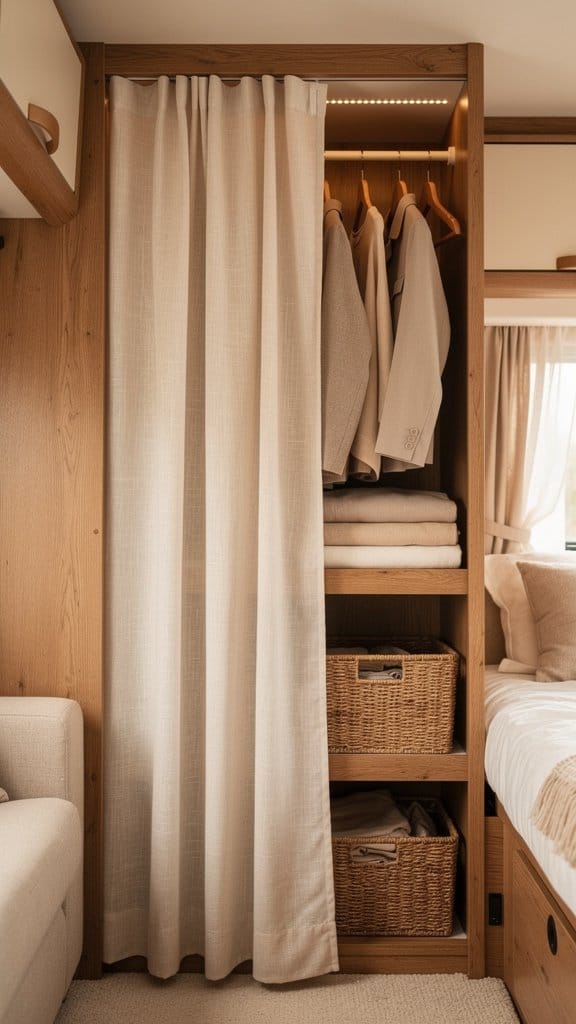
Replacing solid closet doors with a fabric curtain lightens your space visually and physically. Curtains make access easier and reduce the risk of banging into things.
Style Notes
- Choose washable fabrics in neutral or patterned tones that reflect your aesthetic.
- Install a lightweight rod with snap clips for quick removal.
- Coordinate colors with your bedding or upholstery for harmony.
Visually, curtains soften the space and make your camper feel more open and homey—a small change with big payoff.
17. Add Command Strips and Mini Racks
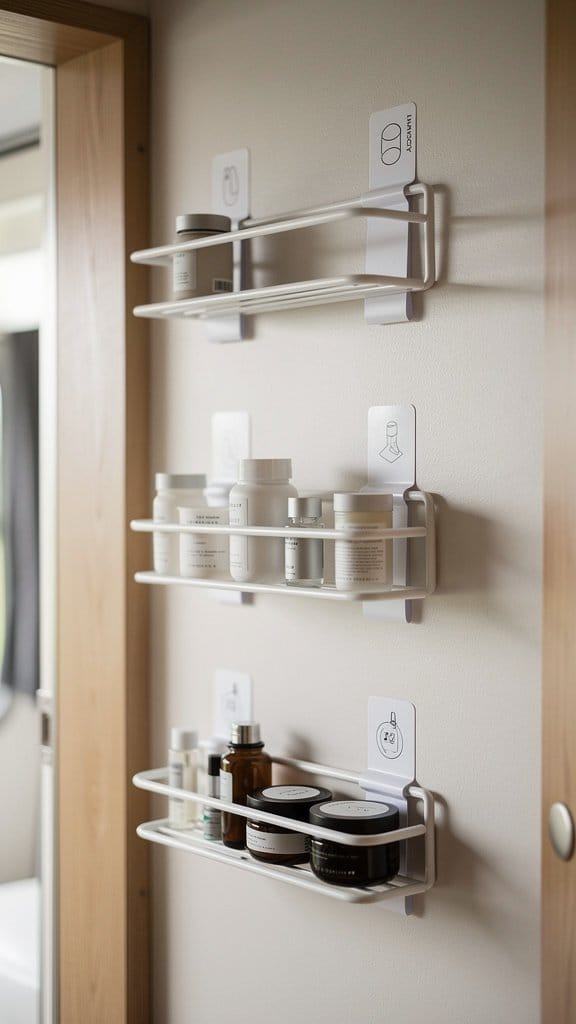
When you can’t drill or permanently install hardware, Command strips are your best friend. You can mount mini racks for belts, jewelry, or toiletries without damaging walls.
Small Space Tricks
- Clean surfaces with rubbing alcohol for better adhesion.
- Use mirror or chrome finishes for a modern look.
- Rearrange easily if your needs change mid-trip.
Temporary yet sturdy, these tools empower you to experiment with layouts—no commitment required.
18. Dedicate a “Grab-and-Go” Section
For everyday wear or travel essentials, create one zone that’s quick to access. This could be a hanging caddy or a single shelf labeled “Essentials.”
Layout Suggestions
- Place items like hoodies, hats, keys, and toiletries here.
- Use lightweight bins or fabric pockets for consistent organization.
- Keep it near the door for pre-adventure convenience.
This tiny habit keeps your morning prep low-stress and your packing routine predictable—less searching, more exploring!
Final Thoughts
With these 18 camper closet storage ideas, you’ll never fear your closet again. The goal isn’t perfection—it’s creating a system that fits your travel rhythm. Start small, test what works, and enjoy how much lighter and easier camper life feels when every inch has purpose and style!
Frequently Asked Questions
Start by using adjustable shelving and modular storage bins to customize your closet layout. Prioritize vertical space and use stackable containers or hanging organizers to keep everything tidy and accessible.
Lightweight materials like aluminum, plastic, or wood laminate are ideal for camper shelving. They’re durable enough to handle travel vibrations while keeping your rig’s overall weight low.
Yes—simple items like over-the-door racks, fabric bins, and collapsible boxes can dramatically improve organization without breaking the bank. You can also repurpose household items such as shoe organizers and tension rods.
Use non-slip hangers, closet rods with tension locks, or travel straps to secure clothing in place. Packing garments tightly or in garment bags also minimizes shifting when the camper is in motion.
Absolutely. Adhesive hooks, removable command strips, and hanging organizers allow you to expand storage without damaging walls or cabinetry. They’re perfect for renters or anyone wanting reversible upgrades.