📌 Love these ideas? Follow us on Pinterest for daily home decor inspiration! Follow @SeasonalHomeMagic →
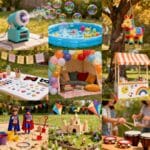
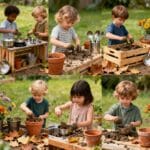
Kids don’t need fancy toys to have rich, imaginative play—give them dirt, water, and a place to mix the two and you’ve got magic. A mud kitchen is simple to build, surprisingly durable, and wildly engaging. Best of all, you can tailor it to your space, budget, and your child’s interests. Here’s exactly how to build one, step by step, without needing a full workshop.
Why a Mud Kitchen Is Worth Building
Mud kitchens are creativity engines. They blend pretend play with sensory exploration and a little bit of science.
They also invite kids outside, where mess is welcome and cleanup is easier. Plus, they can help kids practice social play, measuring, pouring, and problem-solving without screens or instructions.
Plan Your Design: Space, Size, and Style
Start with your space. A mud kitchen can be as compact as a 3-foot bench or as wide as a full outdoor workstation.
Sketch a quick layout with must-haves: a counter for mixing, a “sink,” and storage for pots and tools. If you’ve got room, add a second counter or a shelf for “ingredients.”
Ideal Dimensions
- Counter height: 20–26 inches for ages 2–6; 28–32 inches for ages 6–10.
- Counter depth: 12–18 inches. Go deeper if you’re adding a real basin.
- Width: 36–60 inches depending on space and number of kids.
Placement Tips
- Near a water source is ideal, but a simple jug with a spigot works too.
- Choose partial shade for comfort and to protect wood and little hands from hot surfaces.
- Keep it on dirt, gravel, mulch, or lawn—avoid areas that can flood or stain patios.
Gather Materials and Tools
You can build a mud kitchen from reclaimed wood, pallets, or basic lumber. Use what you have, but aim for sturdy and weather-tolerant.
Materials
- Wood: 2x4s for legs and frame; 1×4 or decking boards for shelves and counters.
- Countertop surface: scrap plywood topped with deck boards, a butcher block offcut, or a pallet top.
- Sink: old metal mixing bowl, plastic basin, or retired stainless-steel bowl.
- Fasteners: exterior screws (1 5/8″ and 2 1/2″).
- Backboard (optional): fence board or pallet board for hooks and shelves.
- Hinges and latch (optional): for a small cupboard door.
- Hooks/pegs: for utensils and pots.
- Exterior finish: child-safe exterior oil, water-based outdoor sealant, or paint.
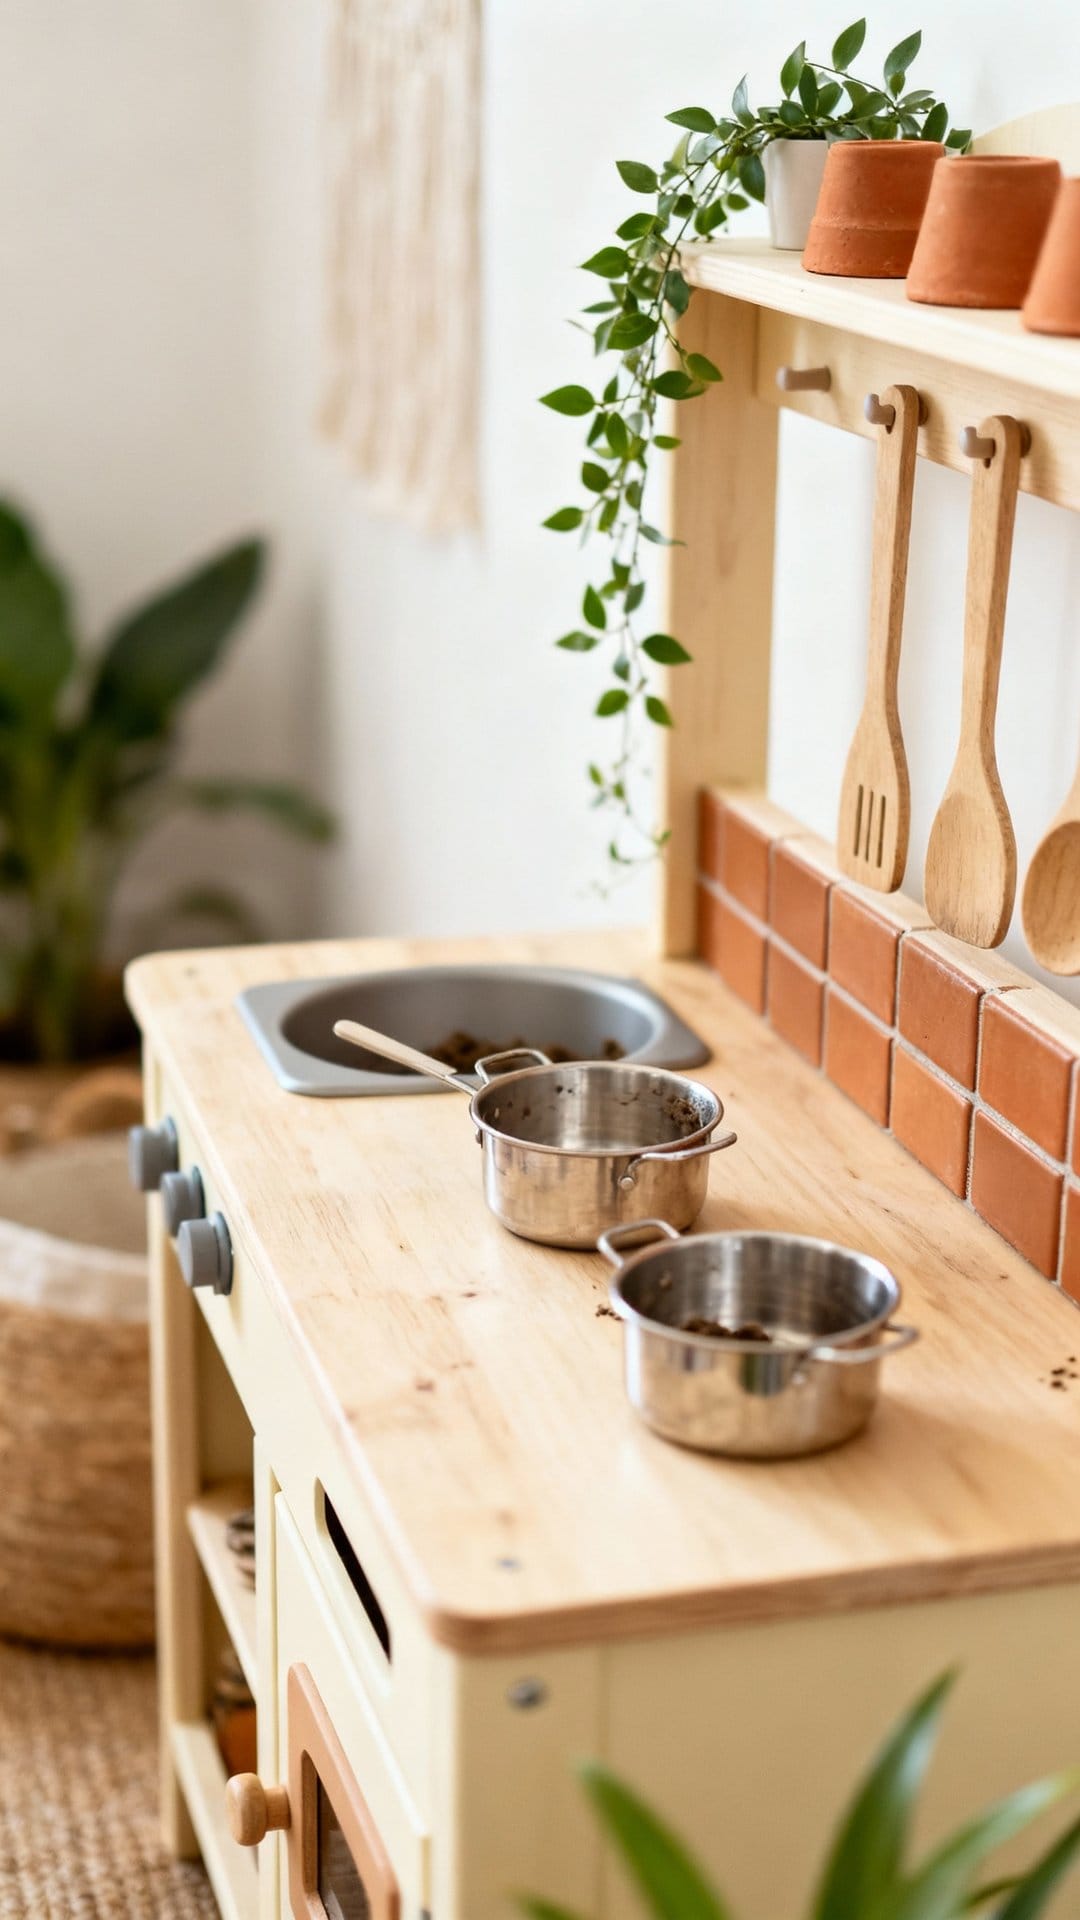
- Accessories: old pots, pans, wooden spoons, measuring cups, muffin tins, spice jars.
- Extras (optional): PVC pipe for a tap, rain chain, chalkboard panel, peg rail.
Tools
- Saw (circular, handsaw, or miter saw).
- Drill/driver with bits.
- Jigsaw (for cutting the sink hole).
- Measuring tape, square, pencil.
- Sandpaper or sander (80–120 grit).
- Clamps (helpful but optional).
Choose a Build Style: Pallet, Bench, or Framed
Pick the approach that matches your tools, time, and scrap pile. Each can look great and last with the right finish.
Option 1: Pallet Hack (Fastest)
- Use one sturdy pallet as the backboard and one as the counter.
- Add legs to raise the counter to kid height.
- Top with a board for a smoother surface and cut a hole for a bowl sink.
Pros: Almost free, quick build. Cons: Pallets can be rough and inconsistent—sand thoroughly.
Option 2: Bench Base (Simple and Stable)
- Start with a basic DIY bench frame using 2×4 legs and a 1x top.
- Add a back panel and a shelf or pegs.
- Cut in a sink if desired.
Pros: Solid, easy to customize. Cons: Requires more lumber and cutting.
Option 3: Full Frame With Storage (Most Features)
- Build a framed base with a lower shelf and side supports.
- Add two counters (prep and sink) plus overhead shelves or a spice rack.
- Optionally include a cupboard or crate storage beneath.
Pros: Looks “kitchen-y,” lots of storage. Cons: Takes more time and materials.
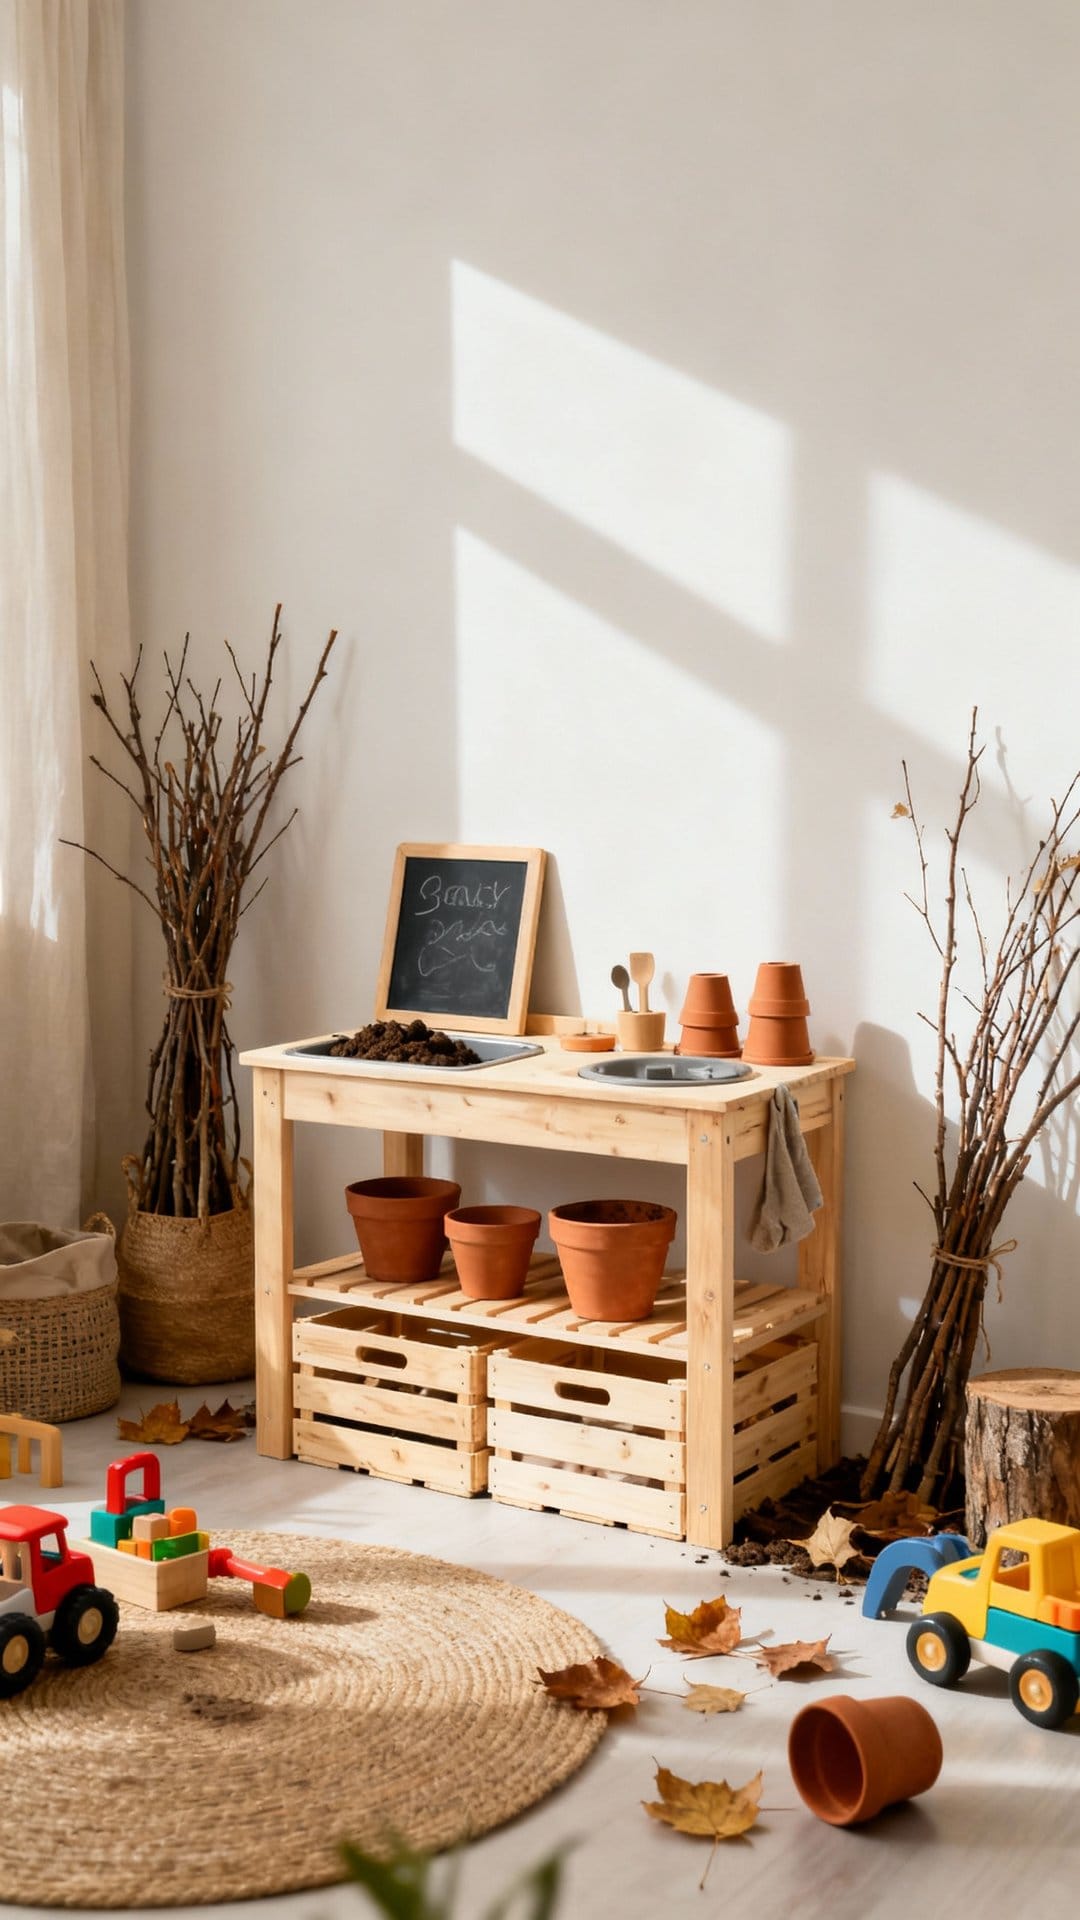
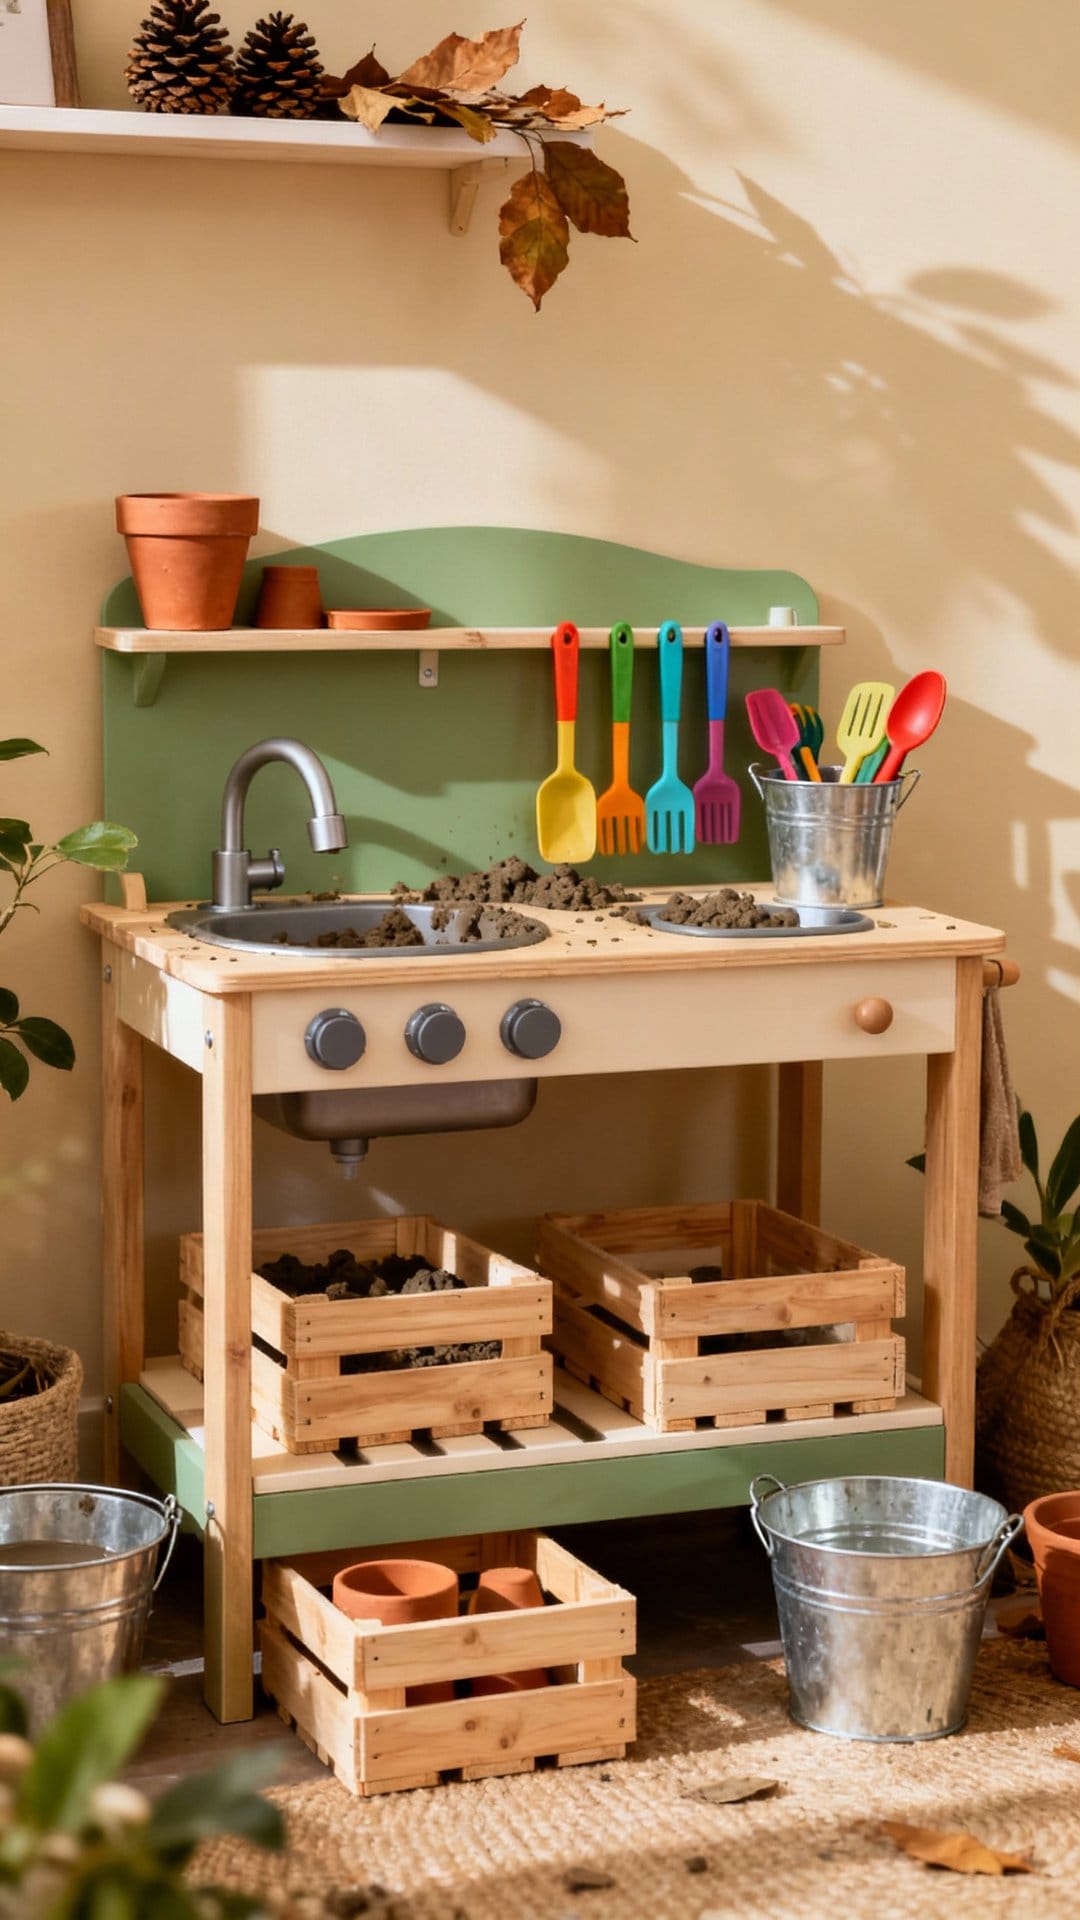
Step-by-Step Build: Sturdy Bench-Style Mud Kitchen
This middle-ground plan is simple, strong, and adaptable. Adjust measurements to your space and child’s height.
Cut List (example for a 48″ wide kitchen at 24″ counter height)
- Legs: 4 pieces of 2×4 at 24″.
- Top frame: 2 pieces of 2×4 at 48″ (front/back rails), 2 pieces at 12″ (side rails).
- Lower shelf frame: 2 pieces of 2×4 at 48″, 2 pieces at 12″.
- Countertop boards: 1×4 or deck boards to cover 48″ x 14″ (approx.).
- Lower shelf boards: enough to cover 48″ x 12″.
- Backboard: fence boards or 1x6s to reach 48″ wide by 18–24″ tall.
Build the Frames
- Assemble the top frame: screw the side rails between the longer rails to make a 48″ x 14″ rectangle.
- Repeat for the lower shelf frame.
- Attach legs inside the corners of the frames: top frame flush with leg tops; lower frame set 6–8″ above ground for storage.
- Check square with a measuring tape (diagonals equal).
Add the Surfaces
- Lay counter boards across the top frame, leaving small gaps for drainage.
- Screw down with exterior screws, pre-drilling to prevent splitting.
- Repeat for the lower shelf boards.
Install the Backboard
- Attach vertical boards along the back edge of the counter, screwed into the top frame and legs.
- Top with a horizontal board or small shelf for jars and bowls.
Add the Sink
- Place your bowl upside down on the counter and trace.
- Drill a starter hole, then use a jigsaw to cut inside the line so the bowl lip catches.
- Drop in the bowl; add a screw-on clip or a wooden block underneath if you want it fixed.
Finishing Touches
- Sand all edges smooth, round over corners, and remove splinters.
- Seal or paint with child-safe exterior finish to extend lifespan.
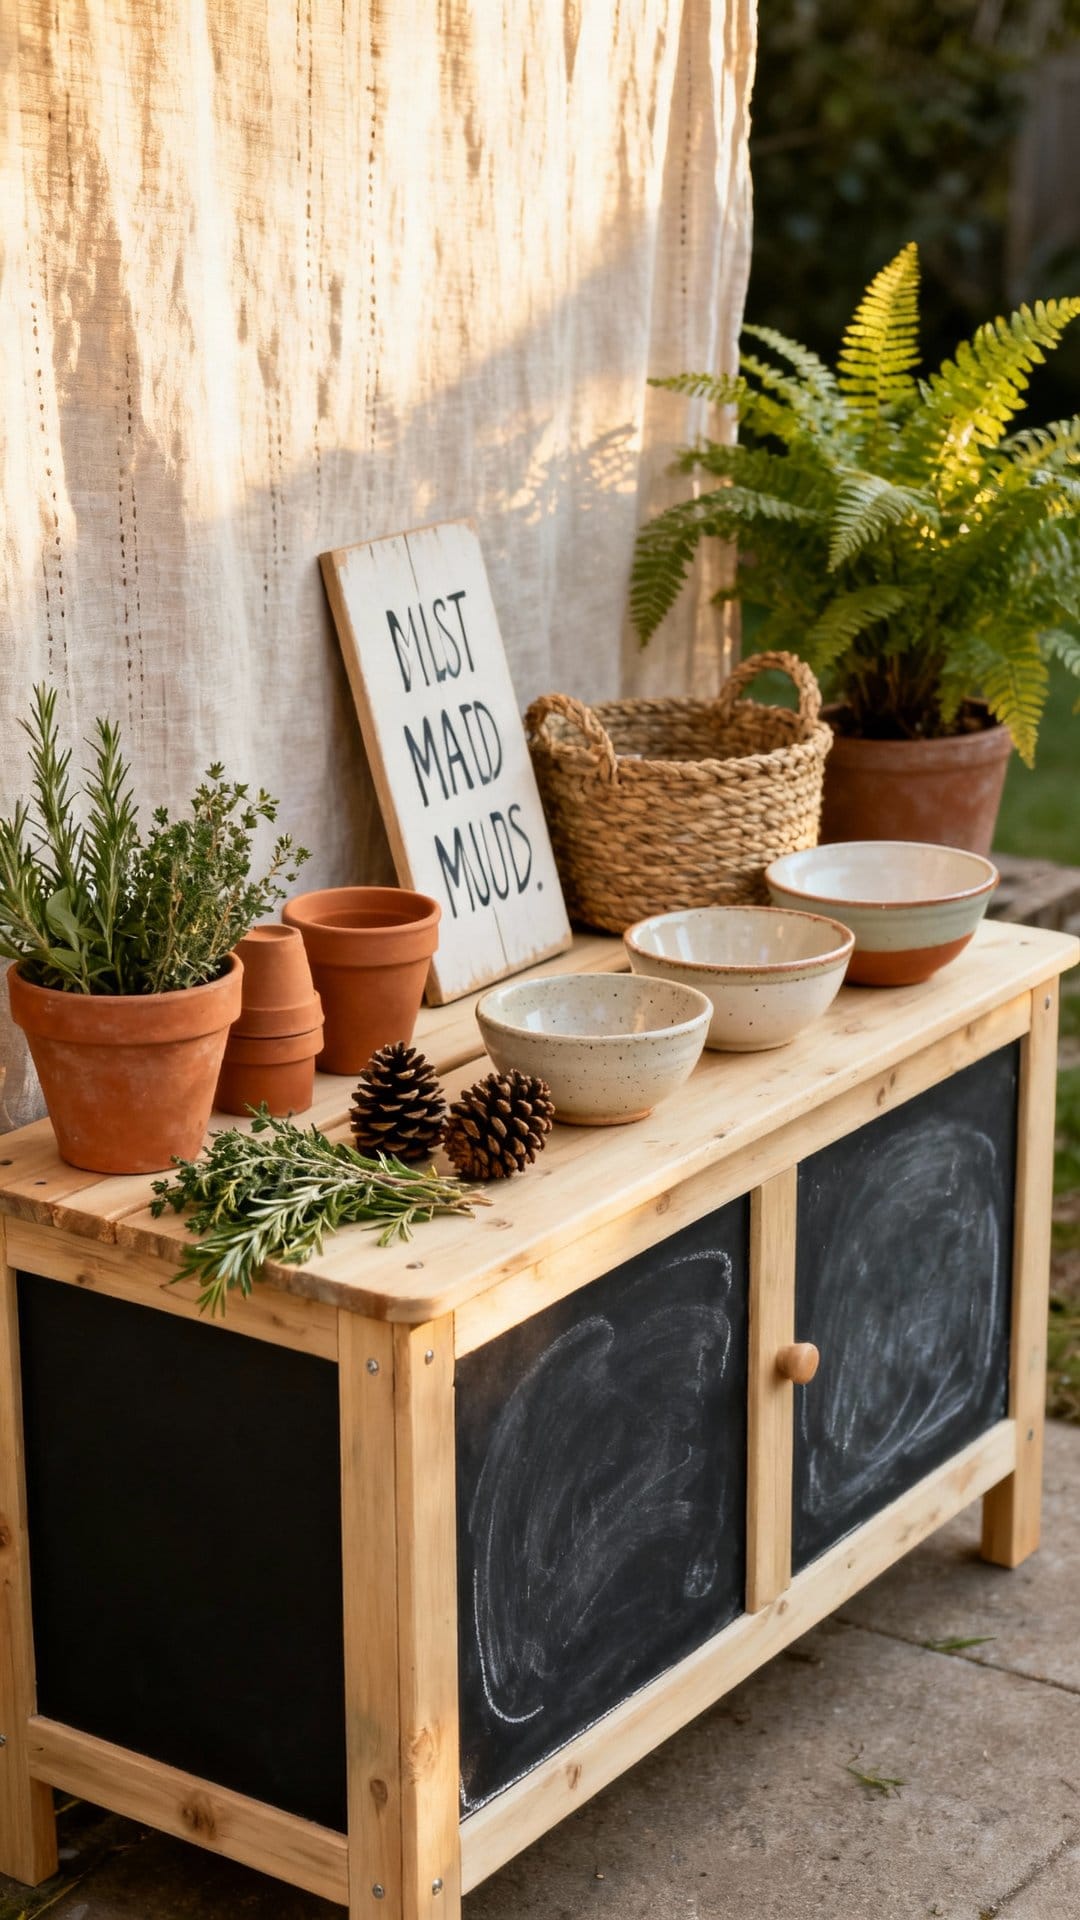
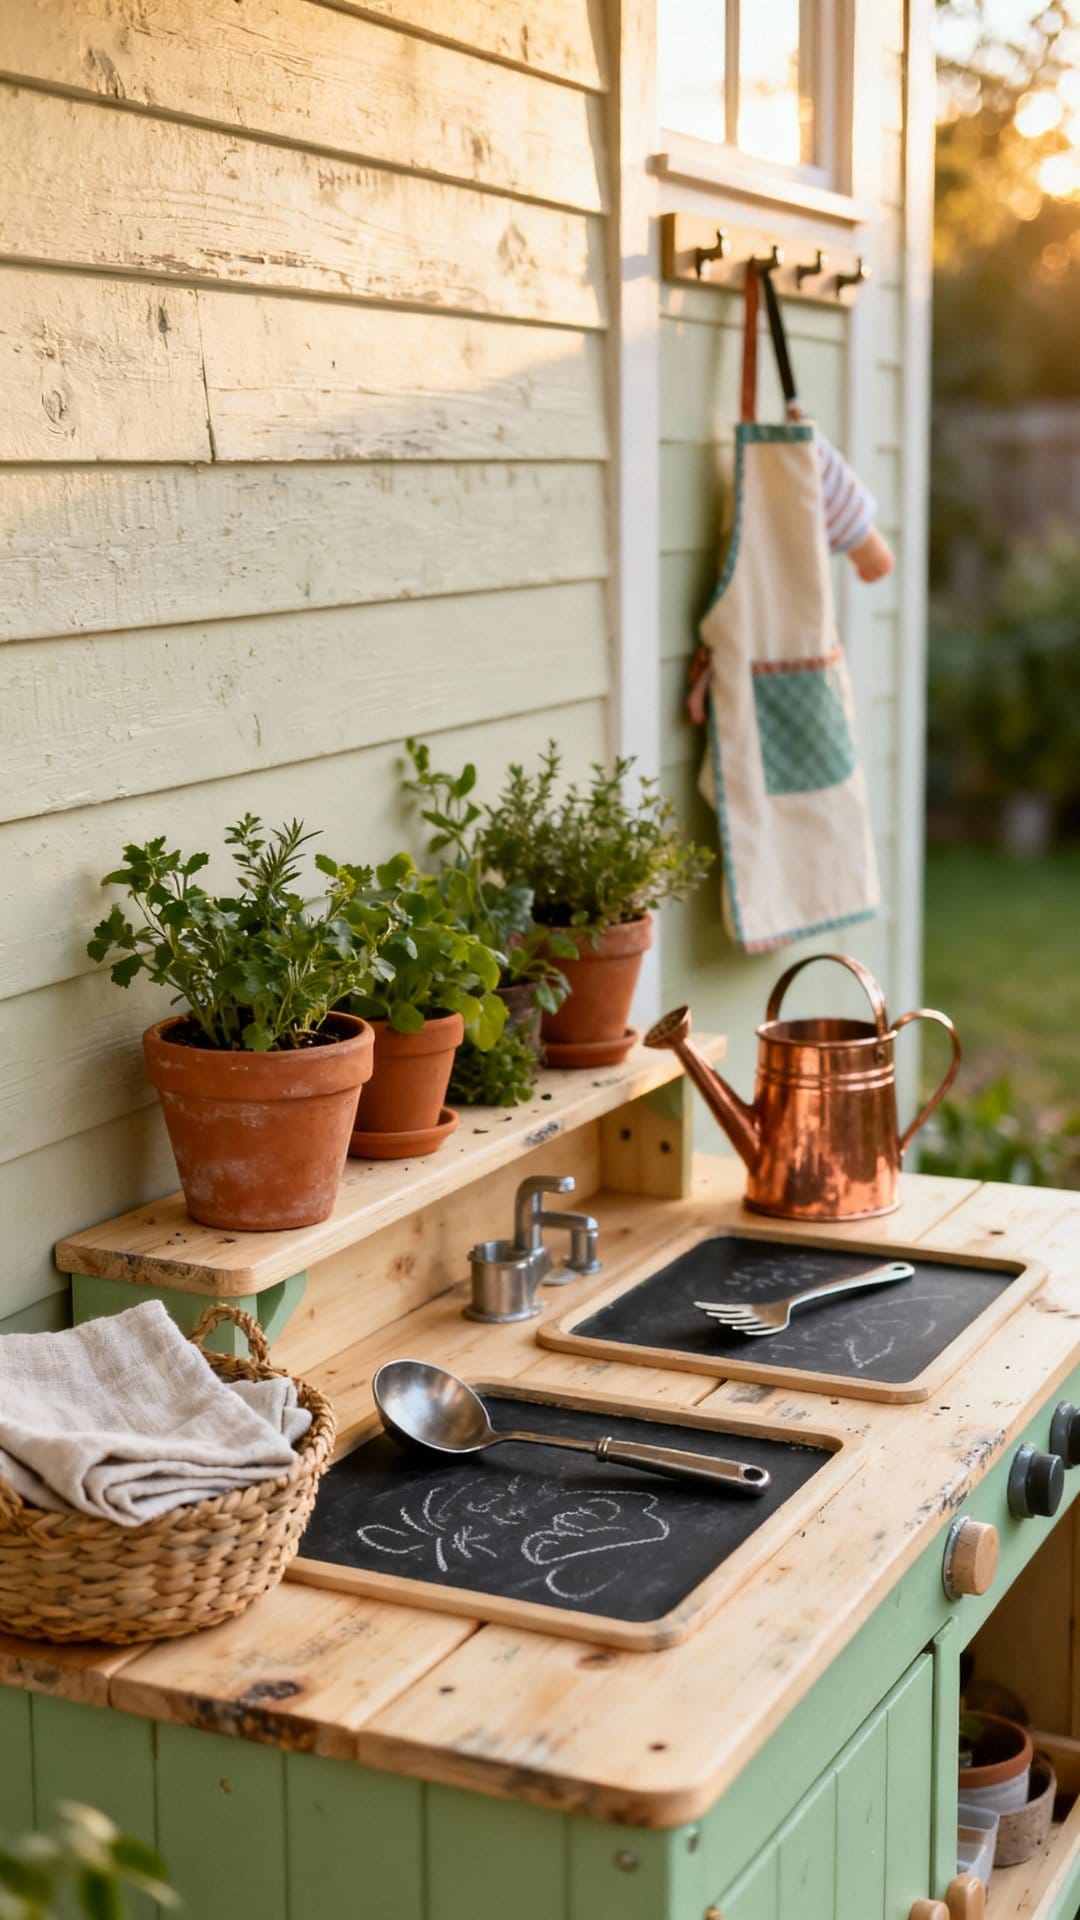
- Add hooks for utensils, a peg rail, and a small chalkboard panel for “menus.”
Water Options: From Simple to Splashy
You don’t need plumbing. The easiest setup is a water jug with a spigot placed on a top shelf.
Kids can fill bowls or “wash” utensils without a hose running nonstop. If you want more, try one of the options below.
Easy Water Add-Ons
- Gravity jug: Place a camping water container on a shelf with a basin underneath.
- PVC tap: Mount a short piece of PVC with a simple ball valve; feed it from a small bucket above.
- Rain chain: Hang a chain from a gutter and let kids catch drips on rainy days.
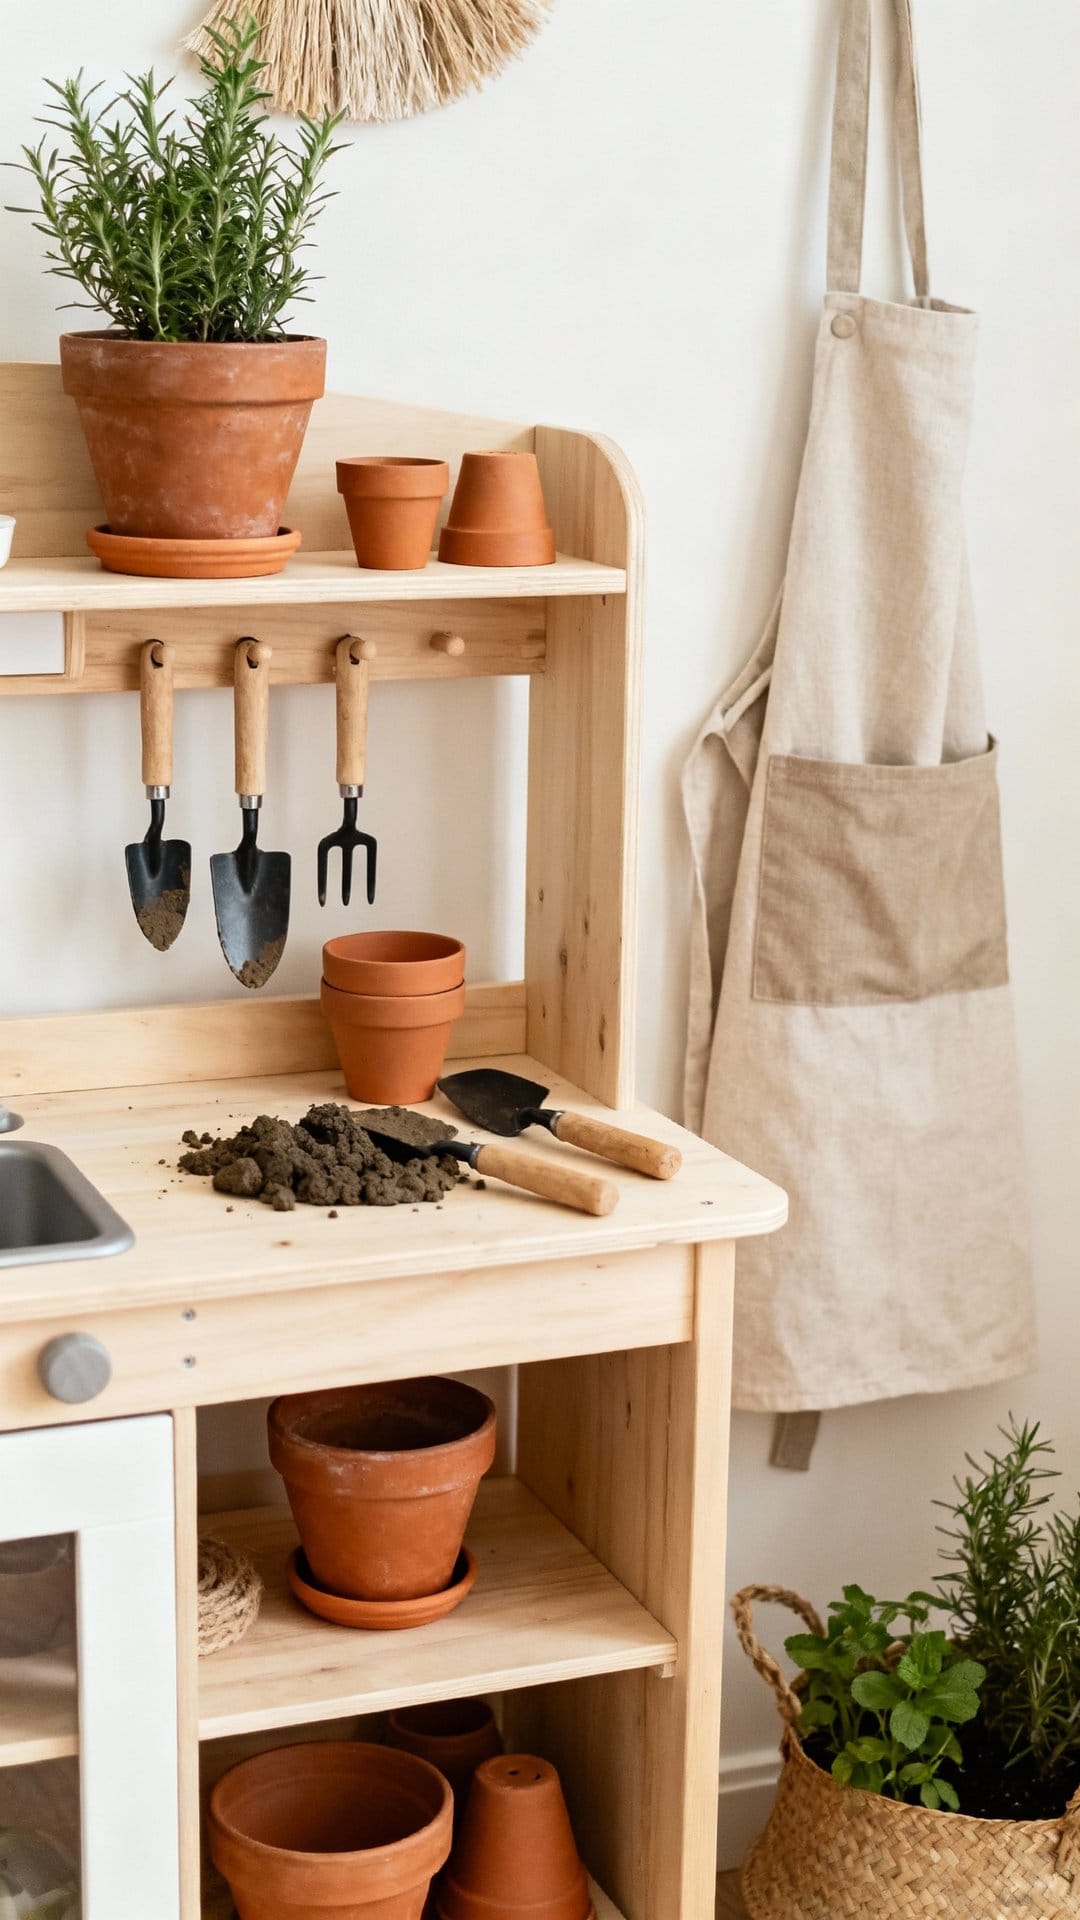
Storage and Organization That Kids Actually Use
Think open and reachable. Closed cabinets outdoors get damp and forgotten.
Use crates on the lower shelf for pots and “ingredients” like pebbles and pinecones. Keep utensils on hooks where kids can see them.
Smart Additions
- Magnetic strip (if your tools are safe and light): for metal measuring spoons.
- Spice rack: small shelves for jars of sand, dried leaves, or colored water.
- Labeling: simple icons or chalk labels so kids can tidy up on their own.
Safety, Durability, and Mess Management
Set your mud kitchen up to last and keep play safe. A few small choices make a big difference.
Safety Basics
- Use exterior-grade screws and stable legs; no wobbles.
- Sand aggressively—hands will explore every edge.
- Avoid pressure-treated wood where kids touch frequently unless sealed; consider naturally rot-resistant options like cedar.
- Skip glassware; stick to metal and plastic.
Durability Tips
- Seal wood yearly, especially horizontal surfaces.
- Lift the frame on small pavers to keep legs off wet soil.
- Leave small gaps in boards for drainage and airflow.
Managing the Mess
- Designate a “mud zone” with mulch or an old outdoor rug.
- Keep a towel, scrub brush, and bucket by the door for quick cleanup.
- Have kids wear a dedicated “mud apron” or old t-shirt and sandals.
Stock It: Tools and “Ingredients” Kids Love
Raid your kitchen and recycling bin before you buy anything. The best tools are simple and sturdy.
Utensils and Tools
- Wooden spoons, ladles, spatulas.
- Measuring cups and spoons.
- Metal bowls, muffin tins, colanders.
- Funnels, turkey basters, squeeze bottles.
- Small garden trowels and a hand rake.
Containers and Props
- Old spice jars with big holes punched in lids for sprinkling sand.
- Plastic bottles for colored water (add a few drops of food coloring).
- Mason-jar style containers with wide mouths (plastic lids preferred).
- Clipboards or a chalkboard for “recipes” and menus.
Natural Ingredients
- Sand, soil, and water (the core trio).
- Leaves, petals, sticks, pebbles, pinecones.
- Herbs like mint or rosemary for scent.
- A bucket of shells or seedpods for texture.
Make It Theirs: Fun Custom Features
Personal touches turn a simple bench into a beloved play spot. Involve your kids in choosing features and colors.
Ideas to Personalize
- Paint a bright backsplash with their favorite colors.
- Stencil “recipes” or measurement marks on the counter.
- Add a pretend oven: a plywood door with a porthole cutout.
- Install a bell or service window for a “café” vibe.
- Create a herb box nearby for garnish picking.
Seasonal Play and Learning Extensions
Rotate supplies to keep interest fresh and spark new kinds of play. Use weather to your advantage.
Seasonal Rotations
- Spring: flower petal “soups,” seed sorting, worm observation (gentle and brief).
- Summer: ice cubes, colored water, frozen “treasure” blocks to melt.
- Fall: leaf rubbings, acorn grinding, pumpkin “spice” mixes with cinnamon sticks.
- Winter (if feasible): snow ice cream pretend play, warm water experiments, mud “bricks.”
Simple Learning Tie-Ins
- Math: measuring, doubling “recipes,” counting scoops.
- Science: mixing solids and liquids, filtration with a colander, erosion with water flow.
- Language: menus, order-taking, naming new “dishes.”
Budget-Savvy Sourcing Tips
Keep costs low by reusing and reclaiming. Mud kitchens don’t need perfect materials to shine.
- Check local reuse centers for cabinet doors (great shelves) and old bowls for sinks.
- Ask friends for spare kitchenware or post a request in a neighborhood group.
- Use leftover deck boards or fence offcuts for counters and backsplashes.
- Skip pricey finishes; a basic exterior oil or paint sample often suffices.
Quick Build Variations
Pressed for time? Choose a minimal build and upgrade later as interest grows.
One-Hour Crate Kitchen
- Stack two wooden crates horizontally as a base.
- Top with a scrap board to form a counter; clamp or screw in place.
- Add a bowl sink and a water jug on a crate “upper shelf.”
Fold-Away Mud Bar
- Use a hinged board on a fence as a drop-down counter.
- Add two chains to hold it level when open.
- Mount a peg rail above for tools; store bowls in a bin below.
Maintenance and Upkeep
A little care keeps the mud kitchen inviting and safe. Make it a monthly habit.
- Rinse and dry metal tools to prevent rust; swap in plastic if corrosion is an issue.
- Tighten screws and check for wobbles after big play days.
- Re-sand rough spots and re-seal counters as needed.
- Refresh “ingredients” and compost anything moldy or overly soggy.
Troubleshooting Common Issues
Most problems have simple fixes. Don’t overthink—this is a mud zone, not a showroom.
Wobbly Frame
- Add diagonal braces on the back or sides.
- Set legs on pavers or adjust for level ground.
Constantly Muddy Pathways
- Lay a mulch pad or pea gravel around the kitchen.
- Add a boot brush and a mat at the door.
Water Everywhere
- Use a shallow basin with overflow holes drilled near the top.
- Place buckets or watering cans to catch runoff and reuse on plants.
Time and Cost Snapshot
Expect a half-day to a weekend project, depending on your design.
- Pallet build: $0–$40; 2–3 hours.
- Bench build: $60–$150; 4–6 hours.
- Full frame with extras: $150–$300; 1–2 days.
Accessories are easy to source free. Your biggest investment is elbow grease and a good sealant.
Play Prompts to Kickstart Imagination
Some kids dive right in; others benefit from a nudge. Offer a scenario and step back.
- “Café Day”: Write a chalkboard menu with three “specials.”
- “Potion Lab”: Set out colored water, glitter, and a strainer.
- “Bake-Off”: Muffin tins, measuring spoons, and a timer for pretend judging.
- “Garden Chef”: Gather herbs and edible flowers from a supervised patch.
Conclusion
A mud kitchen doesn’t need to be perfect to be perfect for your kids. Build a sturdy surface, add a sink and some hooks, and let the elements and imagination do the rest.
Start simple this weekend. As your kids invent new games, you can add shelves, water features, and fun details over time. The best mud kitchens evolve with play—and that’s where the real magic happens.