These patio string light ideas can turn your outdoor space into a warm, glowing retreat by sundown with a single flip of a switch. String lights flatter every face, survive most weather, and make Tuesday night feel worth staying outside for. Pick your setup and enjoy that cozy glow tonight.
The good news is that these patio string light ideas do not require professional installation or a serious budget. Most take an afternoon with a few hooks and a hardware store run. Whether you have a wide backyard pergola, a small apartment balcony, or just a concrete slab with two posts, there is a configuration here that works for your exact space and power situation.
1. Zigzag The Classics Across The Patio
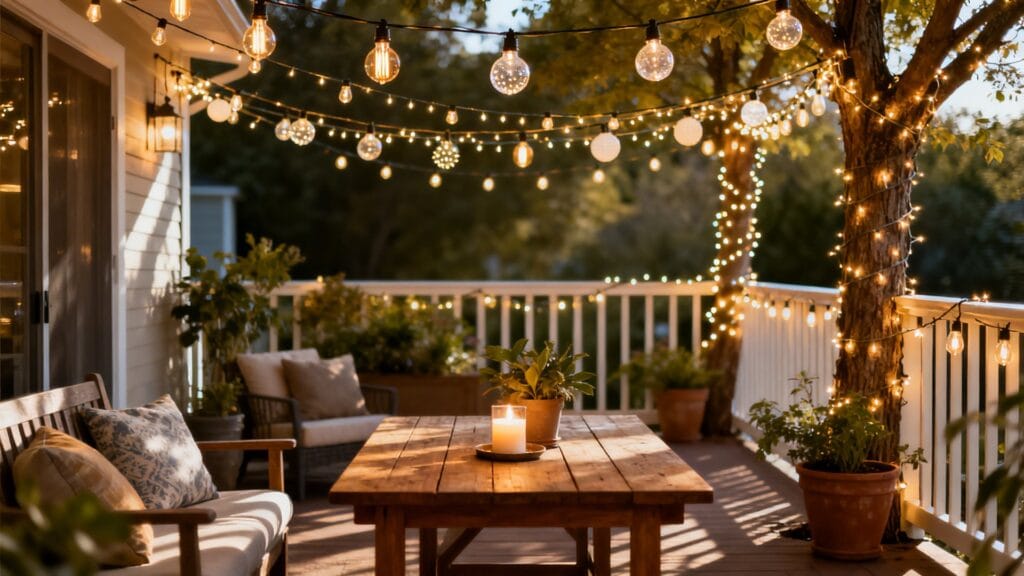
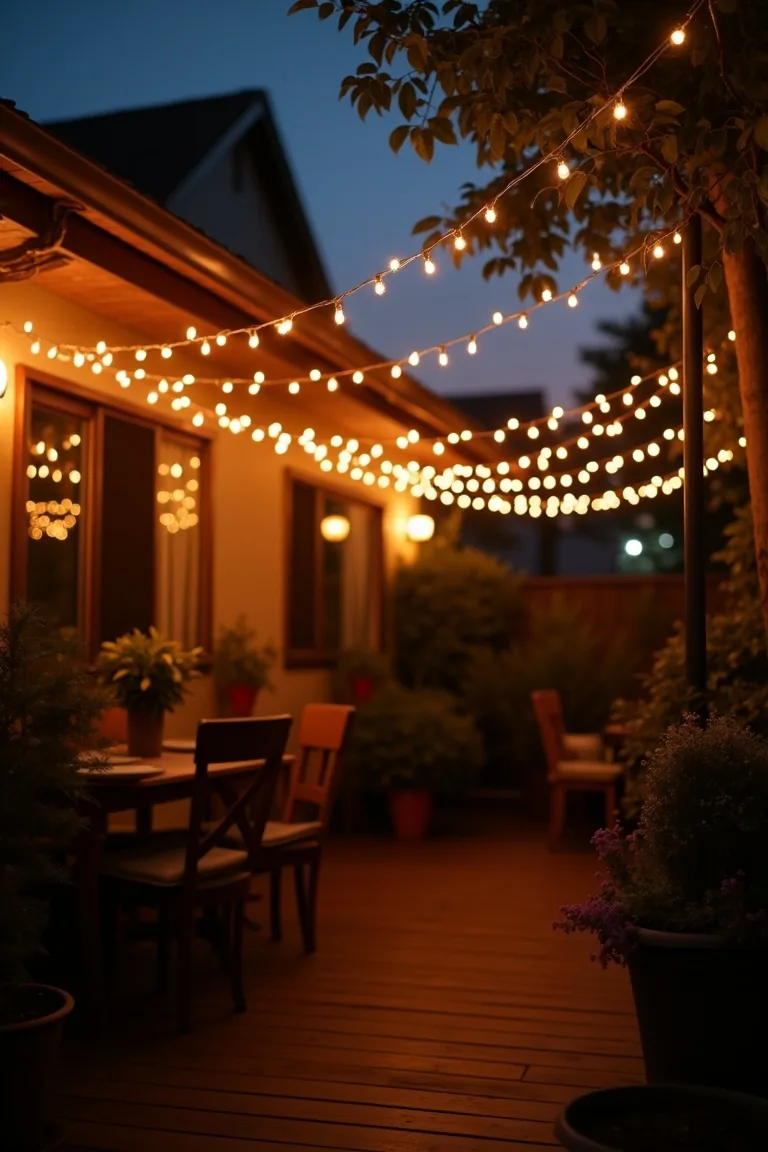
Start with the most reliable setup in outdoor lighting: classic globe string lights run in a zigzag pattern overhead. The overlapping lines create balanced light across your whole seating area and give even a bare concrete slab that relaxed bistro feel that makes Tuesday night worth staying outside for.
The zigzag works because it distributes light without creating dark corners. Each run overlaps the last by a foot or two, so you get consistent coverage at eye level. Warm white at 2700K is the sweet spot, bright enough to read a menu, soft enough to feel like dusk even at 9 PM.
Layout Suggestions
- Anchor each run with eye hooks or cup hooks spaced 4–5 feet apart along eaves, posts, or a fence.
- Allow a 6–10 inch sag between anchor points, perfectly taut looks stiff, too loose tangles in wind.
- For a 10×12 ft patio, four parallel zigzag runs give even coverage without overwhelming the space.
- Use warm white bulbs in the 2700–3000K range for the coziest, most flattering tone.
This is the setup people come back to every summer. It works with any furniture style and takes under an hour to hang.
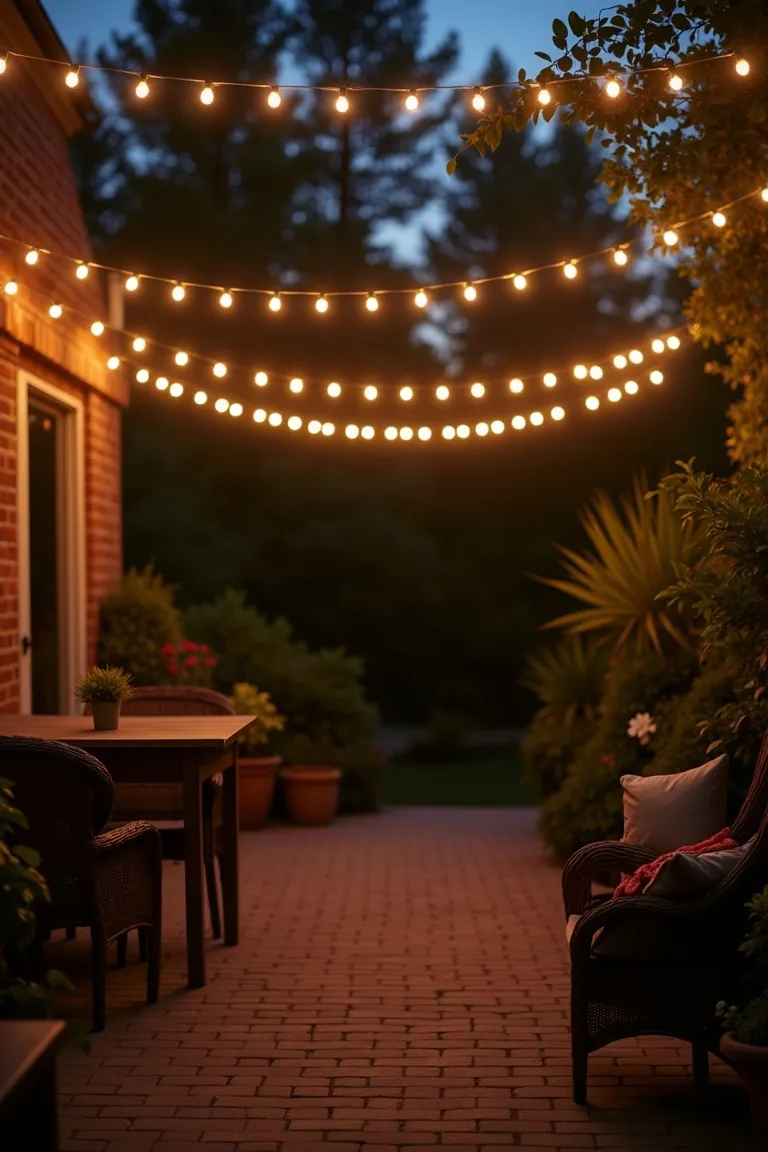
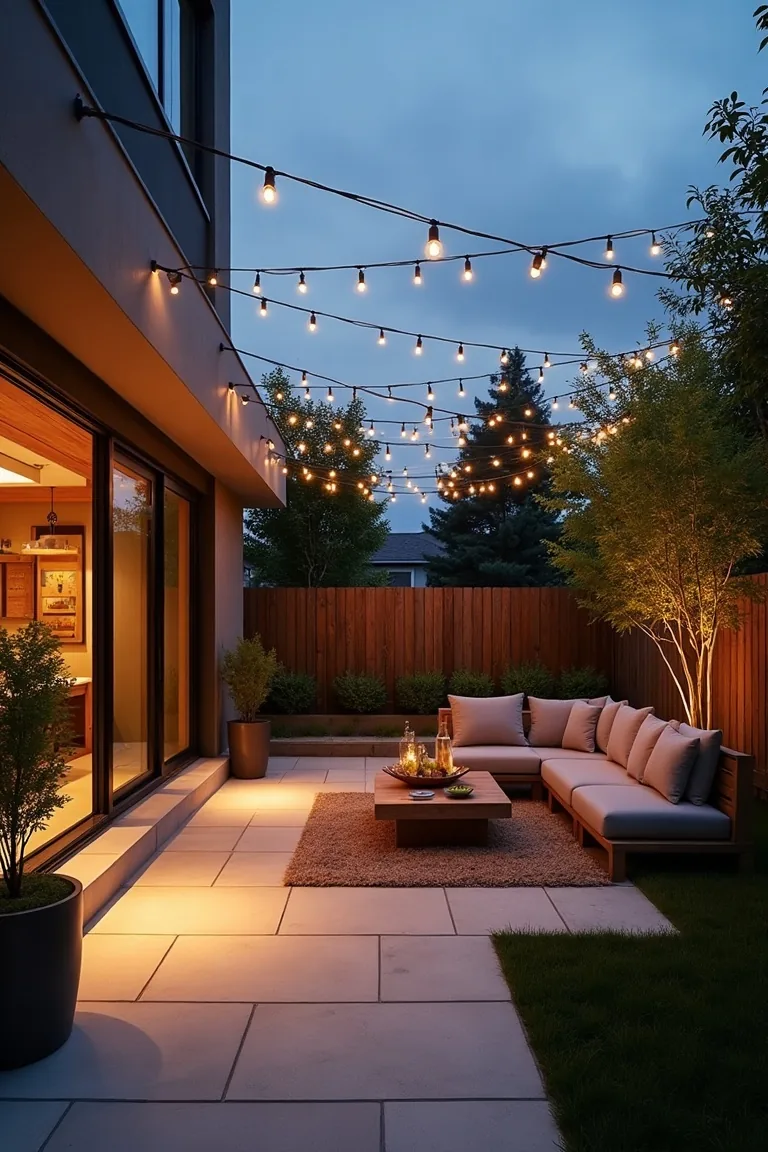
2. Create A Light Canopy That Feels Like A Night Sky
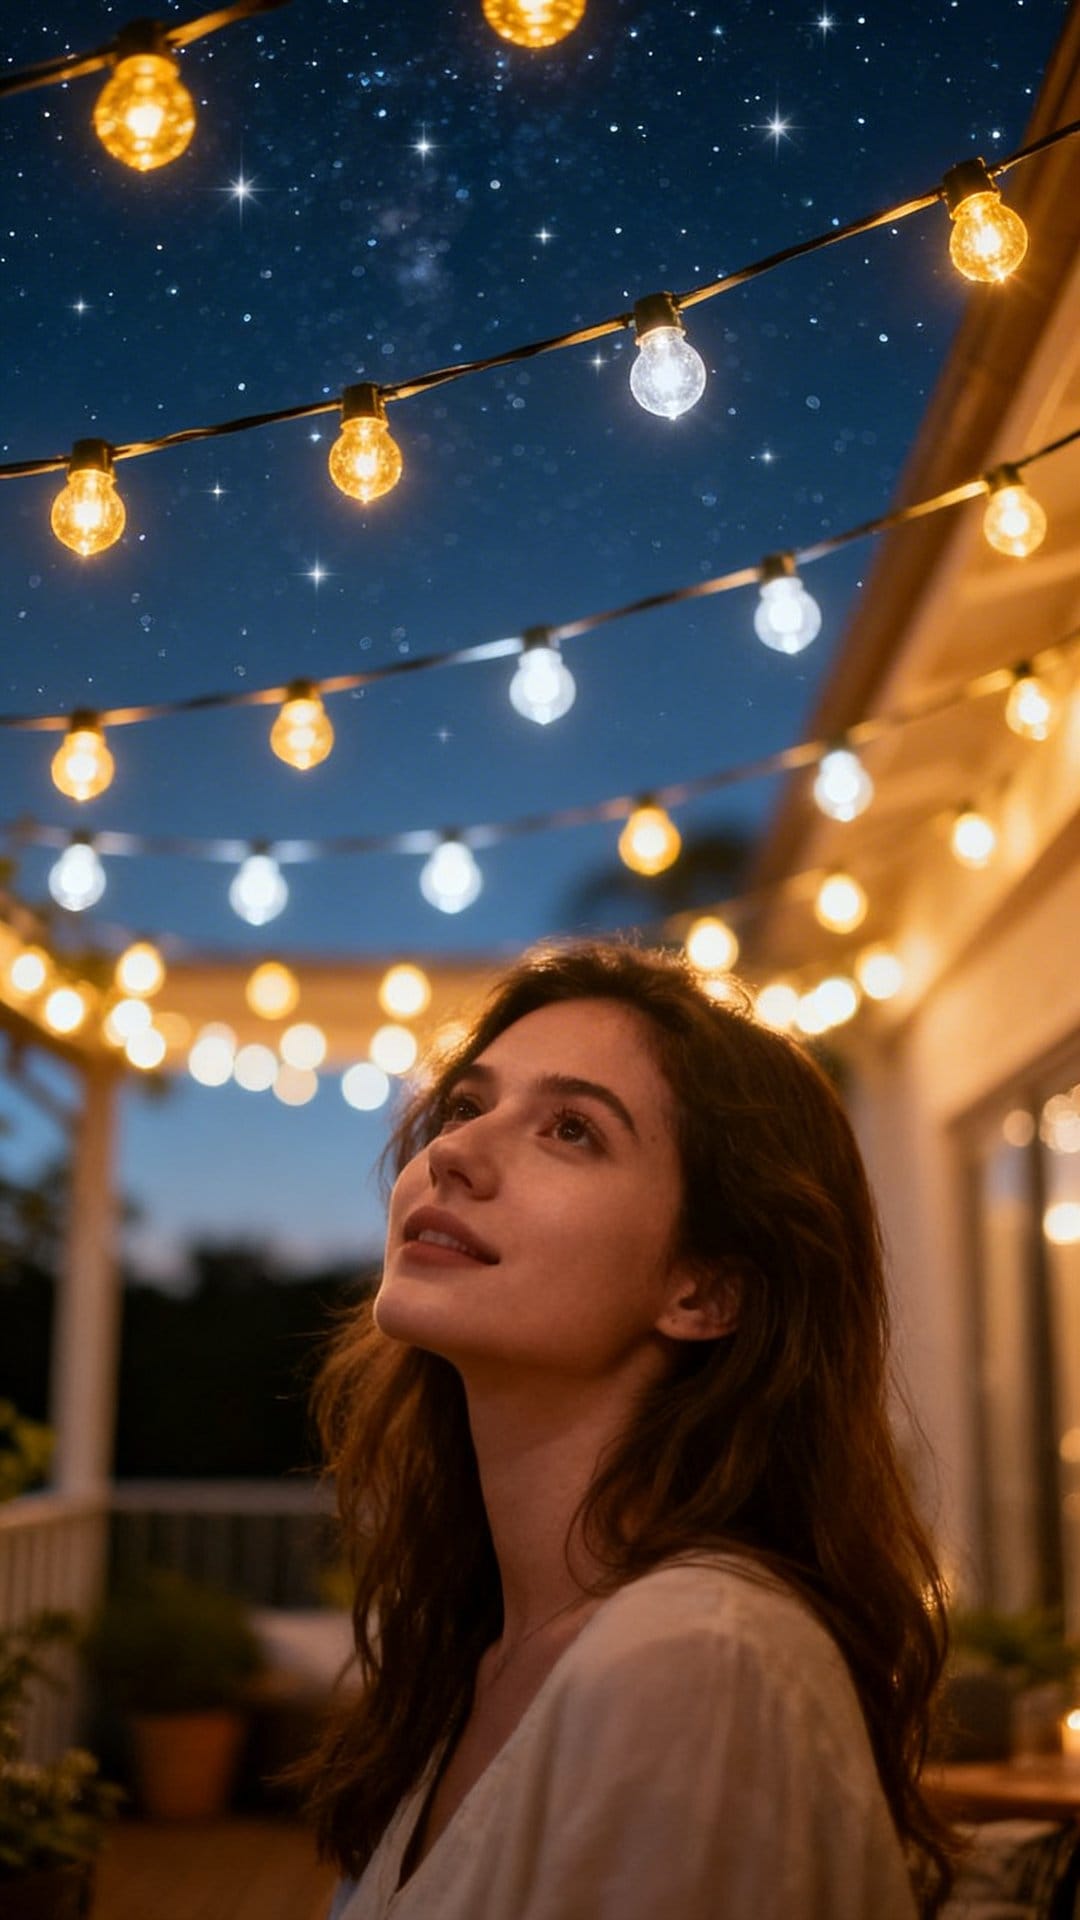
Crisscross multiple strands to form a full canopy overhead and your seating area becomes something else entirely, a cocoon of soft light that makes guests want to stay for one more hour, then another. The trick is building the grid before you hang anything.
Map out a 12-inch grid on paper first. You want anchor points on all four sides so each strand has a fixed start and end point. Slightly varying the spacing between strands, some 10 inches apart, some 14, gives a natural, starry scatter instead of a rigid box.
Key Design Elements
- Plan anchor points in a grid before buying wire, you need one per strand, plus corner anchors.
- Vary strand spacing between 10 and 16 inches for an organic, layered effect.
- Choose shatterproof globe bulbs if wind is common, they survive gusts that crack standard glass.
- Wire the strands to a single smart plug so the whole canopy goes on with one tap.
- Add a center drop point with a longer cord to create a subtle depth.
Perfect for garden parties or any night when you want the space to feel like an event. See more ideas for outdoor entertaining in our garden party decoration guide.
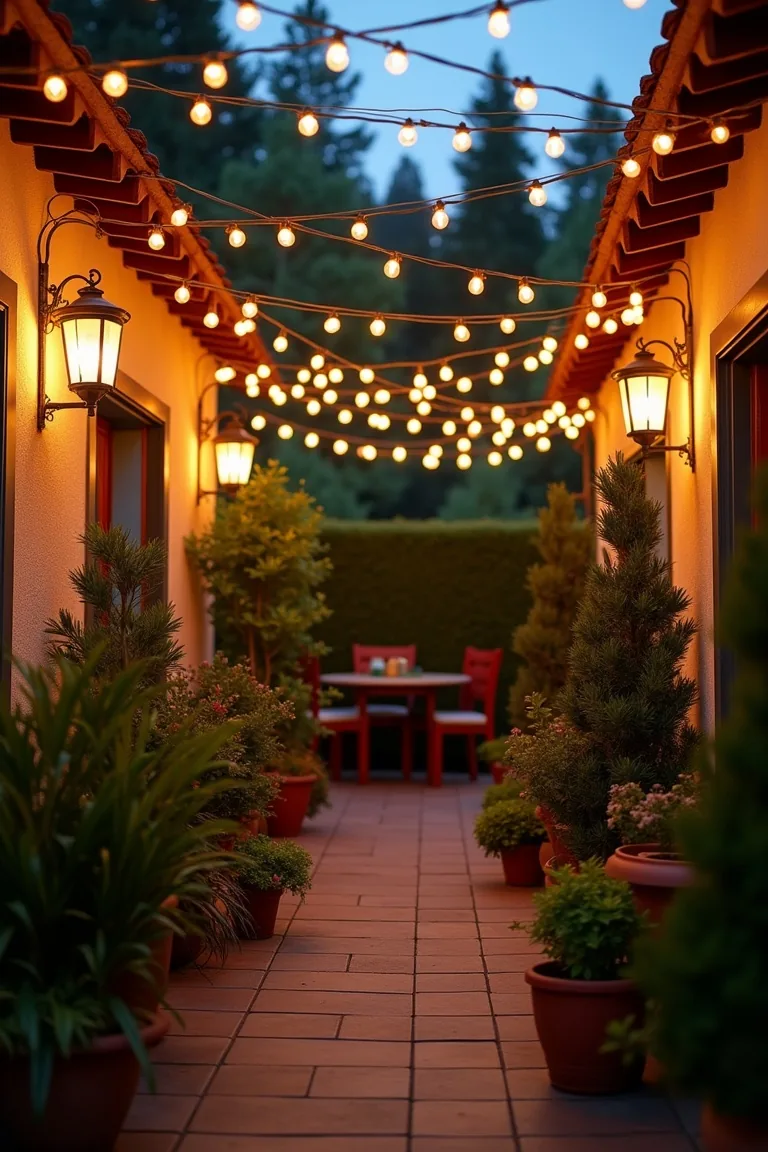
3. Frame The Perimeter For Instant Architecture
Outline your patio's edges with string lights and you create a visual border that reshapes even an open yard corner into a defined room. Small patios especially benefit from this, the perimeter line tells guests where the space begins and ends, and that definition makes it feel intentional.
Run lights along the outer fence line, railing, or roofline edge and you get perimeter glow that is more subtle than overhead coverage. It complements statement pieces, a fire pit (see our covered patio ideas for shaded layouts), a statement planter, a dining table, without competing with them.
This approach also works well as a secondary layer alongside an overhead zigzag. The combination of perimeter outline and ceiling coverage creates a fully enclosed feeling that makes any patio more immersive after dark.
Styling Notes
- Run lights along fences, railings, or the outer roofline to define the space clearly.
- Use cable ties or adhesive cord clips to keep lines tidy, loose cords read as unfinished.
- Add a dimmer to shift from dinner-bright to late-evening cocktail mode.
- Black cord against a dark fence disappears; white cord against light walls does the same.
Use this when you want a polished look that requires minimal effort to maintain.
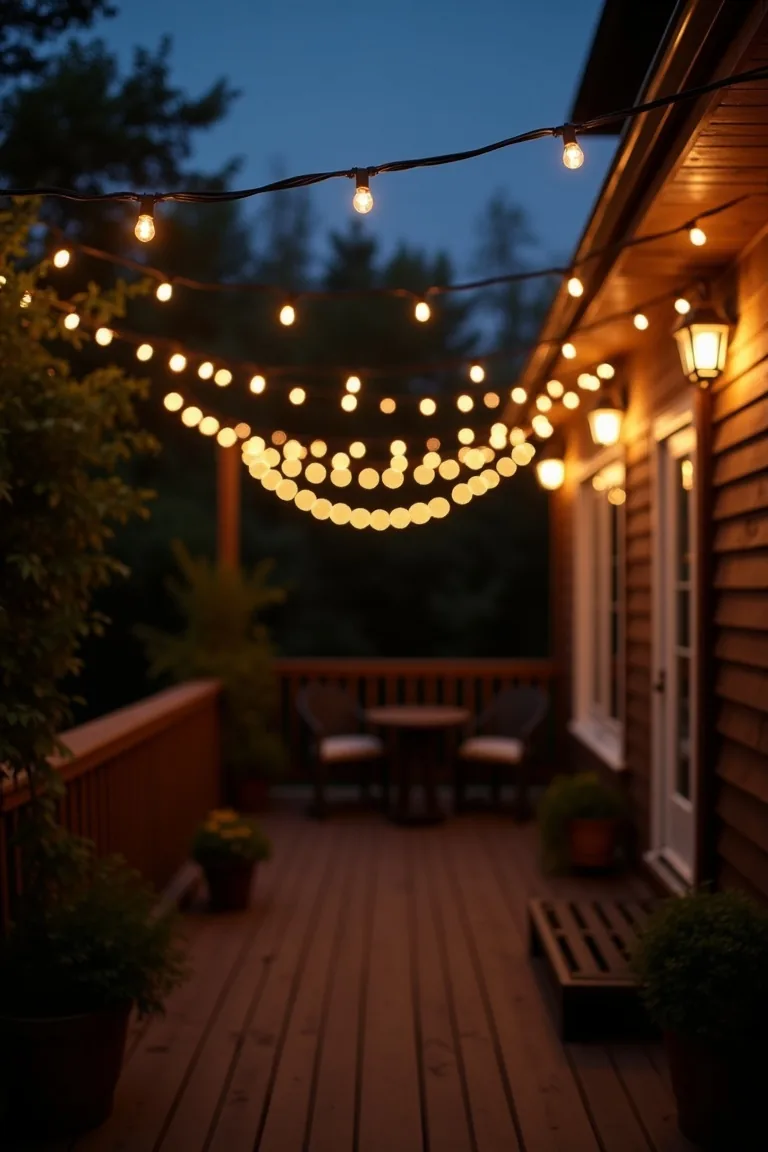
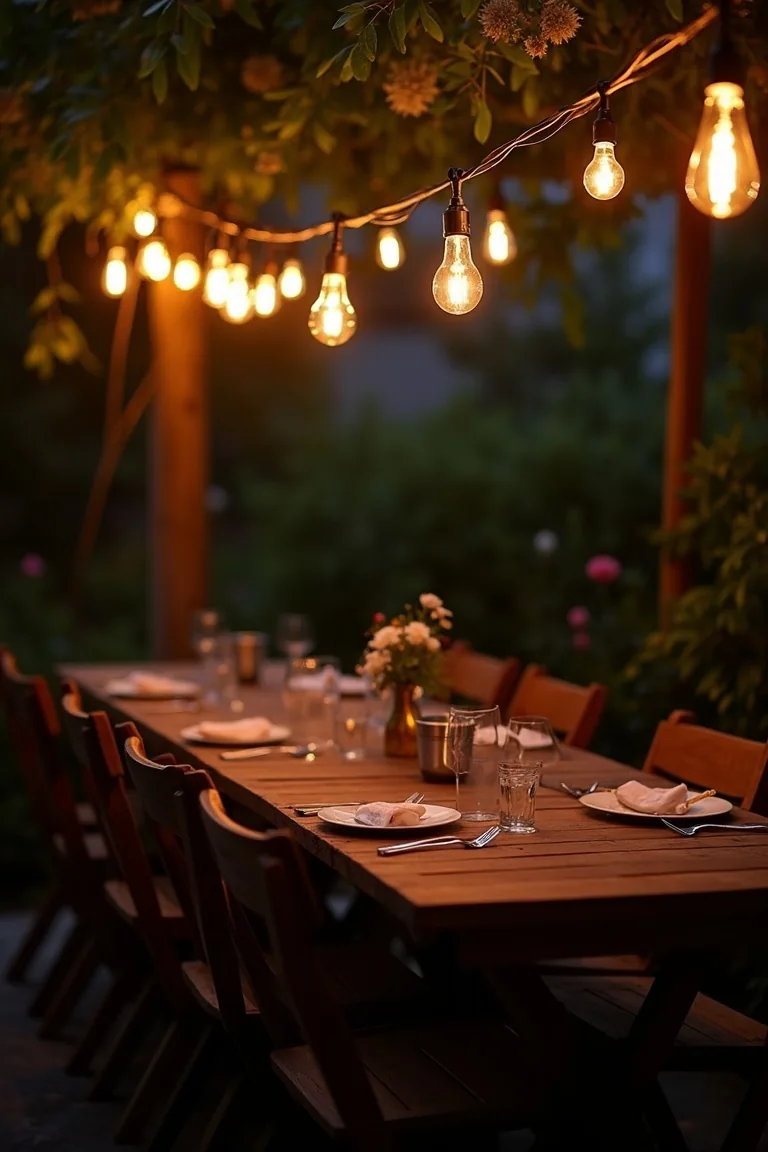
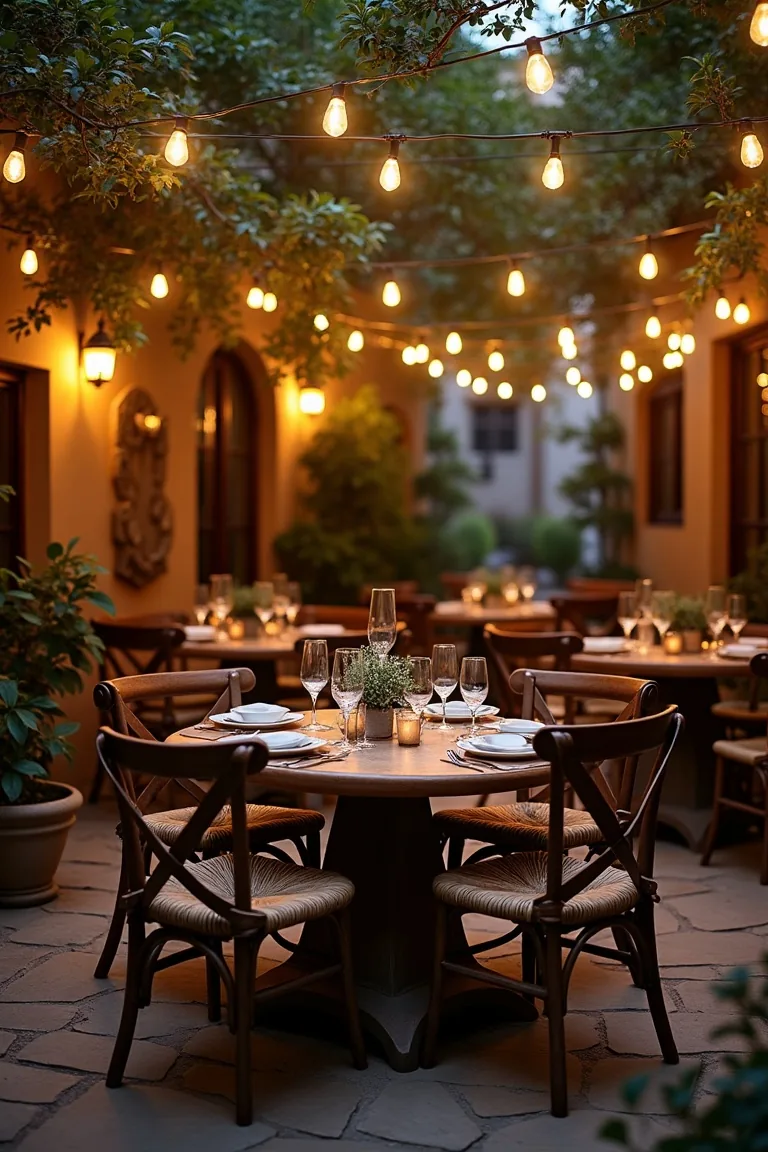
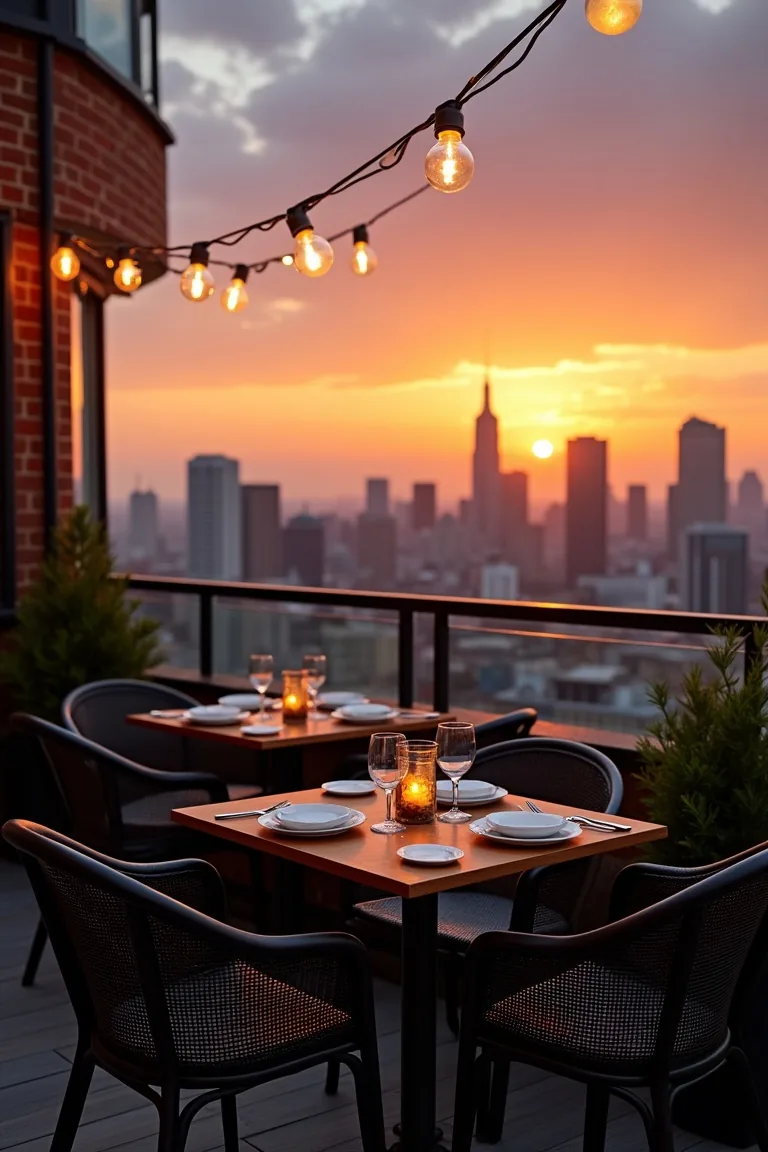
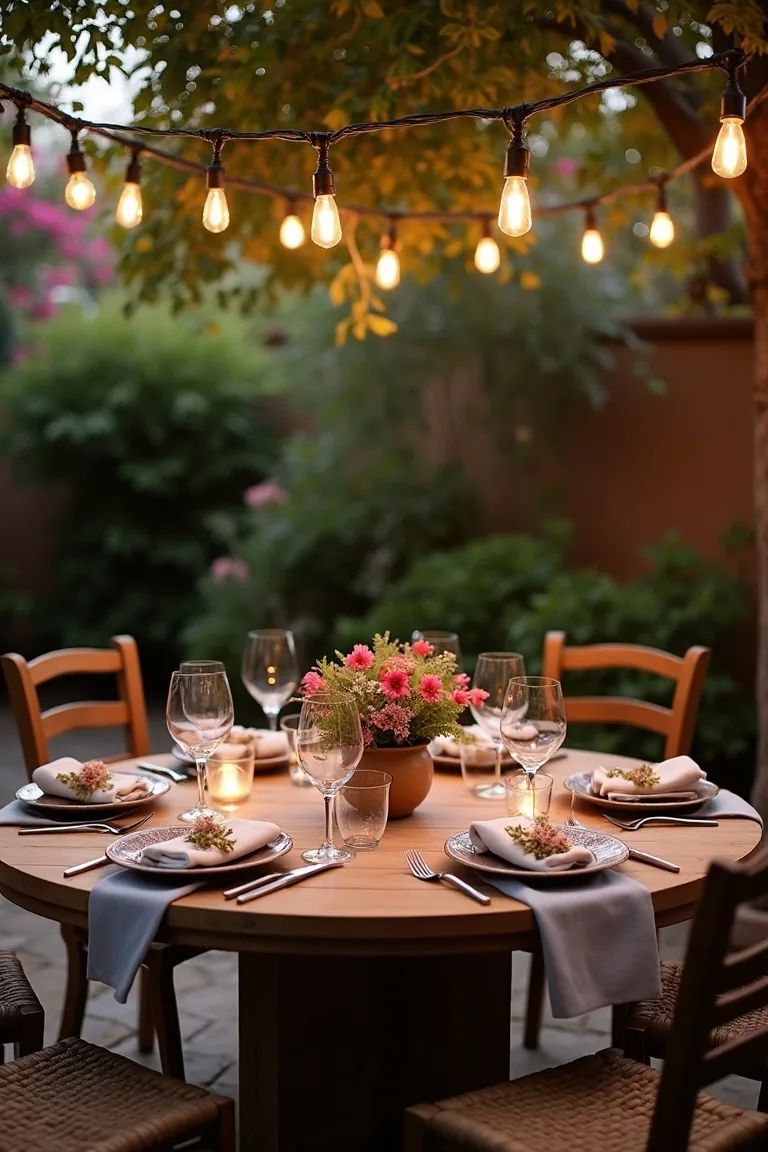
4. Drape Over A Dining Table For Bistro Energy
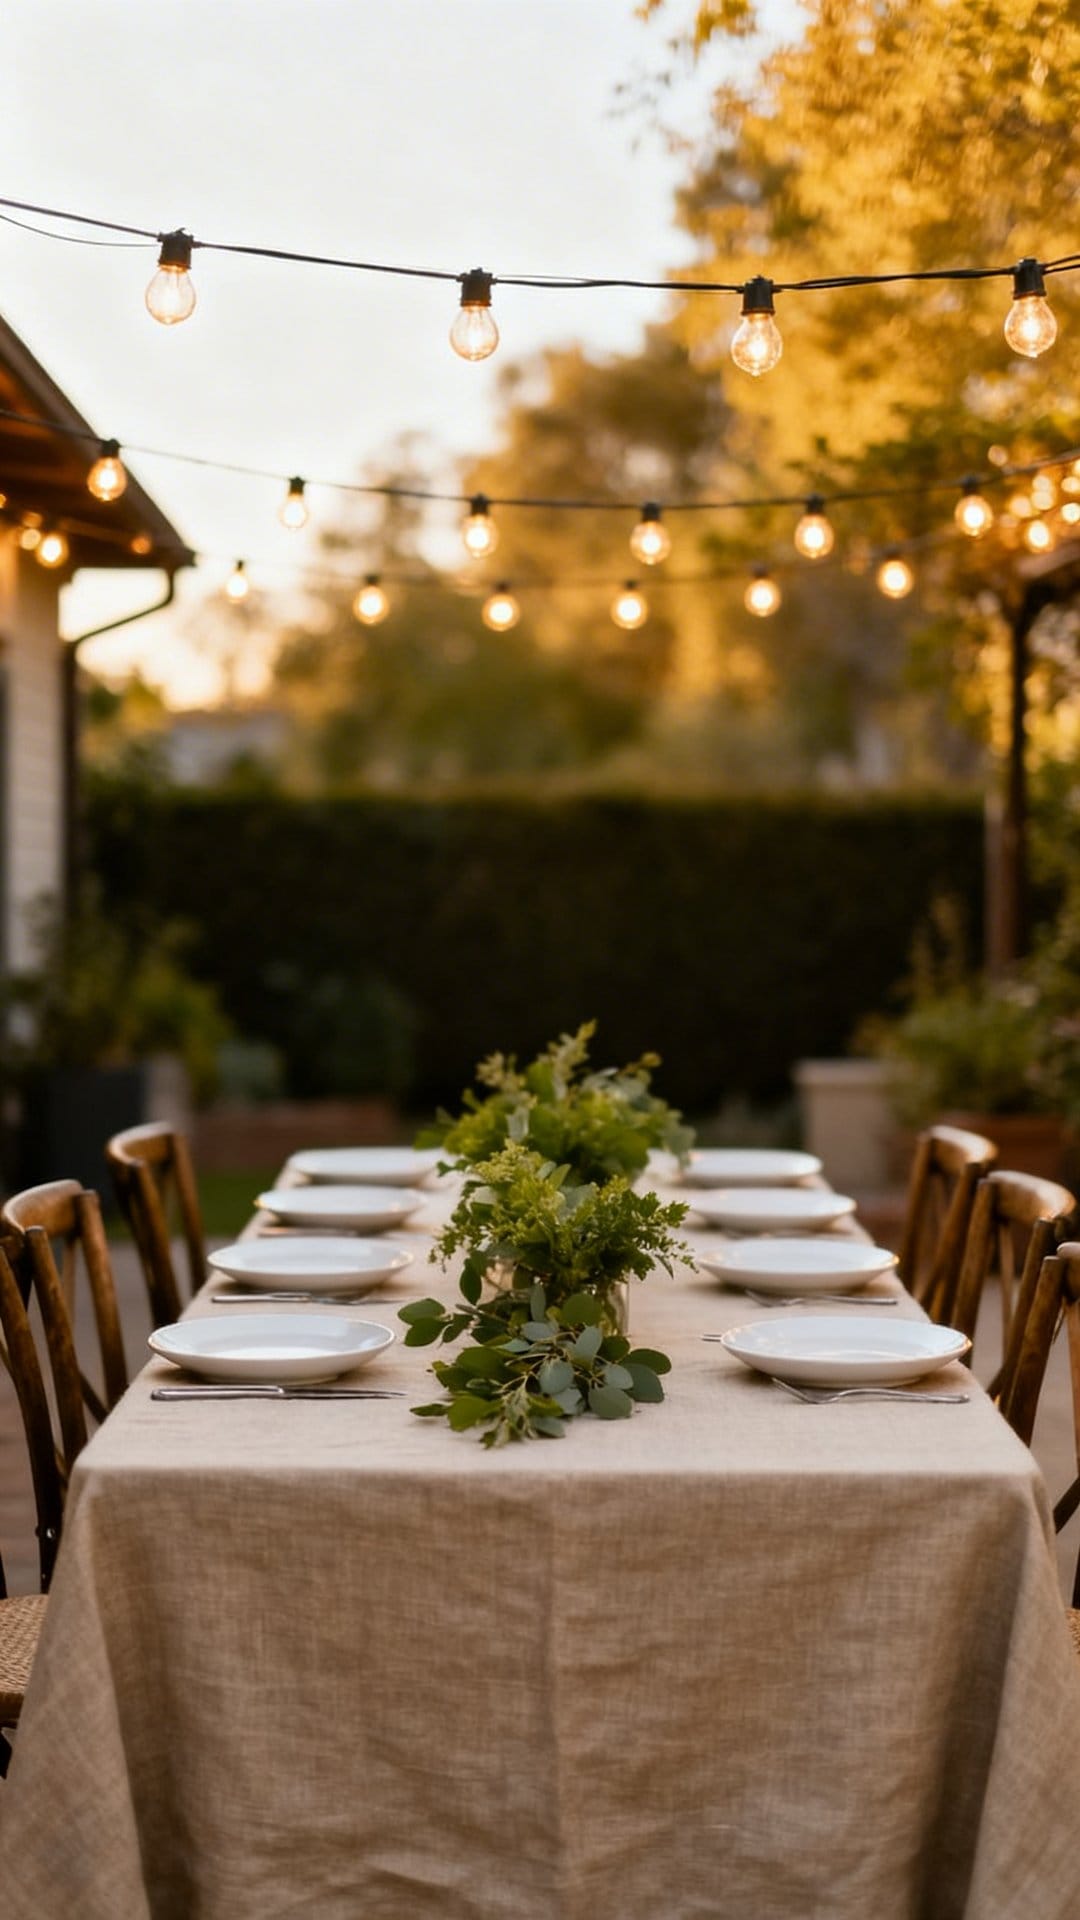
String a few strands directly above your outdoor dining table so the light falls right on the faces of everyone sitting there. It sets a mood that no overhead flood light can touch, conversations get slower, the food tastes better, and nobody wants to be the first to go inside.
The key is hanging the lights low enough to feel intimate but high enough that no one bumps their head, roughly 7 to 8 feet above the table surface is the sweet spot. Two poles at opposite ends of the table are all you need if you have no pergola or eaves to anchor to. Set this up for a small outdoor dinner and the whole table looks like it was styled for a magazine.
Layout Suggestions
- Hang strands 7–8 feet above the table for intimate light without blocking sightlines.
- Use two tall poles with ground spikes if you lack a pergola or eave anchor.
- Warm white LED strands stay cool to the touch and use less power than traditional bulbs.
- An inline dimmer or smart plug lets you shift the brightness between courses.
- For longer tables, run three strands lengthwise rather than two for even coverage.
If you are planning a full outdoor dinner setup, our garden party decoration ideas cover table styling to match.
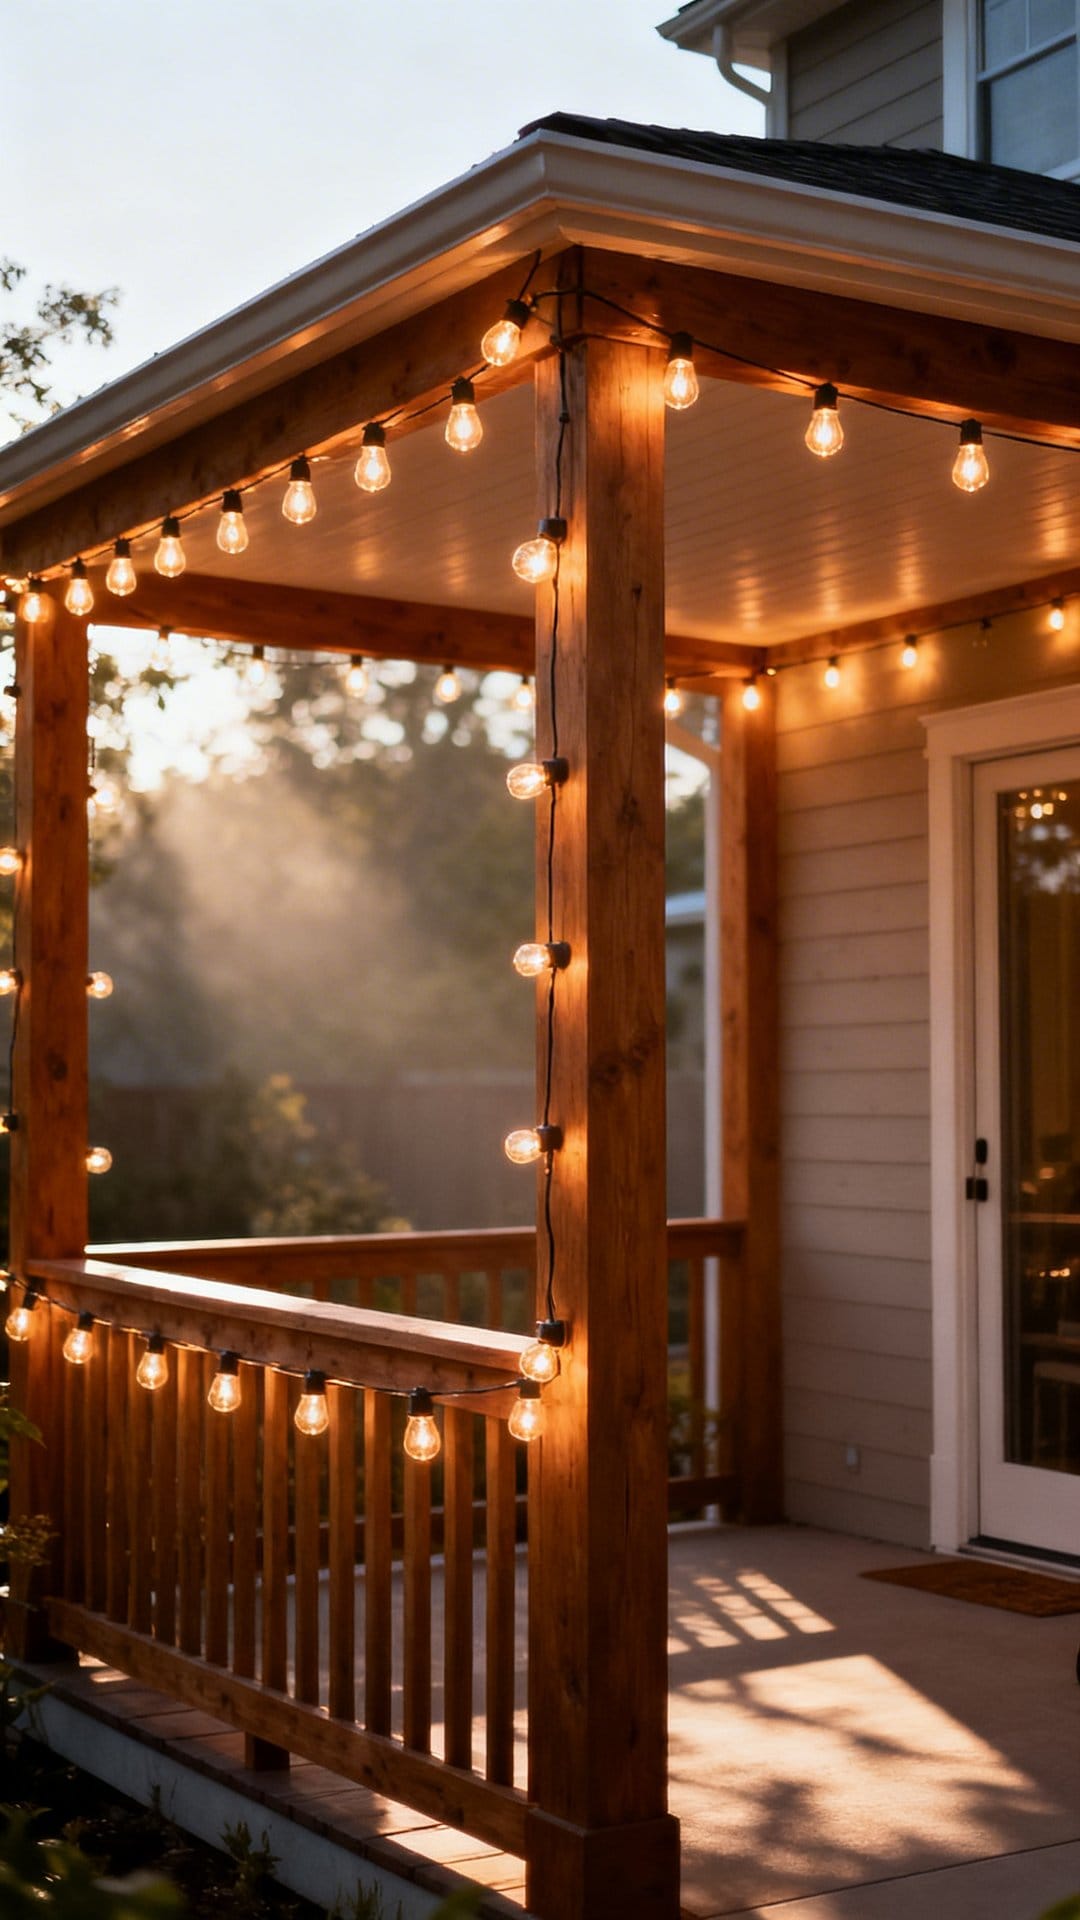
5. Wrap Posts And Beams For Subtle Sparkle
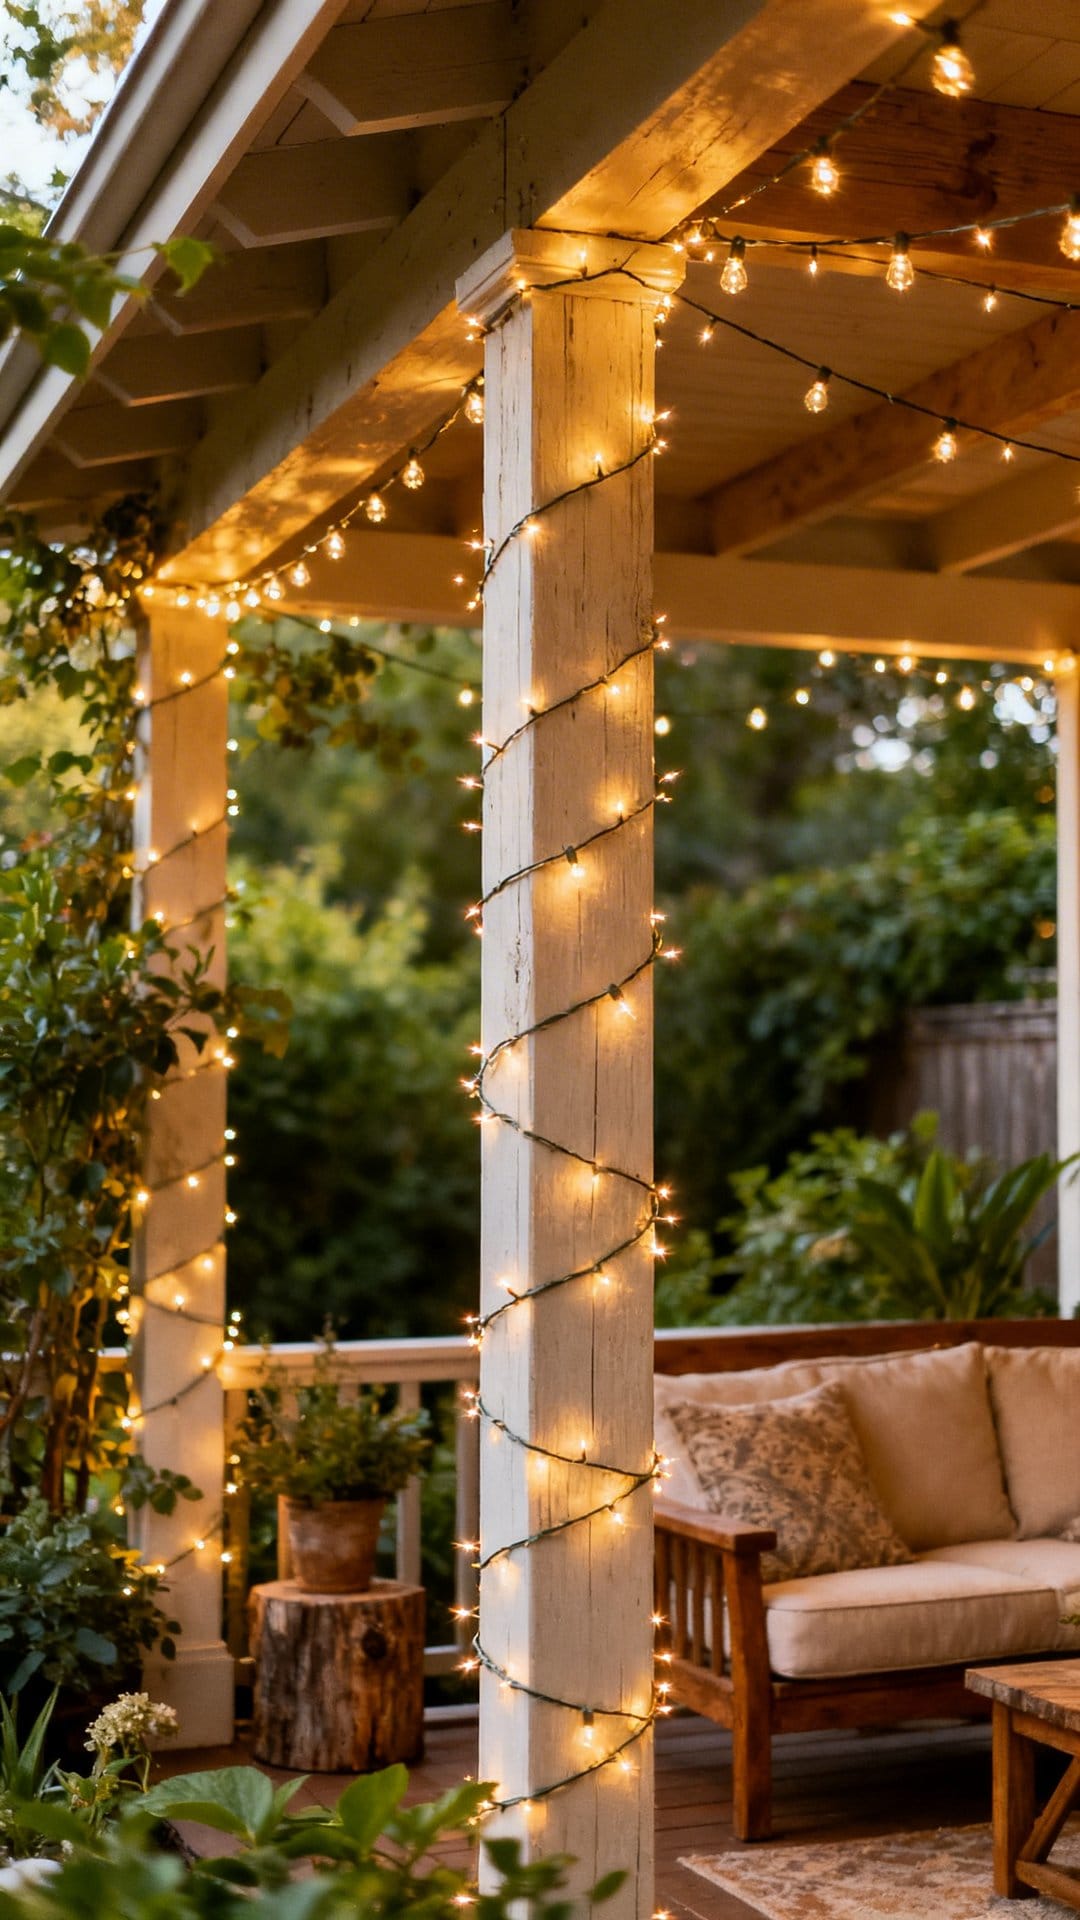
Wrap string lights around vertical posts or pergola beams like a slow spiral and you get gentle pools of accent light without blinding anyone. Where overhead runs give broad coverage, wrapped posts give intimate glow at sitting height, the kind that flatters faces and makes everything feel warmer.
Start at the base and work upward with consistent spacing. Tighter wraps give a denser, brighter look; looser spacing reads as more delicate. For thick 6x6 posts, use larger globe bulbs, tiny fairy lights get lost. For slim 4x4 posts, smaller bulbs wrap more naturally.
Decorating Details
- Start at the base and spiral upward with 4–6 inches between loops for a refined look.
- Secure every third loop with a clear zip tie, then trim the tails flush.
- Use smaller S14 or G25 bulbs on slim posts; G40 or G50 on wider beams.
- Match the cord color to the post, black cord on dark-stained wood, white on natural cedar.
Best when you want accent light that stays in the background and lets your furniture do the talking.
6. Layer Bulb Sizes For Depth
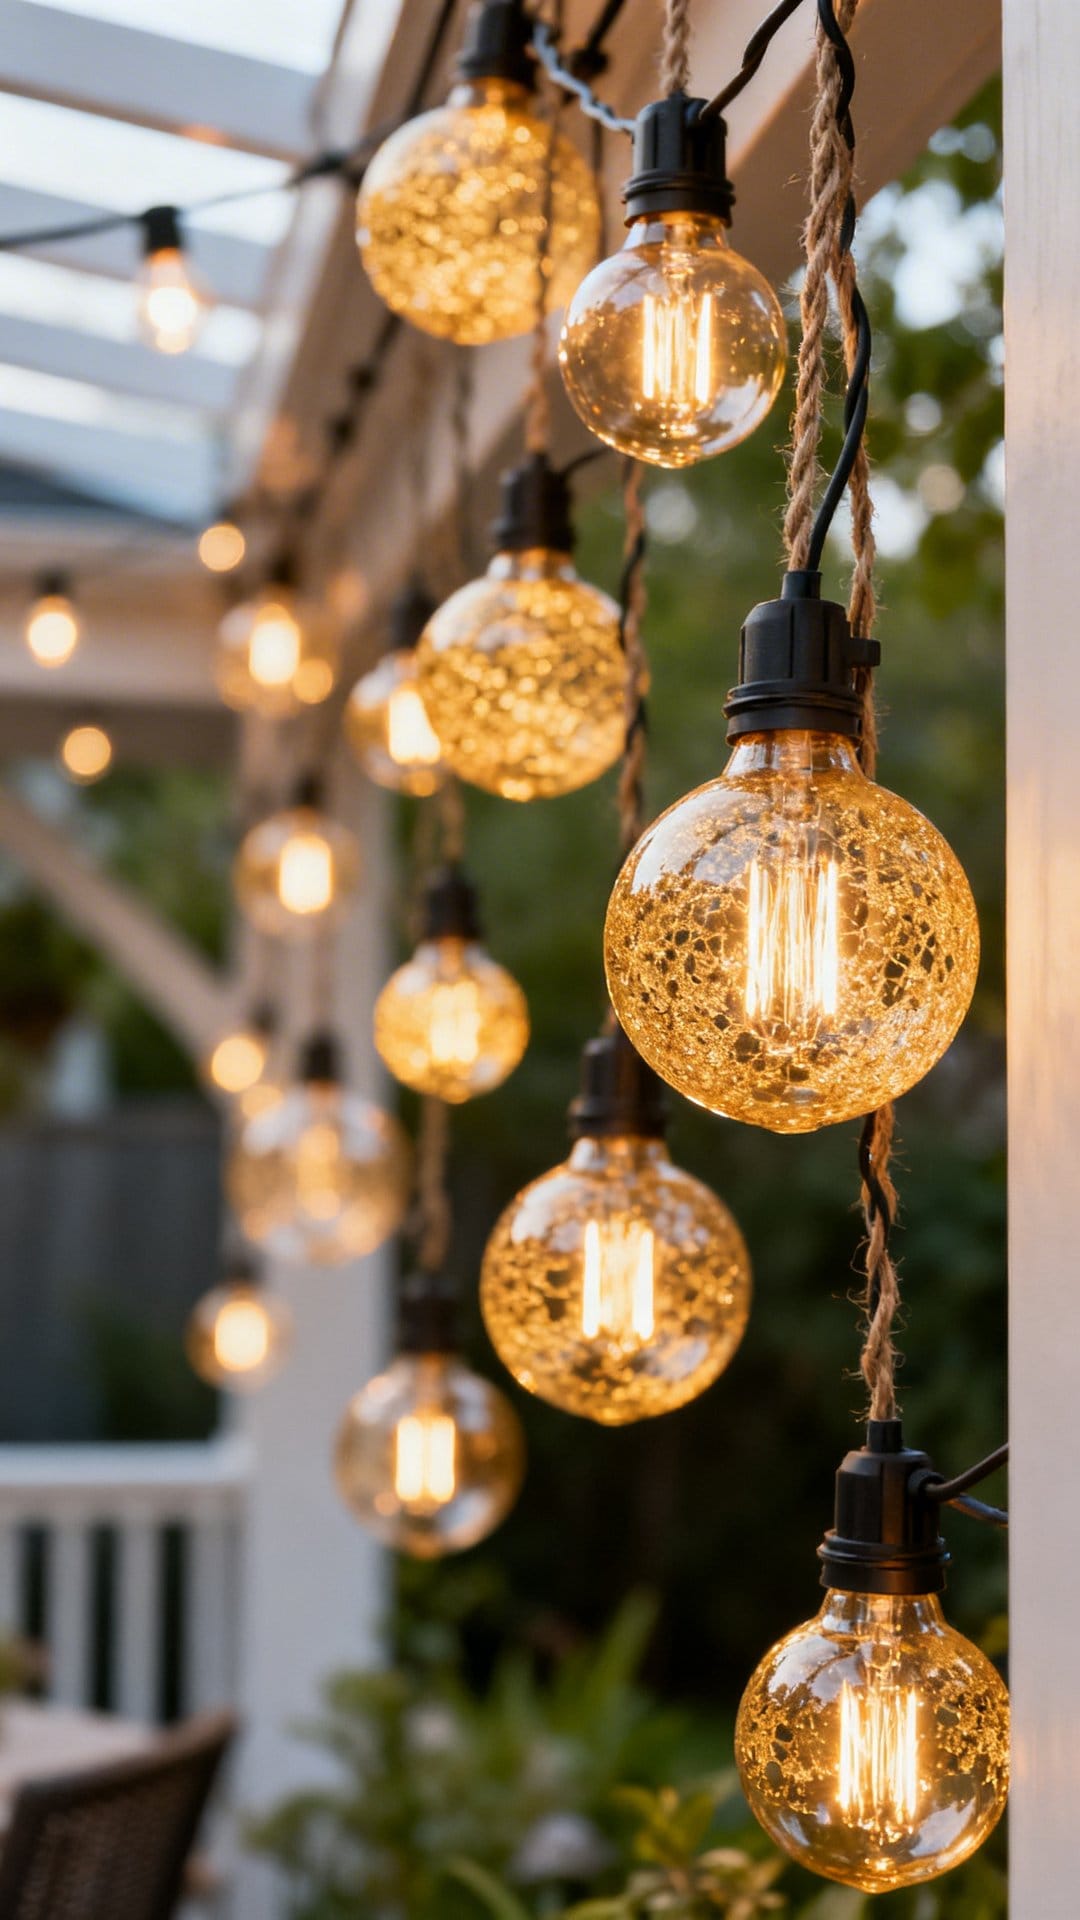
Mix standard G40 or G50 globe bulbs with tiny fairy lights and the result looks like it took a designer to put together. The contrast in scale creates visual texture, big globes anchor the eye, micro LEDs fill the gaps with shimmer, and the whole thing photographs beautifully.
Keep color temperatures consistent, otherwise the warm glow of globes clashes with the cooler cast of cheap fairy lights. Buy both strands from the same brand if you can, or test side by side before committing to a full run.
Cost-wise, this approach is smarter than it looks. Fairy light fill-strands are inexpensive and widely available. Pairing a single quality globe run with affordable micro fills gives you a high-end result at a mid-range total cost.
Key Design Elements
- Run larger G40 or G50 globes as your primary overhead pattern first.
- Weave micro LED strands loosely between the main rows, no need for precise alignment.
- Match color temperatures across both strand types: both 2700K or both 3000K.
- Limit to two bulb sizes maximum, three different sizes reads as busy, not layered.
Use this approach when you want a designer feel without the designer price tag.
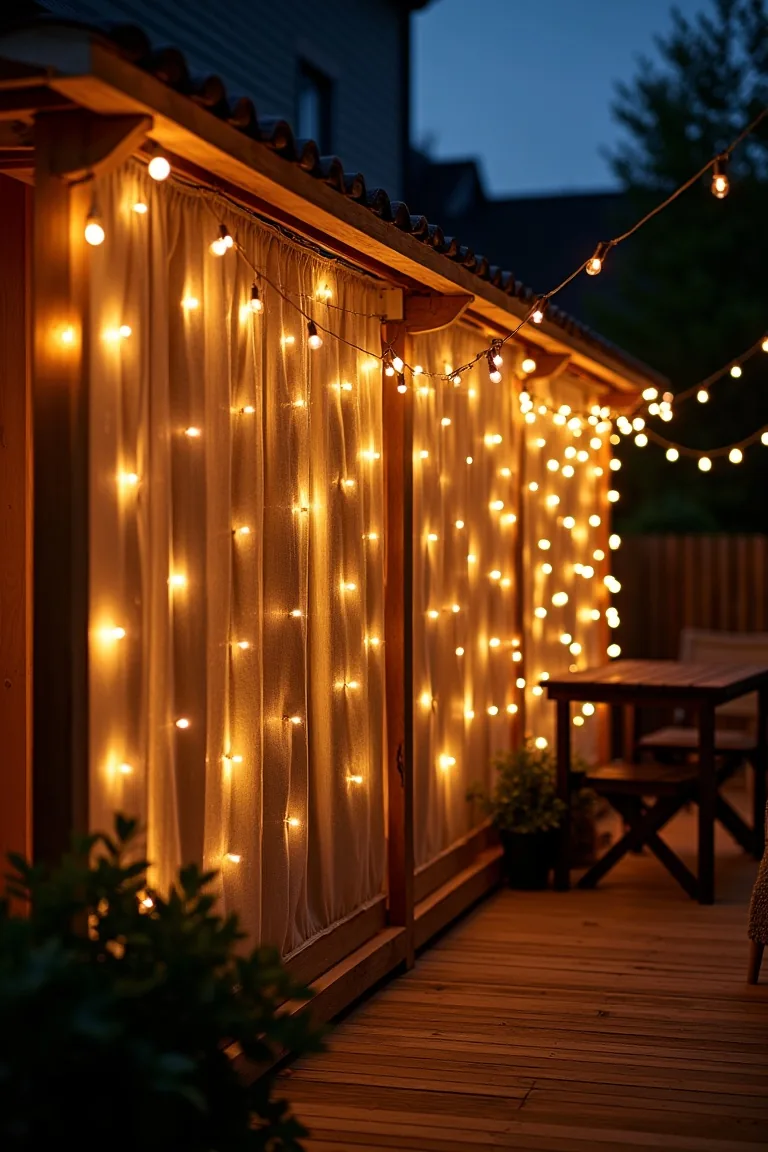
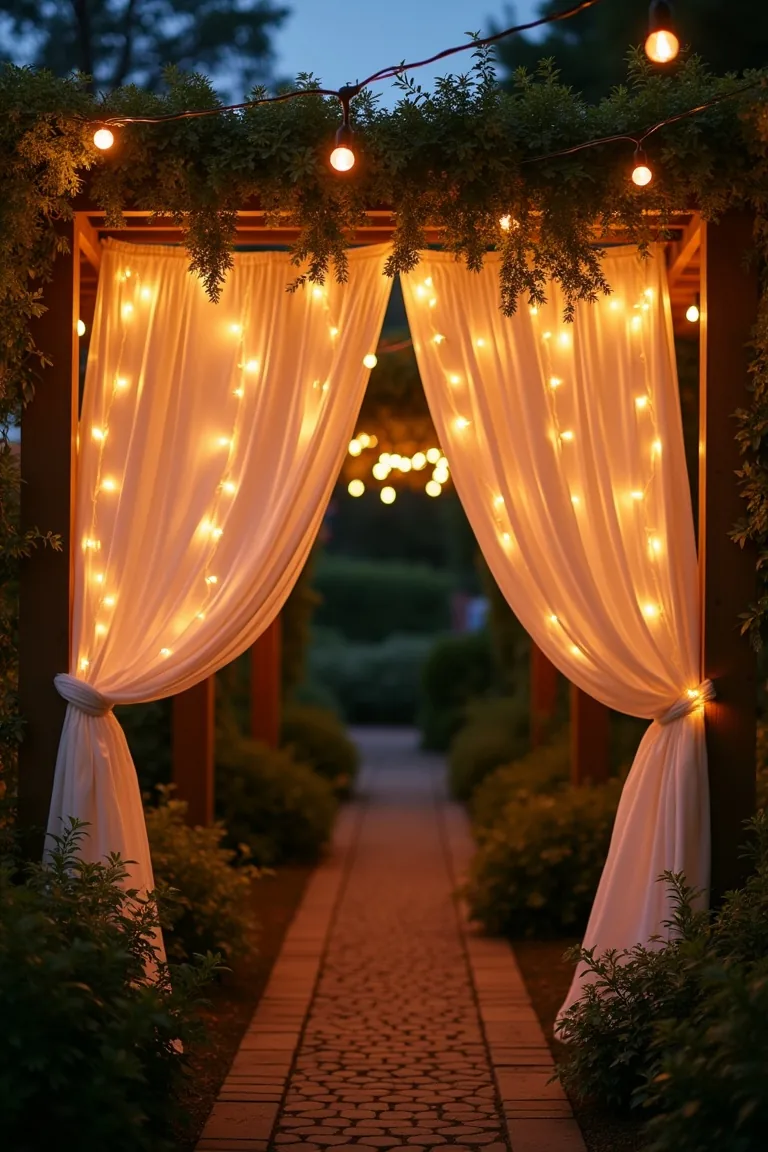
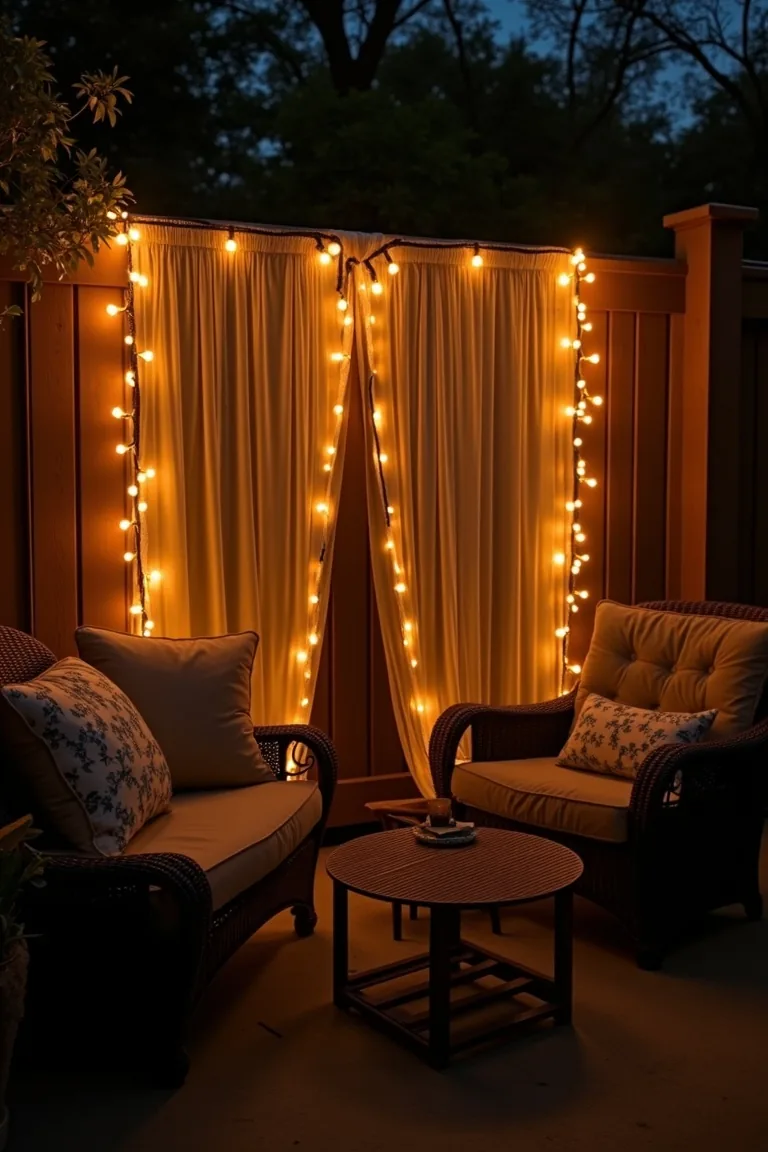
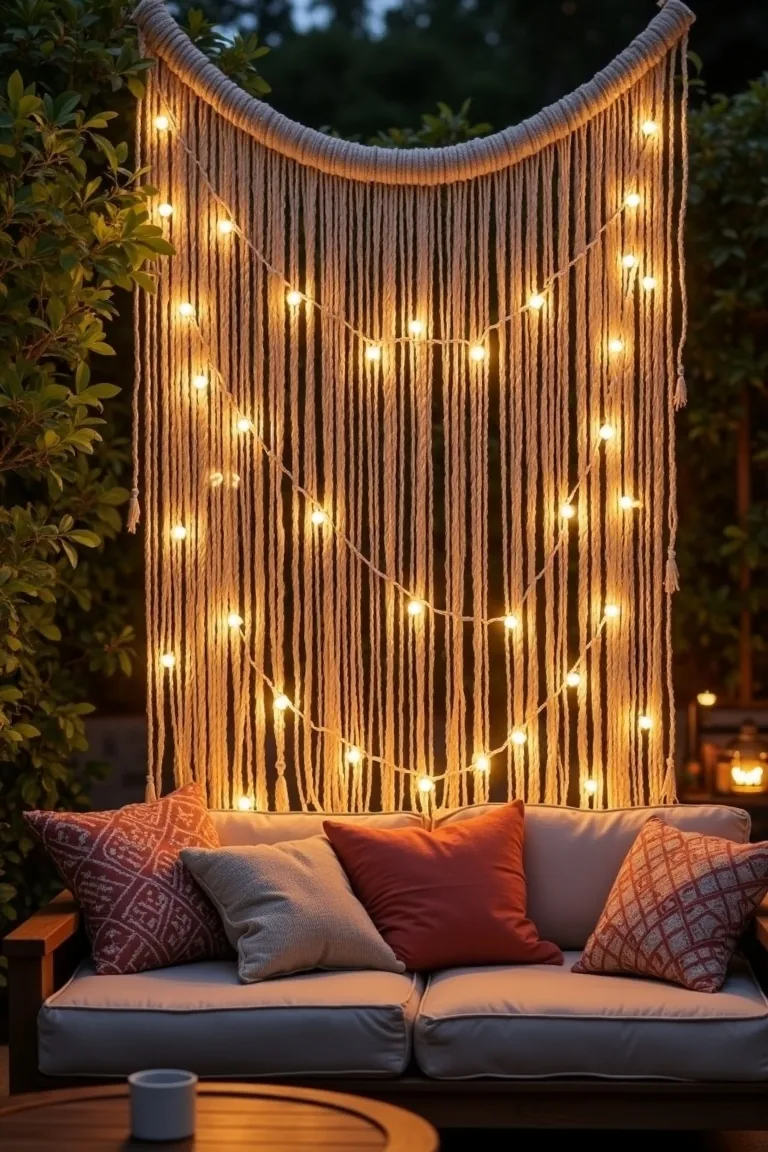
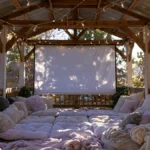
7. Hang Curtain Lights As A Glowing Backdrop
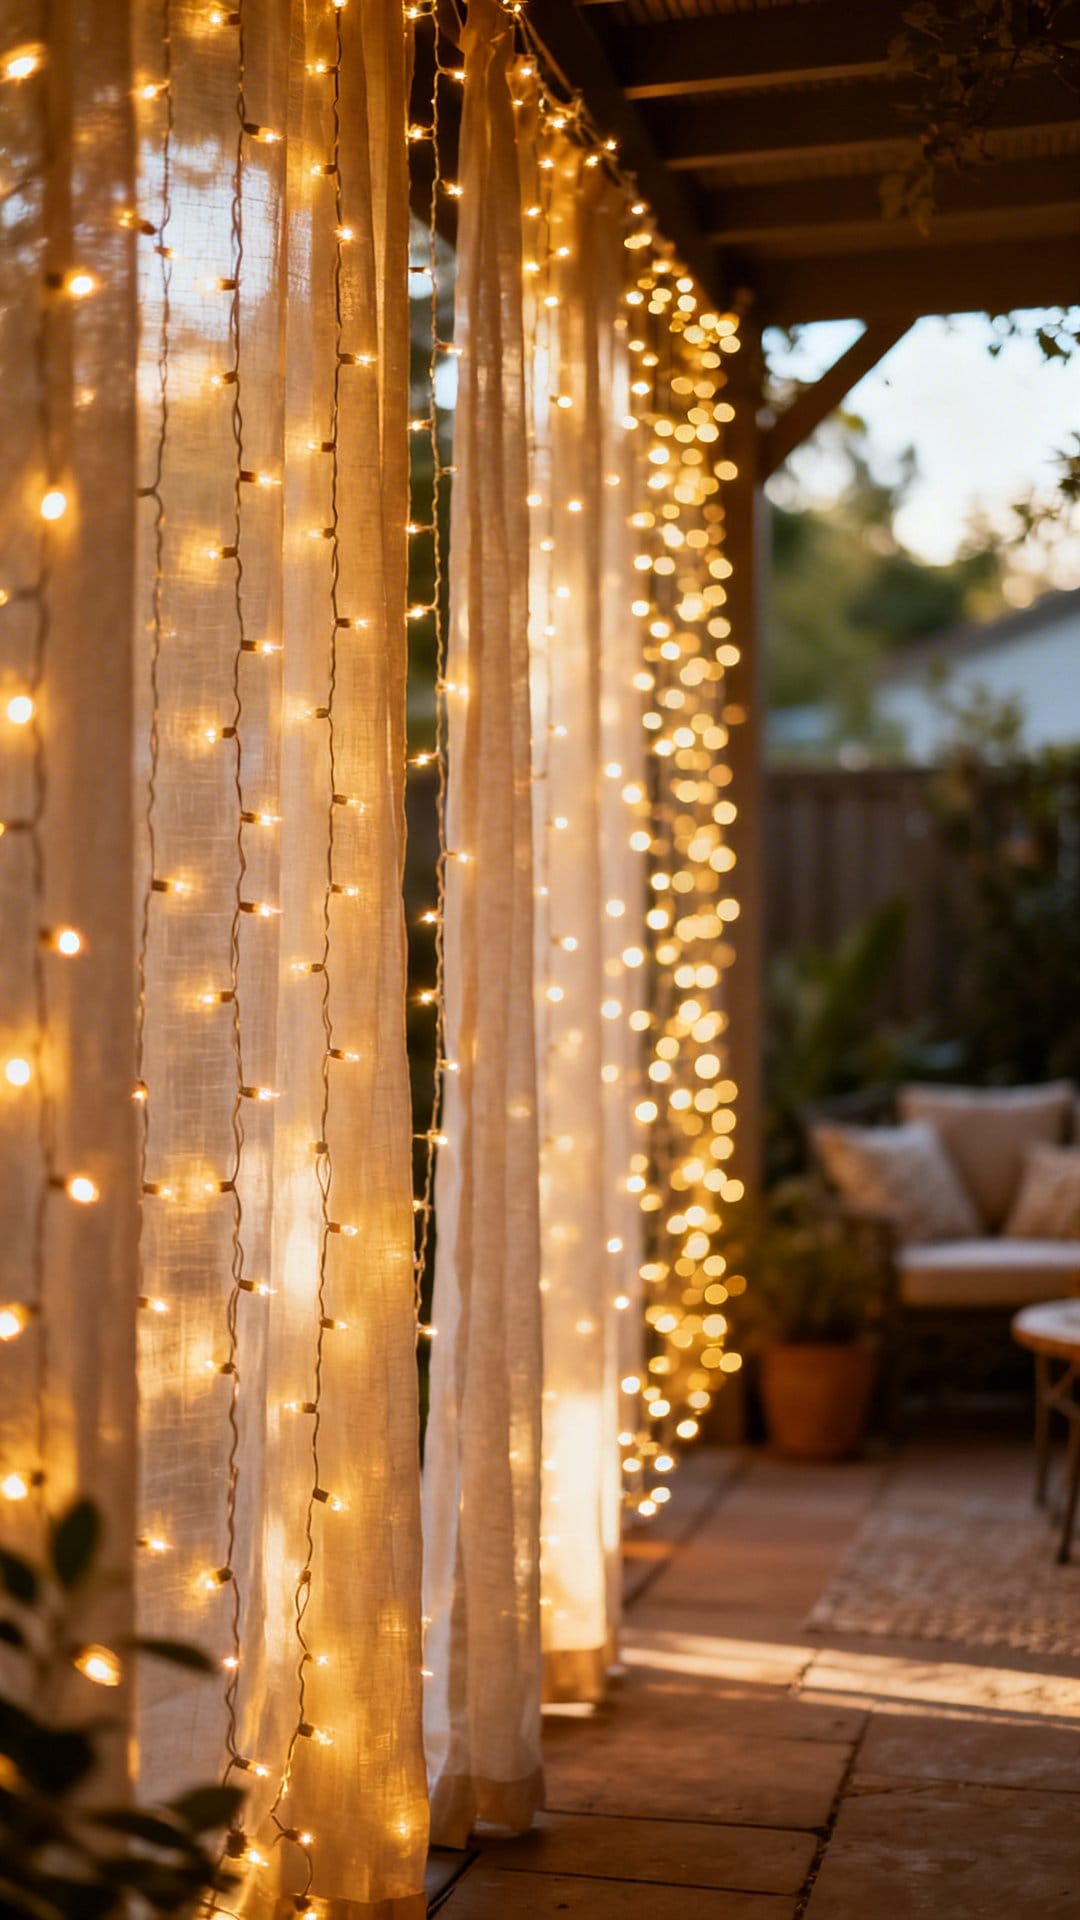
Turn one fence panel or exterior wall into a luminous curtain of light. Curtain panels serve three functions at once: they act as a backdrop for photos, screen out the neighbor's yard, and create an instant mood shift the moment they come on at dusk.
The best placements are behind a seating area or along the far edge of a patio so the light washes forward onto your space. A timer that triggers at dusk means you never have to remember to switch them on, the patio just looks right every evening.
Styling Notes
- Attach a tension wire or rod along the top edge and hang curtain panels side by side.
- Overlap panels by 2 inches so there are no visible gaps between sections.
- Set a dusk-triggered timer or smart schedule so lights come on automatically.
- For a softer look, choose warm white over cool white, cool white reads as sterile outdoors.
Perfect for cozy nooks, small patios, and evening setups that need both privacy and atmosphere.
8. Run Lights On A Tension Wire For Clean Lines
Use stainless steel cable to run perfectly straight lines across wide spans and your lights will never sag, twist, or tangle after a storm. This is the method professional outdoor lighting installers use, and it holds up to years of weather without losing that clean, intentional look.
The cable runs taut between anchor points and the string lights clip or loop onto it, meaning the visible wire is the steel, not an orange extension cord. It is especially good for spans over 15 feet where a standard strand would visibly bow in the middle.
Tension wire kits are available at most hardware stores and include everything you need: wire, turnbuckles, thimbles, and end crimps. Budget roughly $30–50 for a single 20-foot span, and the hardware will last indefinitely once installed.
Layout Suggestions
- Use a stainless steel cable kit with turnbuckles so you can adjust tension after installation.
- Attach string lights with carabiners or locking clips, zip ties work but are harder to reposition.
- For spans over 15 feet, add a mid-point support to prevent any visible sag.
- Leave 3–4 inches of slack in the light strand itself so the cable bears the load, not the cord.
Best if you want a durable, permanent installation that looks as precise as it feels.
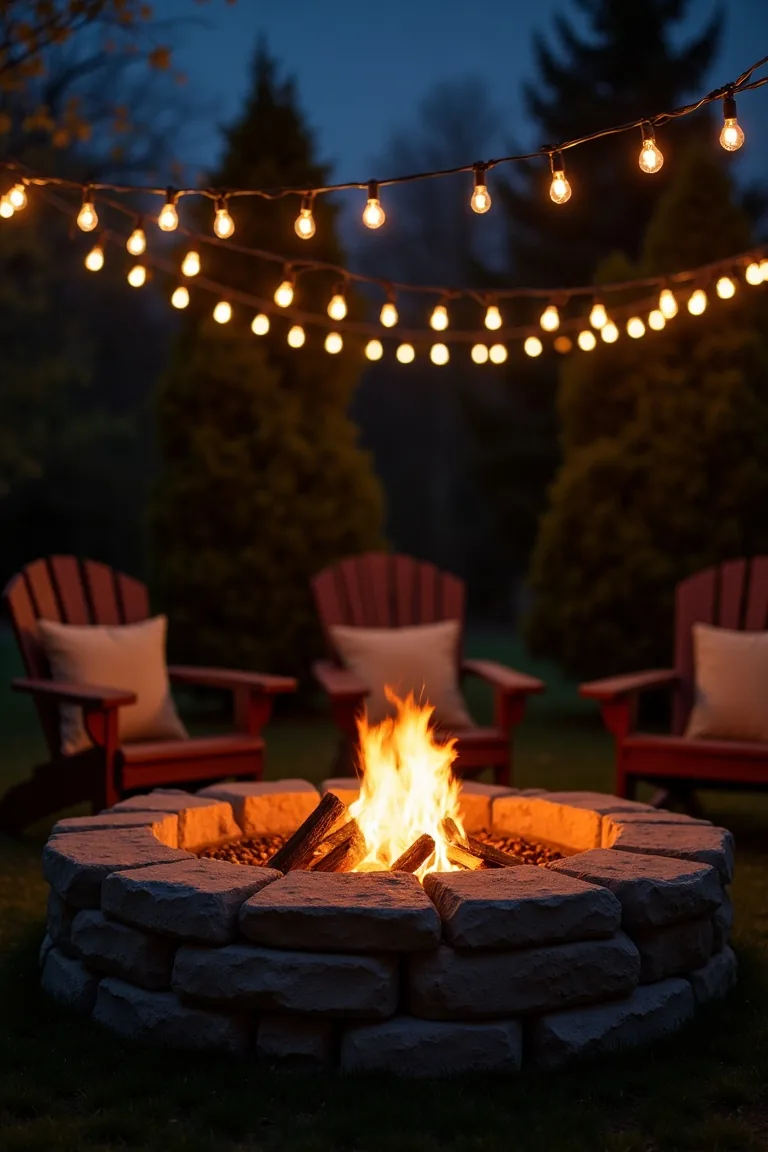
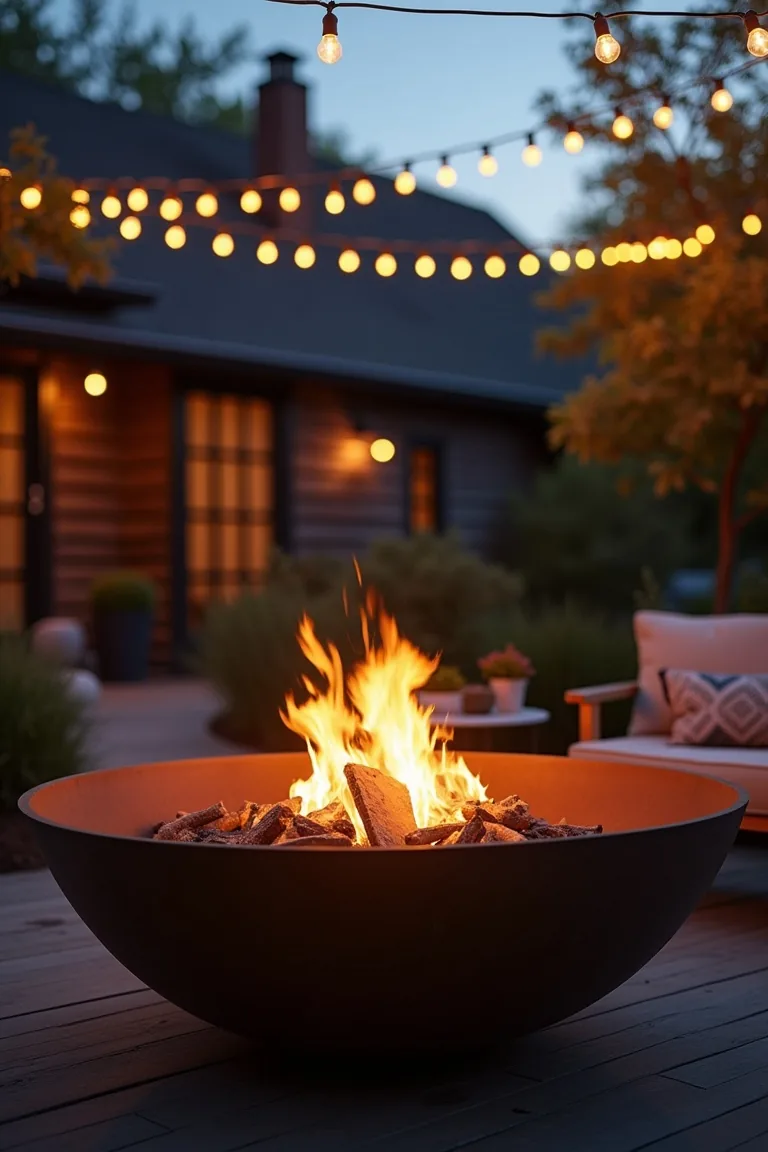
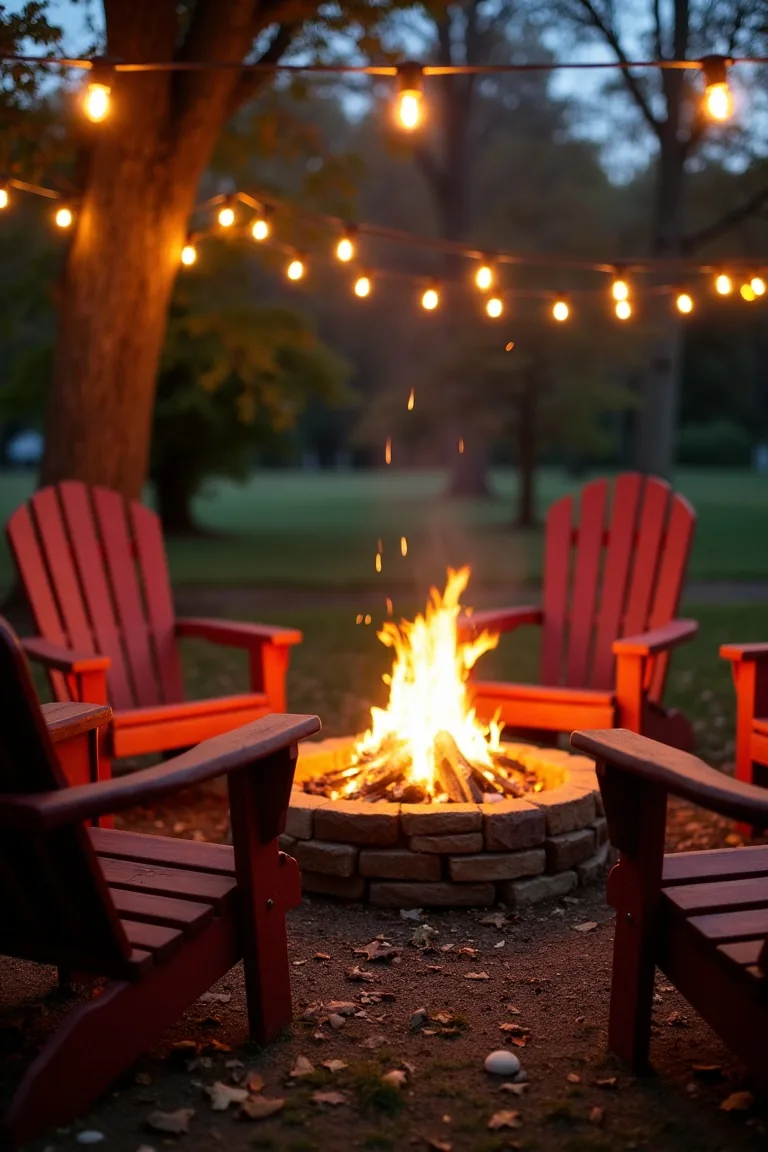
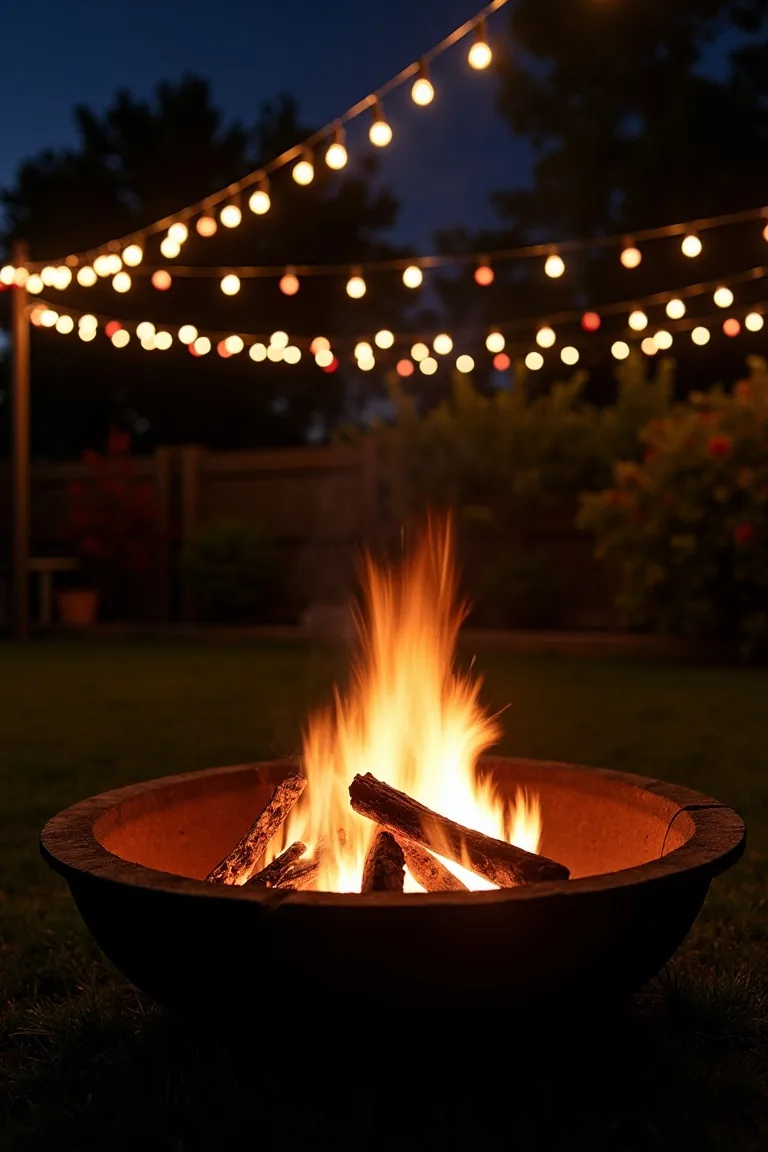
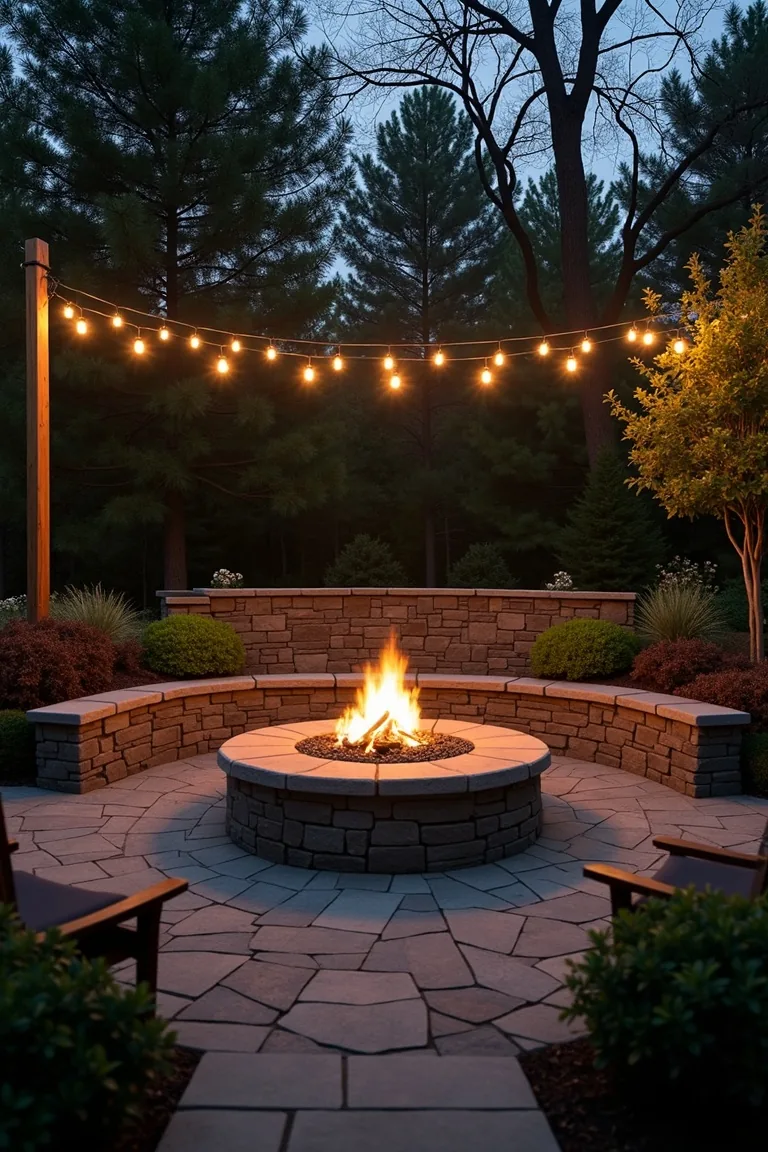
9. Cluster Over A Fire Pit For Drama
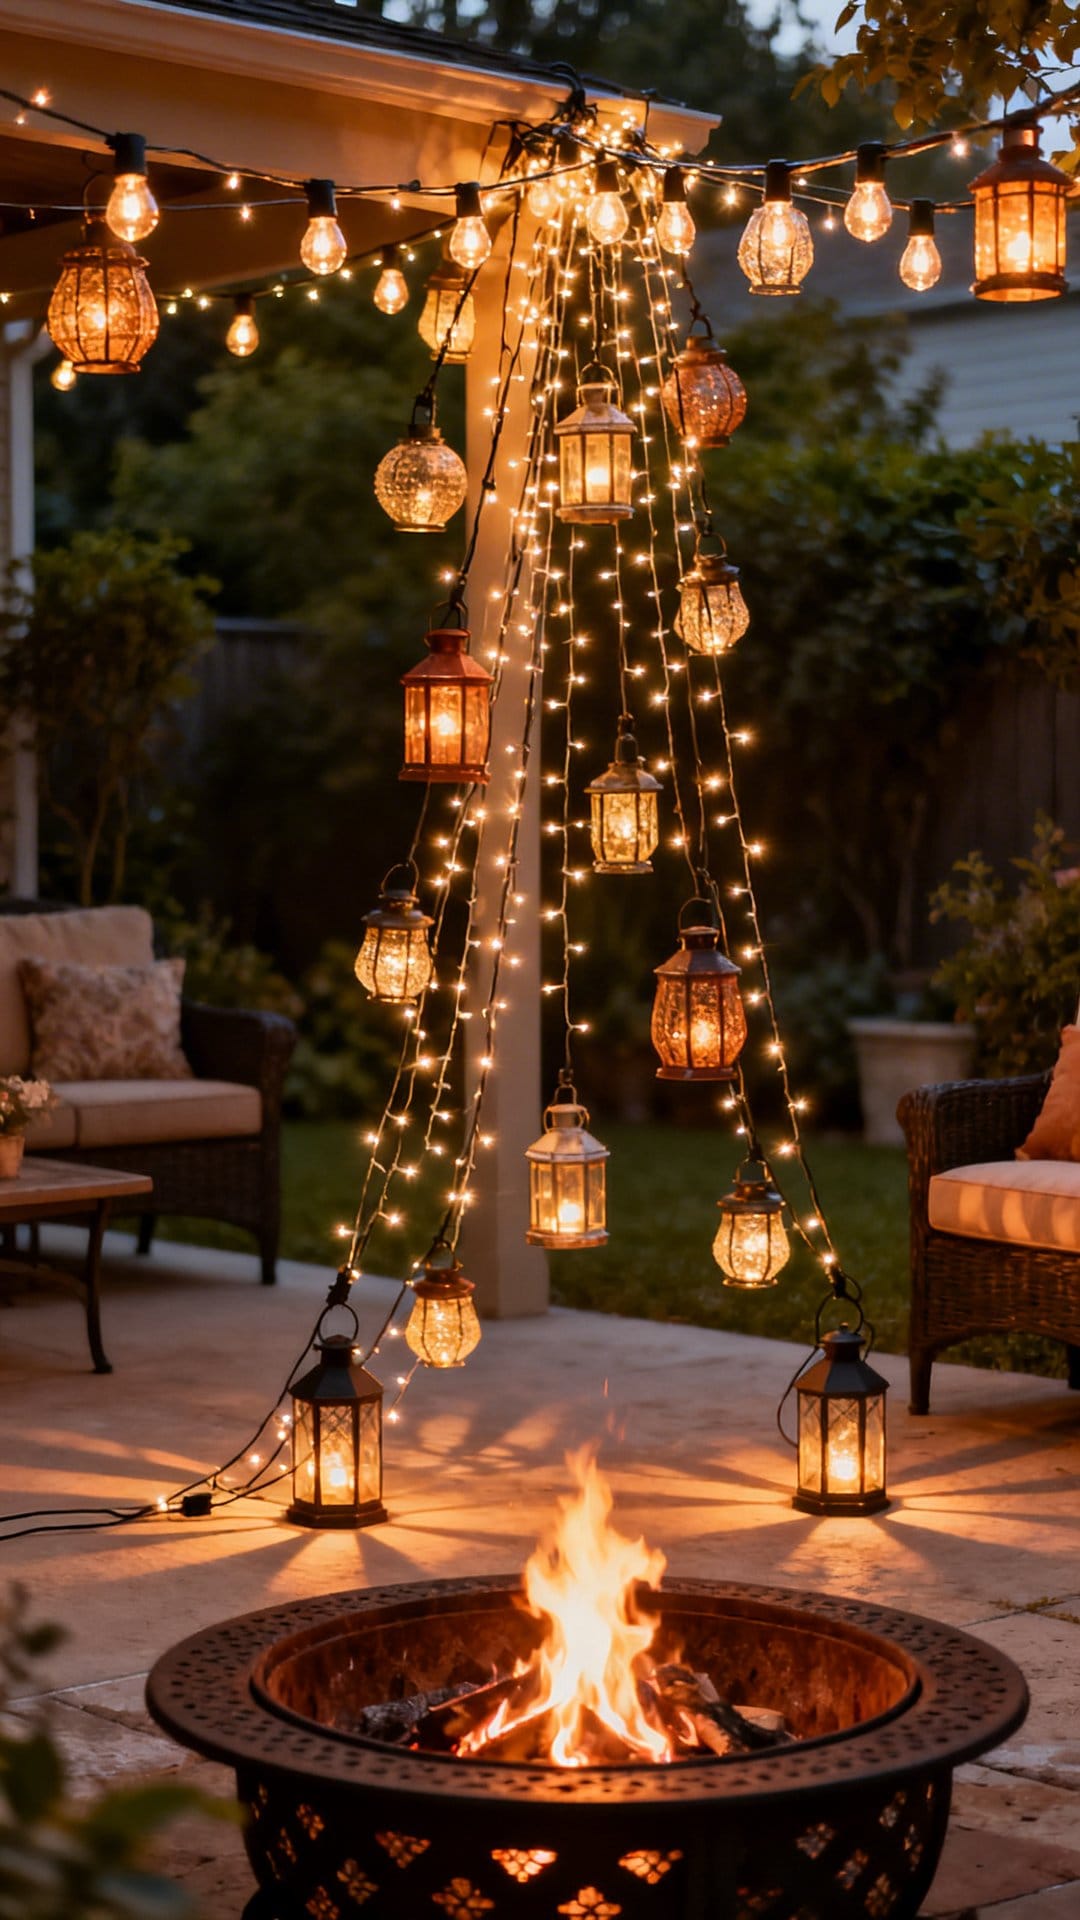
Gather several strands into a loose cluster above a fire pit and you double the atmosphere with almost no extra effort. The string light glow overhead mirrors the fire glow below, and the layered warmth pulls everyone toward the center of the space.
The visual effect is dramatic precisely because the two light sources are different, the flickering orange of fire and the steady warm glow of globe bulbs create motion and stillness at the same time. Keep the cluster slightly loose so wind can move through without tangling strands.
Key Design Elements
- Maintain a minimum 3-foot clearance above any open flame, check your specific light manufacturer's guidelines.
- Anchor strands to pergola rafters or posts rather than a single central point for stability.
- Gather 3–5 strands loosely so they can move slightly in wind without tangling.
- Avoid placing strand hardware directly above high, open flames, side anchors only.
For more ways to combine fire and light in your outdoor space, our summer garden party lighting guide has setup ideas for every patio size.
10. Outline Garden Beds To Guide The Eye
Trace the edge of raised beds or planter rows with low-hung string lights and your garden becomes a feature after dark instead of disappearing into the shadows. The light draws the eye through the space, creating depth and movement even when there is nobody outside.
This works especially well with raised beds because the cord sits just above the rim, high enough to illuminate the foliage, low enough to still feel like a pathway marker. Pair with solar spotlights aimed at your tallest plants for a layered nighttime garden that earns its own viewing.
Solar-powered versions work particularly well here since garden beds are often away from the nearest outlet. No electrical work needed and no cord to trip over when you are out watering in the morning.
Decorating Details
- Stake the cord 4–6 inches above the soil line to avoid water splash and soil contact.
- Use outdoor-rated, IP65 weatherproof strands, regular indoor lights will corrode fast.
- Pair with small solar spotlights on your tallest plants for layered depth.
- At garden bed corners, use a small screw-in guide hook rather than bending the strand sharply.
Use this to highlight your landscaping work and create a destination view from inside the house.
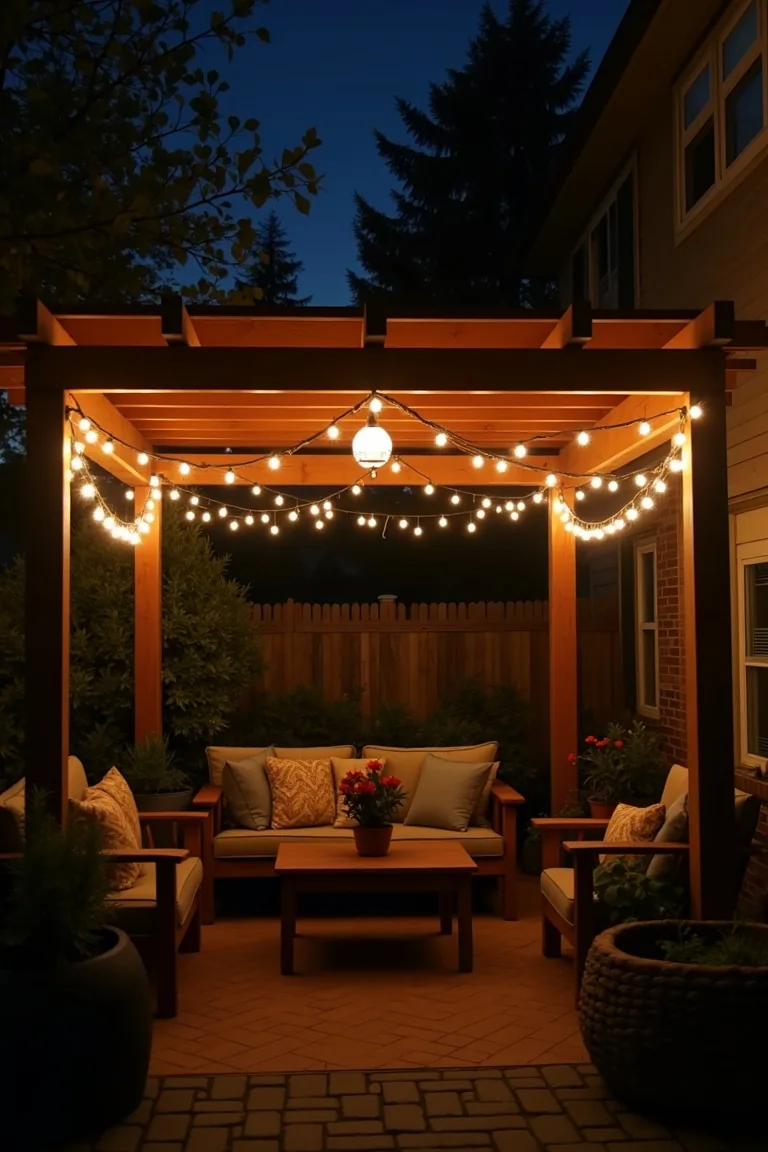
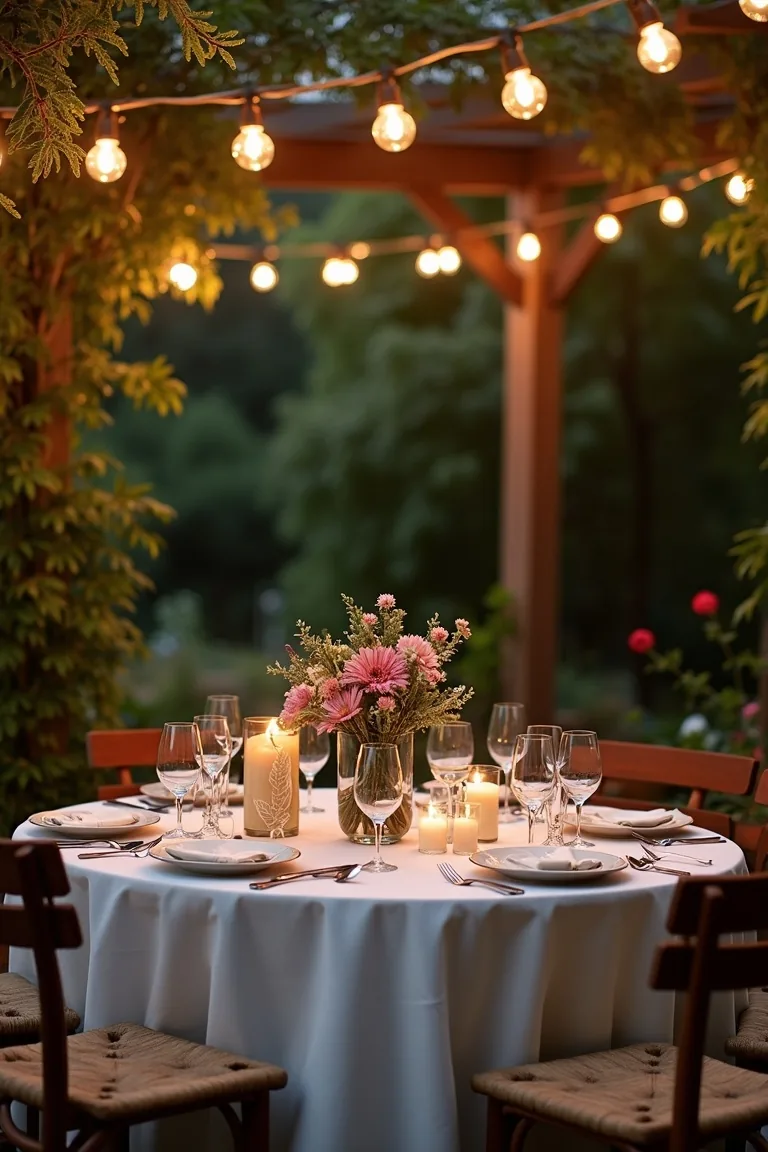
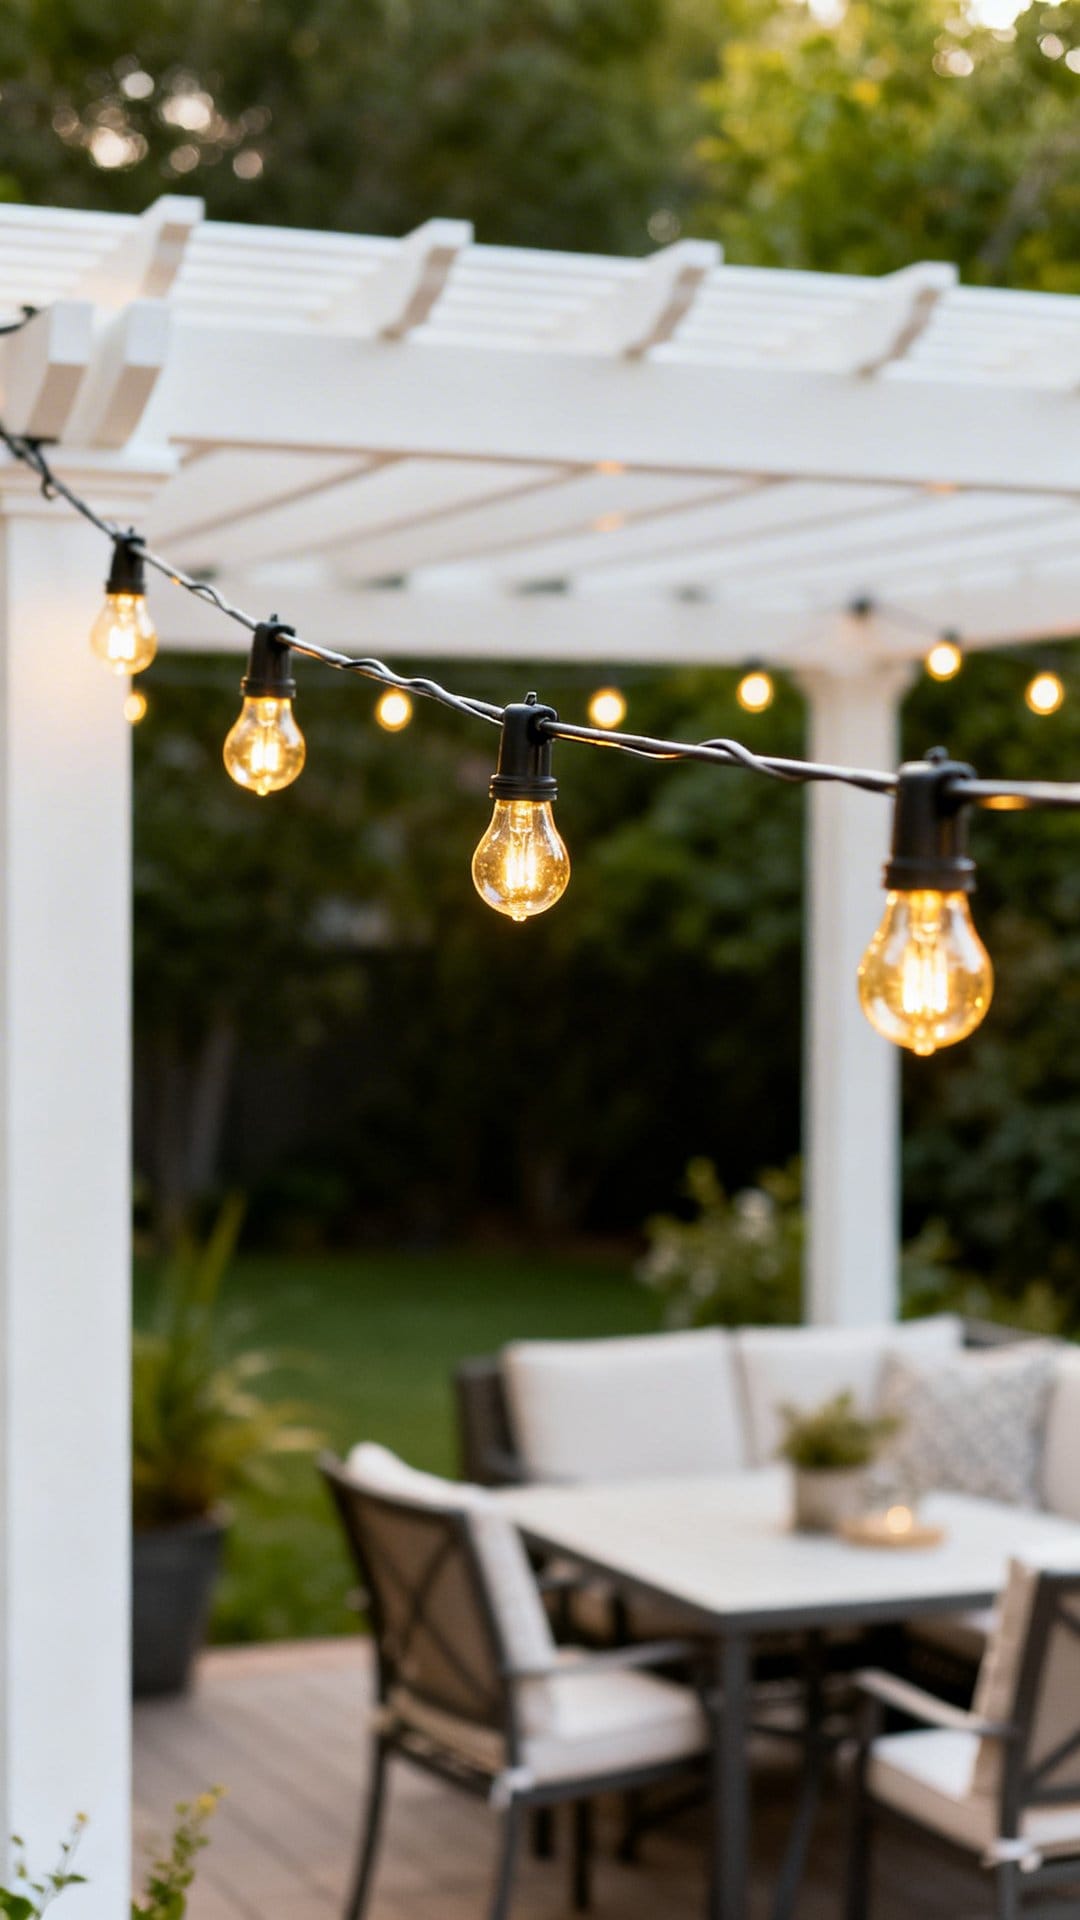
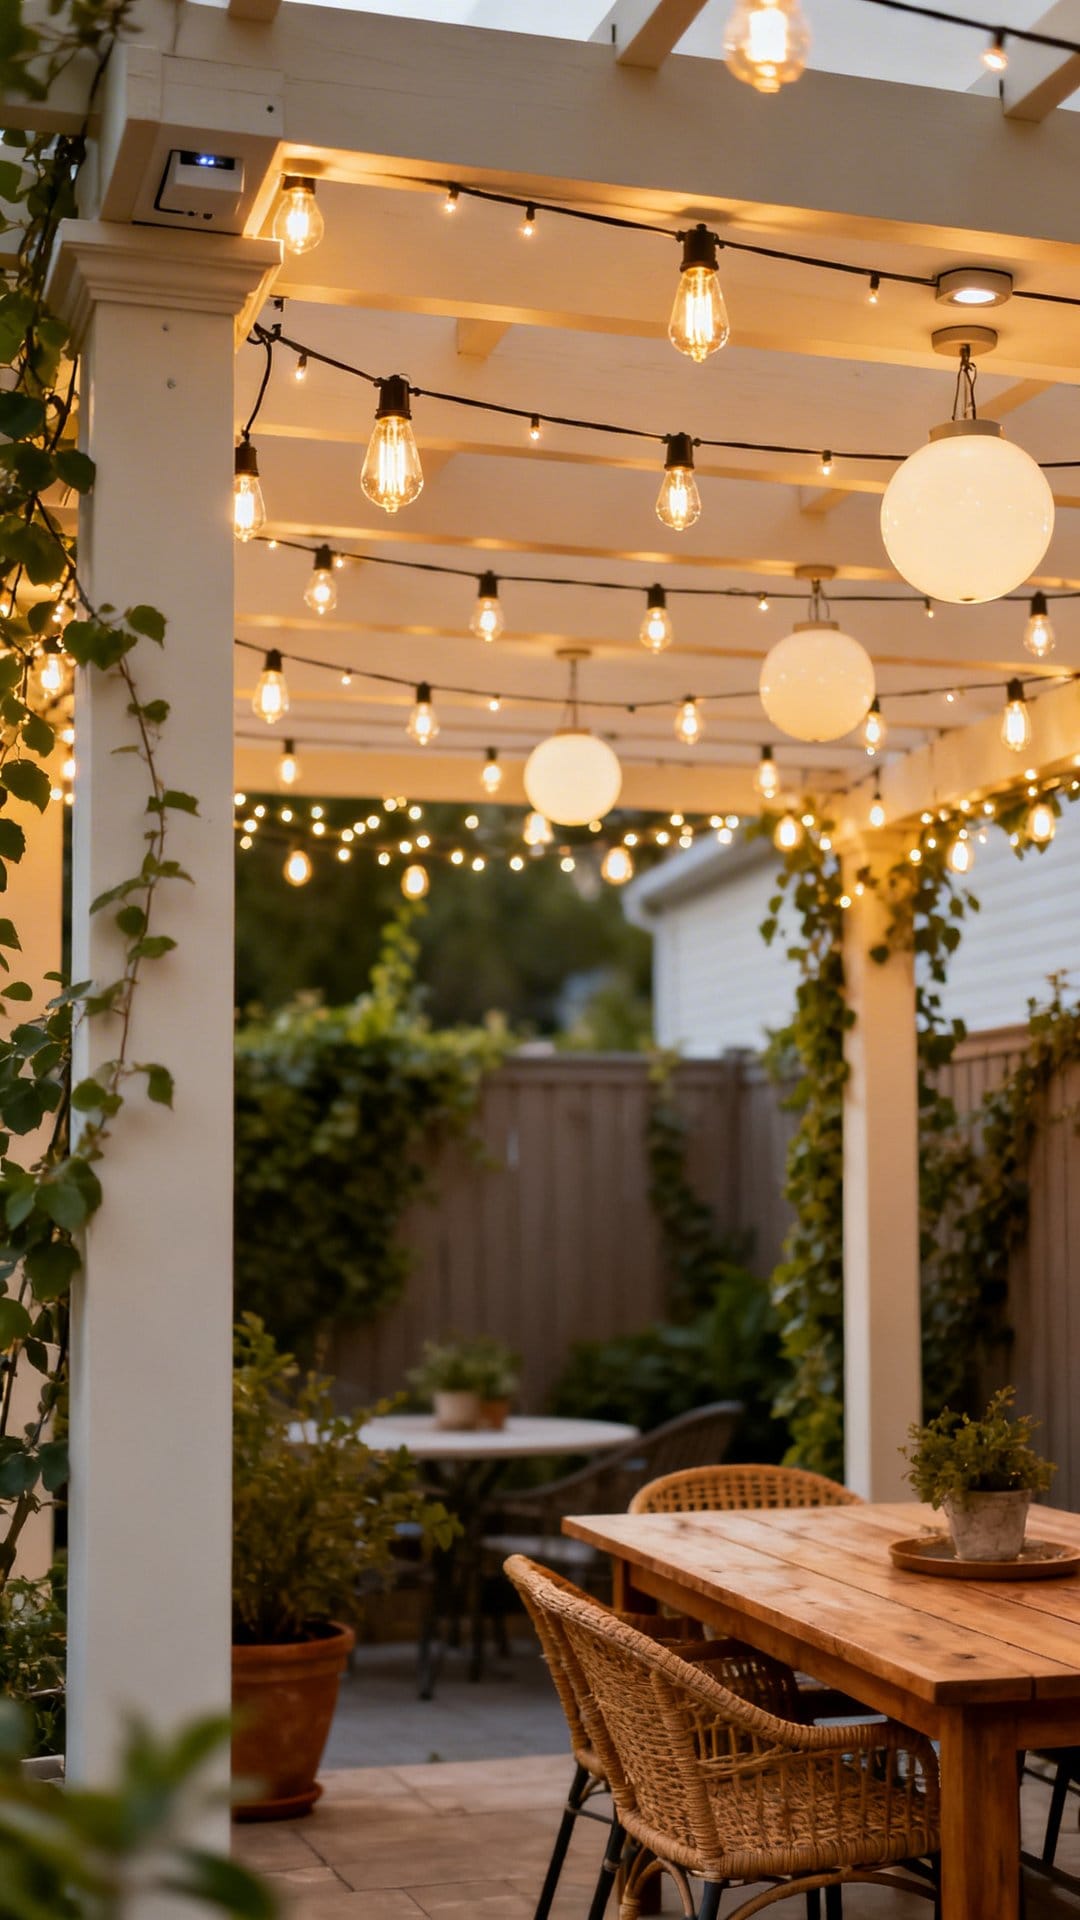
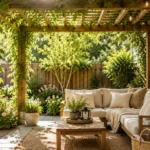
11. Weave Through A Pergola For All-Over Glow
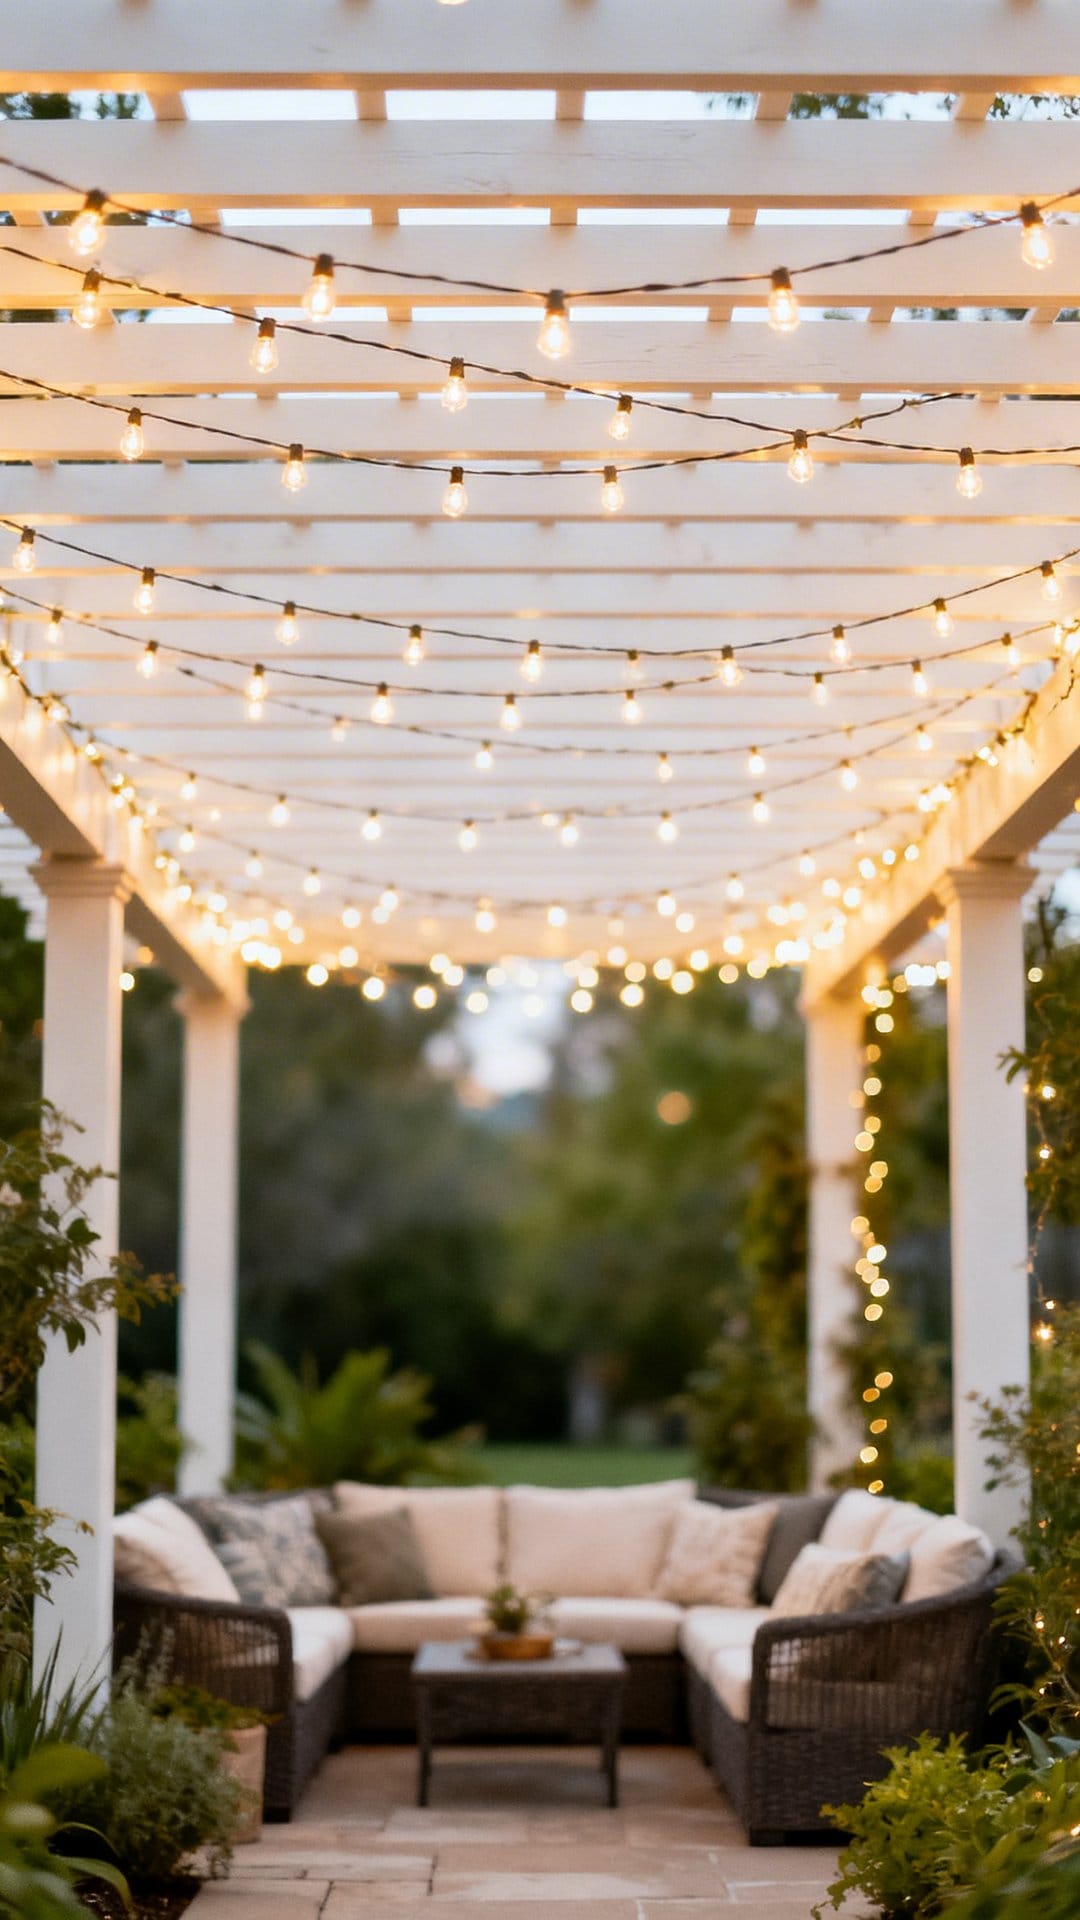
Thread string lights in and out of pergola rafters and you get a patterned ceiling of light that fills the whole structure evenly. It pairs beautifully with relaxed boho patio styling. It looks complex from below but the installation is simple: follow each rafter in one direction, then cross back diagonally to fill the gaps.
Weaving through an older pergola takes about an hour the first time, and once it is up you may not change it for three summers. The key is securing the strand every 12 to 18 inches with small plastic hooks, the kind that push into wood without screws. That way you can remove everything at the end of the season without leaving holes.
Layout Suggestions
- Follow rafters in straight lines first, then add a diagonal pass to fill gaps.
- Secure the strand every 12–18 inches with removable plastic hooks for a clean, damage-free install.
- Add a dimmer at the plug point so you can run full brightness for working or half for relaxing.
- Leave one continuous strand rather than joining multiple, fewer connections mean fewer failure points.
Ideal for a permanent-feeling outdoor room that you will want to use well into autumn.
12. Mix Metals And Bulb Shapes For Character
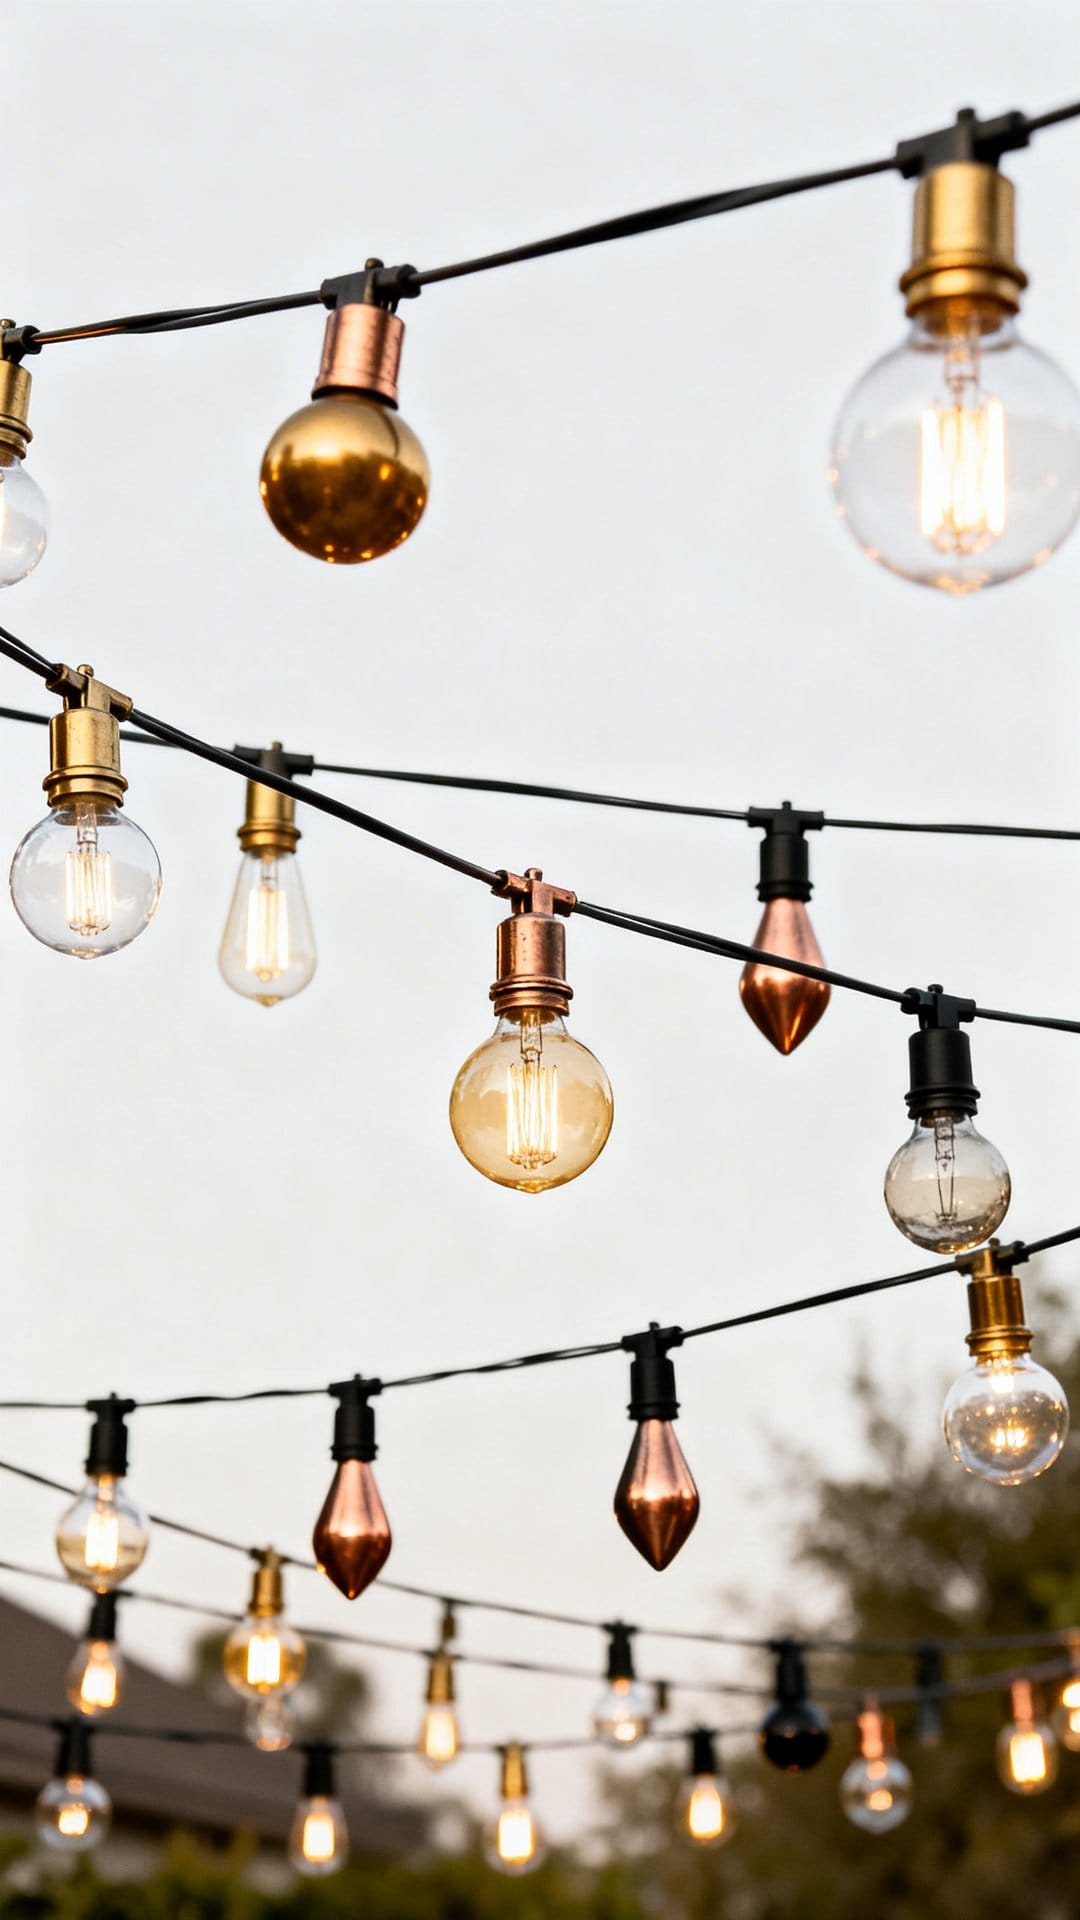
Combine black cord strands, brass clip hardware, Edison ST64 bulbs, and round G40 globes and the result looks like it was collected over years rather than bought in a single trip to the hardware store. Intentional mixing creates personality, pure uniformity reads as showroom-flat.
The rule is to commit to one variable at a time. Mix bulb shapes but keep cord color the same. Or mix cord colors but keep all bulbs the same shape. Changing too many things at once tips from collected to chaotic.
Key Design Elements
- Limit to two cord colors maximum, black and natural copper, or black and white.
- Stick to one color temperature across all bulb shapes so the glow looks unified.
- Repeat each hardware element at least three times so it reads as a design choice, not an accident.
- Edison ST64 bulbs pair naturally with black industrial cord; G40 globes suit white or natural copper.
Best for covered patios and pergolas where you have time to style slowly, this setup rewards patience.
13. Hoop Chandelier DIY (Low Effort, High Impact)
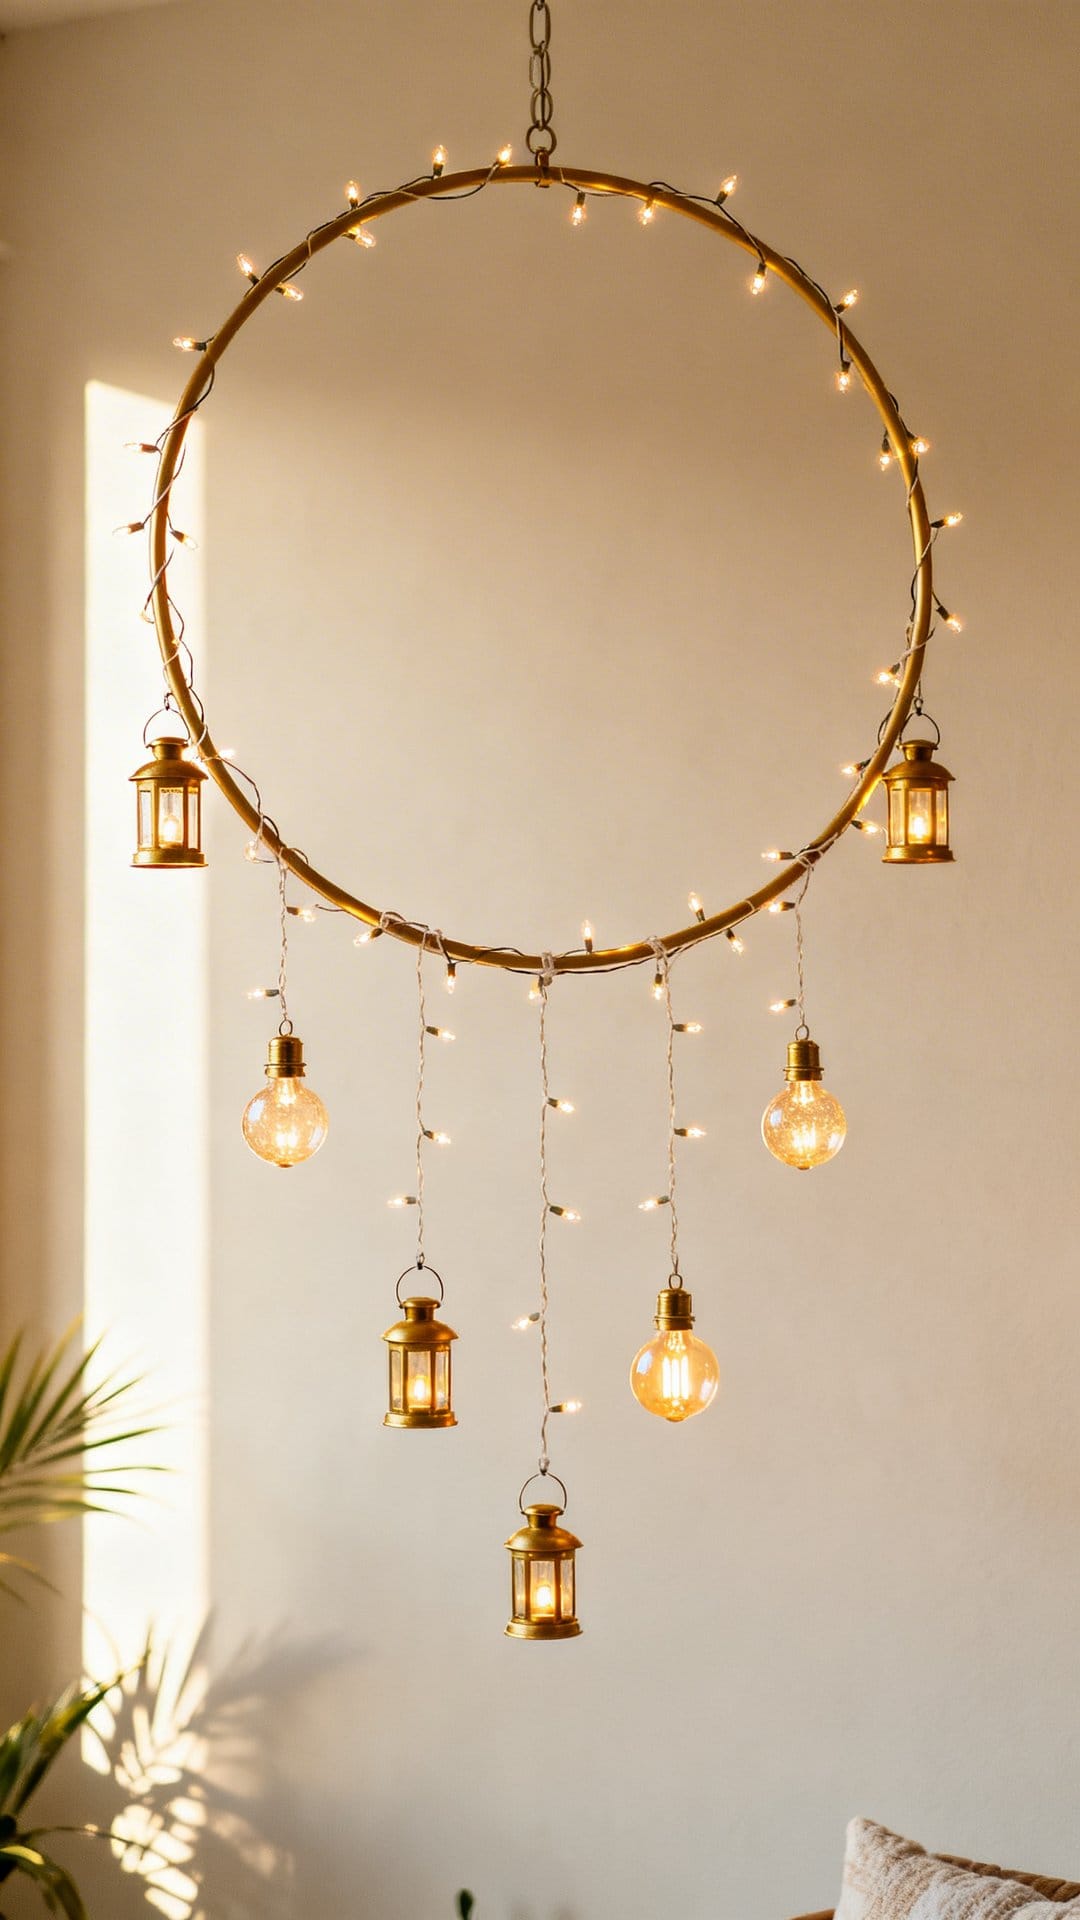
Form a circular chandelier by looping string lights around a metal ring or a sturdy hula hoop, then suspend it above a table or seating area. The concentrated glow draws the eye upward and creates an instant focal point, something every small patio benefits from.
The best ring size for a dining table is 24 to 30 inches in diameter. Any smaller and the proportions feel tight; much larger and it competes with the furniture. Use clear fishing line at three or four suspension points so the ring appears to float rather than hang.
Metal wreath rings from craft stores are ideal, they are rigid, lightweight, and inexpensive. The whole build costs under $20 if you already have a string light strand spare.
Styling Notes
- Use a 24–30 inch metal ring for dining tables; a 16–20 inch ring for accent spots.
- Suspend with three or four equal-length fishing line points for a level hang.
- Wrap the ring with one continuous strand, weaving in and out of any crossbars for stability.
- A ceiling hook or pergola anchor rated for at least 5 lbs handles the weight easily.
Use this as a centerpiece that earns comments every time guests sit down for the first time.
14. Add Dimmers Or Smart Plugs For Mood Control
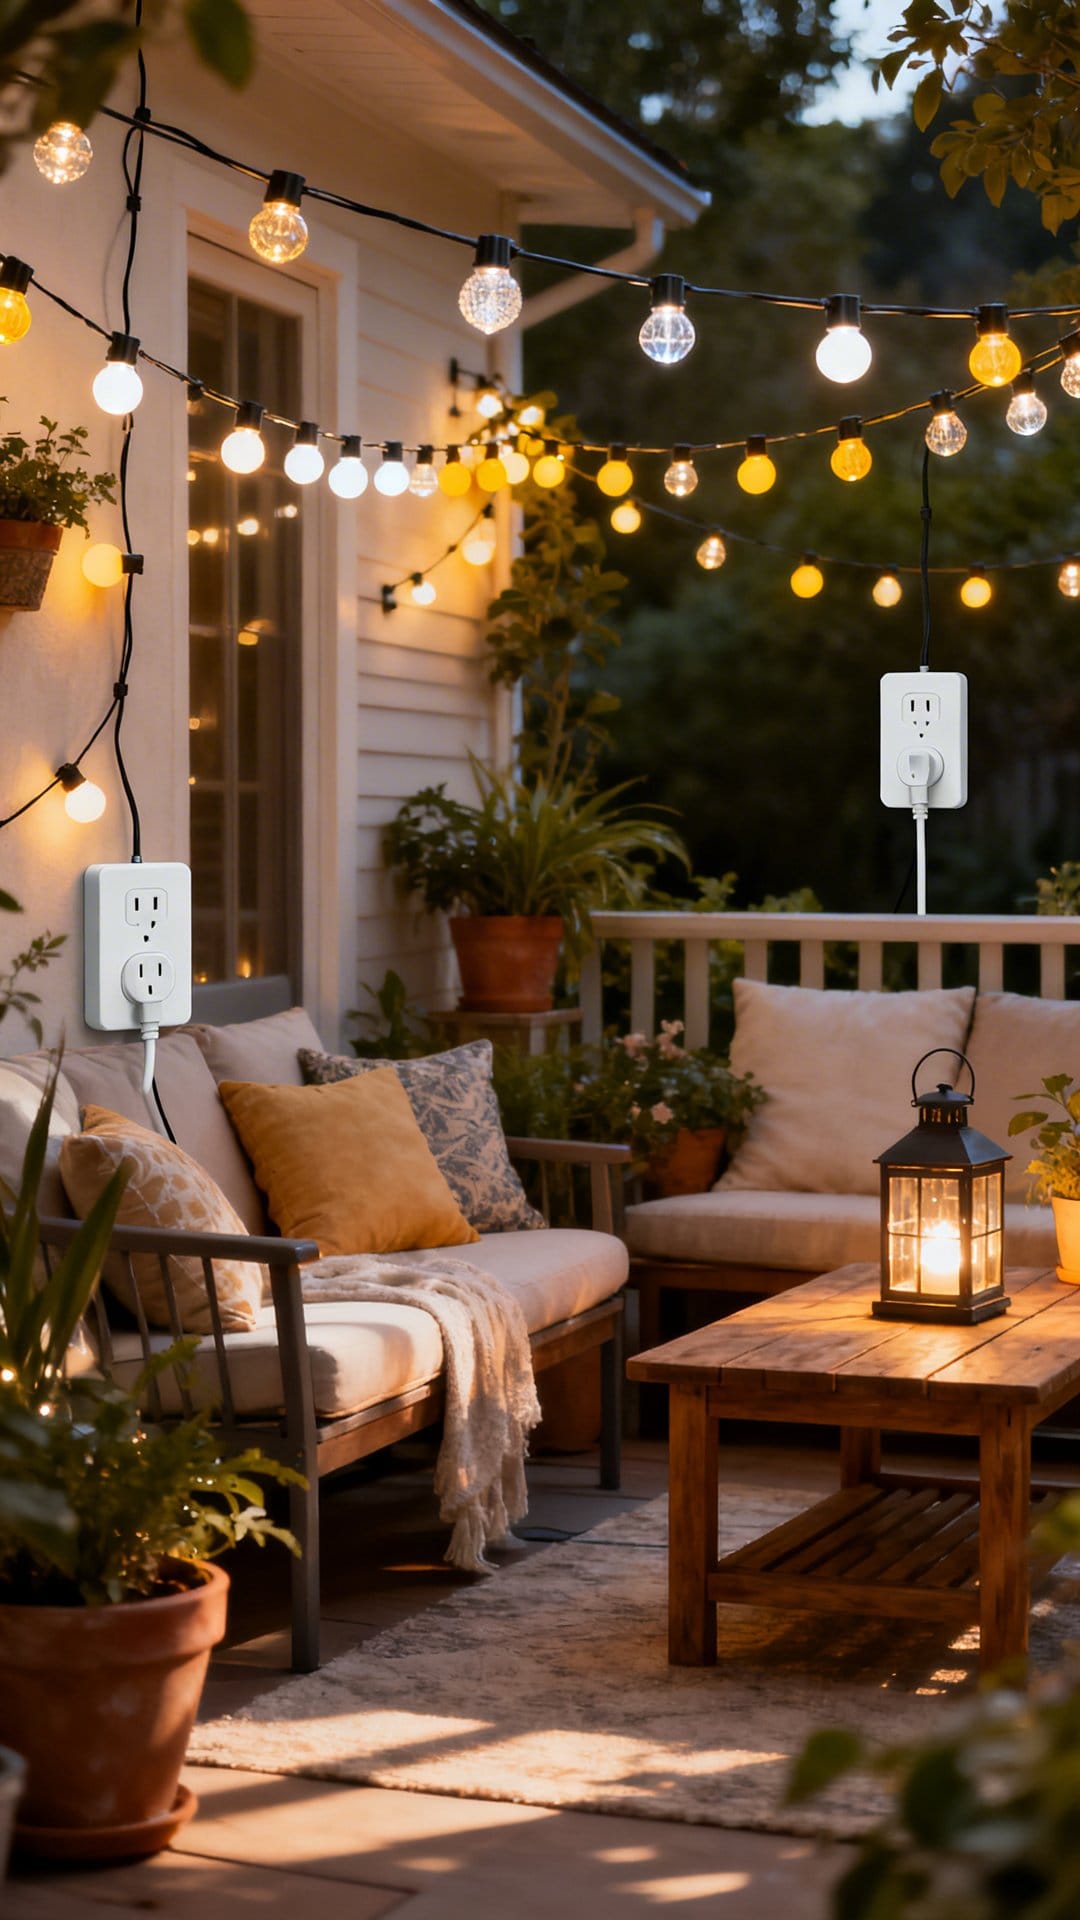
Control the brightness and schedule your lights with a tap on your phone. Dimmers and smart plugs let you shift the patio from bright enough to eat by candlelight to that late-evening whisper glow without leaving your chair.
Setting up a dusk-to-dawn automation is the single easiest upgrade you can make to an outdoor setup, the patio just looks right every evening without any thought. The light is always on when you head outside after dinner and fades off automatically well after midnight.
Decorating Details
- Check that your specific string lights are dimmable before buying a dimmer, LED strands vary.
- Use an IP44 or higher weather-rated smart plug for any outdoor outlet.
- Program a dusk-trigger with a midnight cutoff for fully hands-free operation.
- A 0–10V inline dimmer works for most standard LED strands without a smart home hub.
A small investment in a smart plug or dimmer changes how often you actually use the outdoor space, worth every penny.
15. Run Lights Along A Sail Shade For Coastal Vibes
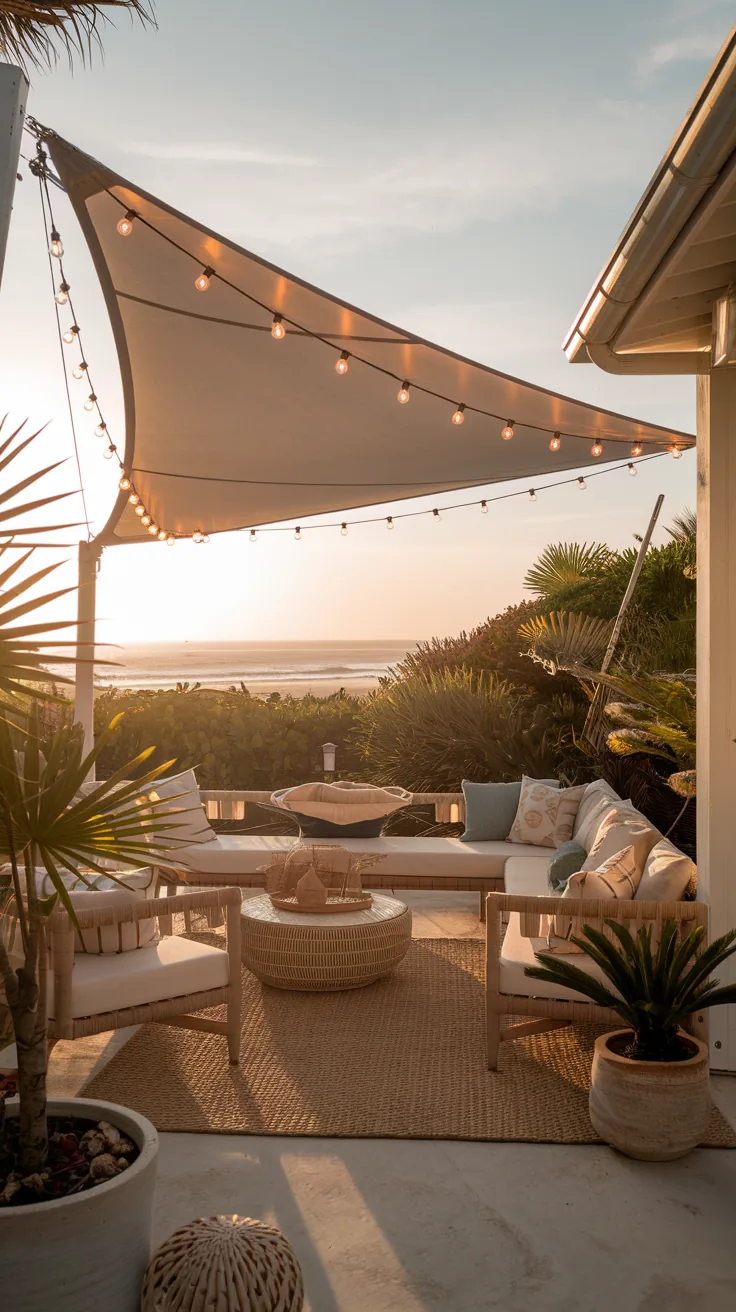
Trace the edges of a shade sail with string lights and the triangular or square shape becomes a lit sculpture after dark. The contrast between the fabric field and the outlined perimeter gives your patio a coastal, breezy quality that pairs well with natural rattan, linen cushions, and anything in a sun-bleached palette.
Use small snap clips along the sail's perimeter binding so the strand sits flush rather than sagging away from the edge. Run the power cord down one of the sail's corner cables to keep it hidden.
Layout Suggestions
- Use snap clips on the sail's perimeter binding to keep the strand flush and taut.
- Route the power cord down a corner cable or post, visible orange cord kills the look.
- Choose a bulb color that complements your sail: warm white pairs with sand or terracotta; cool white suits deep navy or grey.
- Add a second, lower strand at eye level beneath the sail for layered depth.
Best for patios that need sculptural interest after dark, especially where the sail is already a design statement.
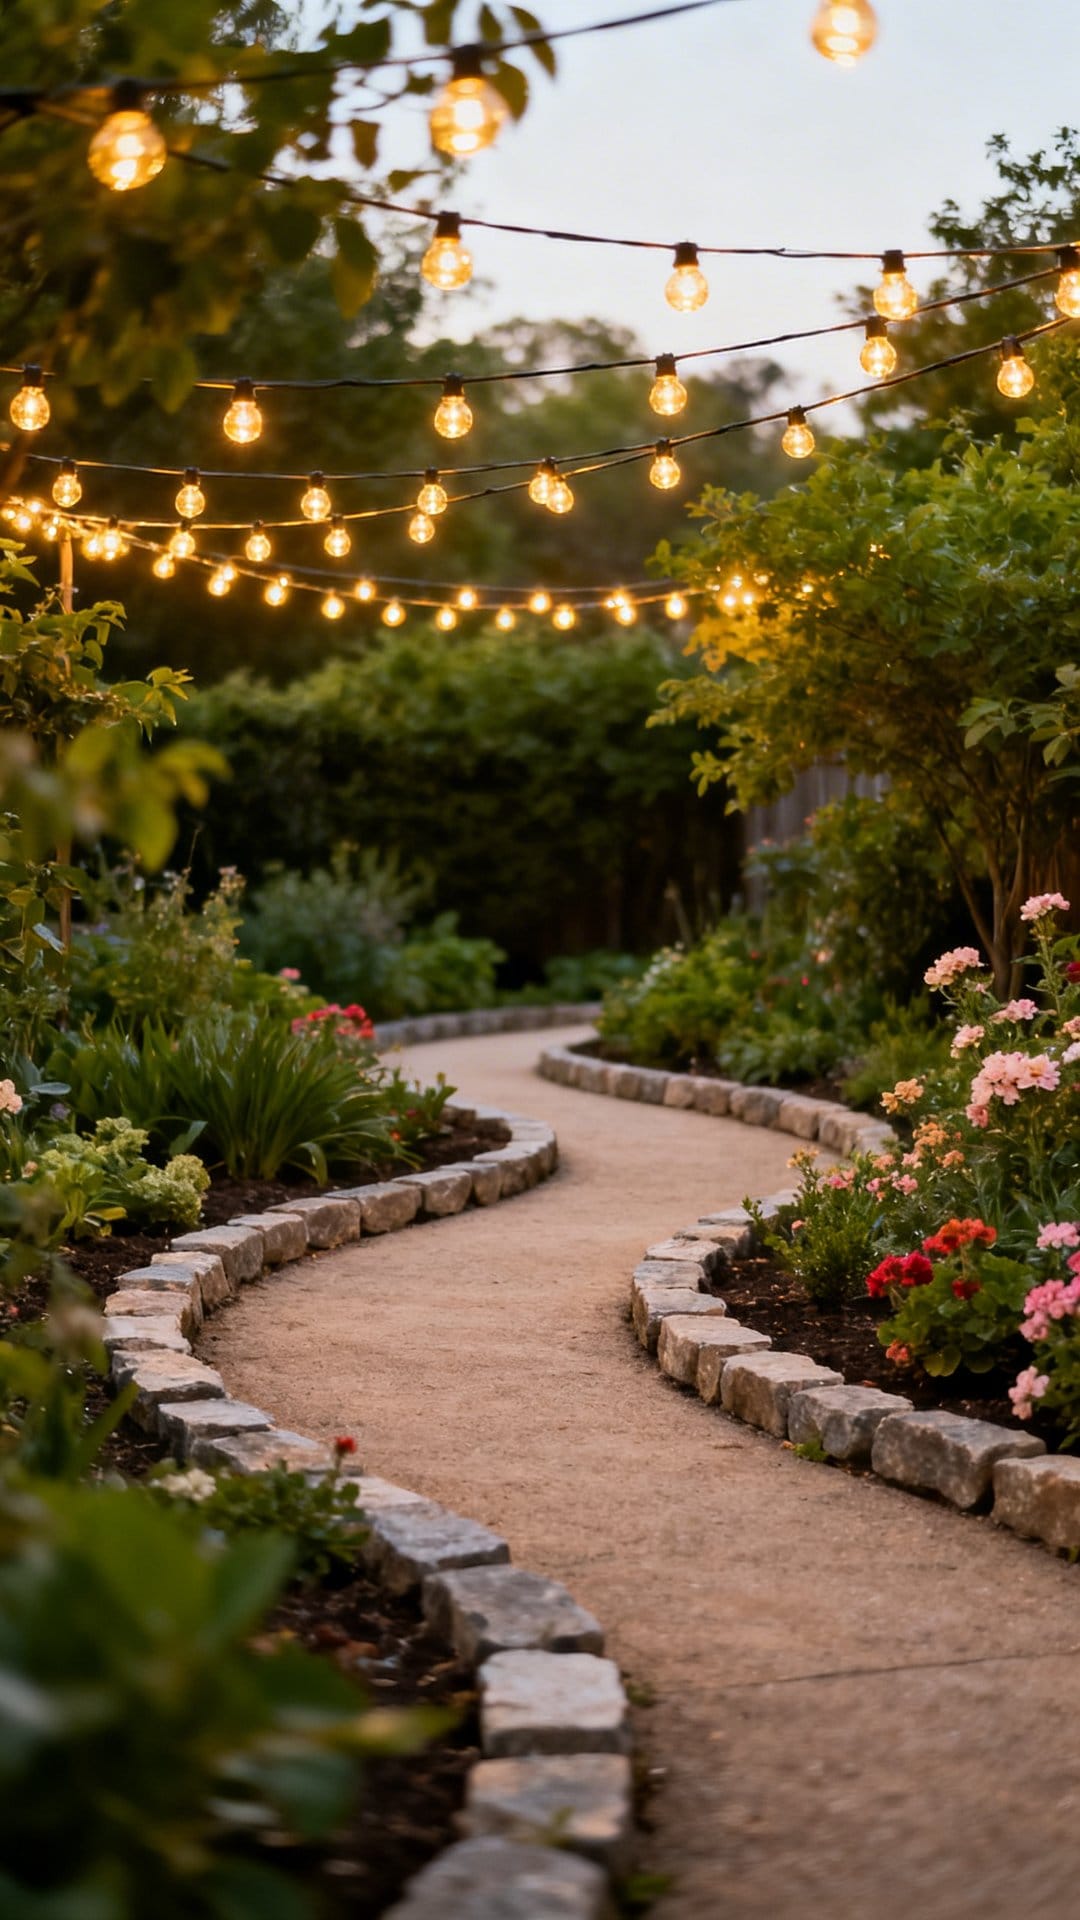
16. Make A Pathway Of Poles And Lights
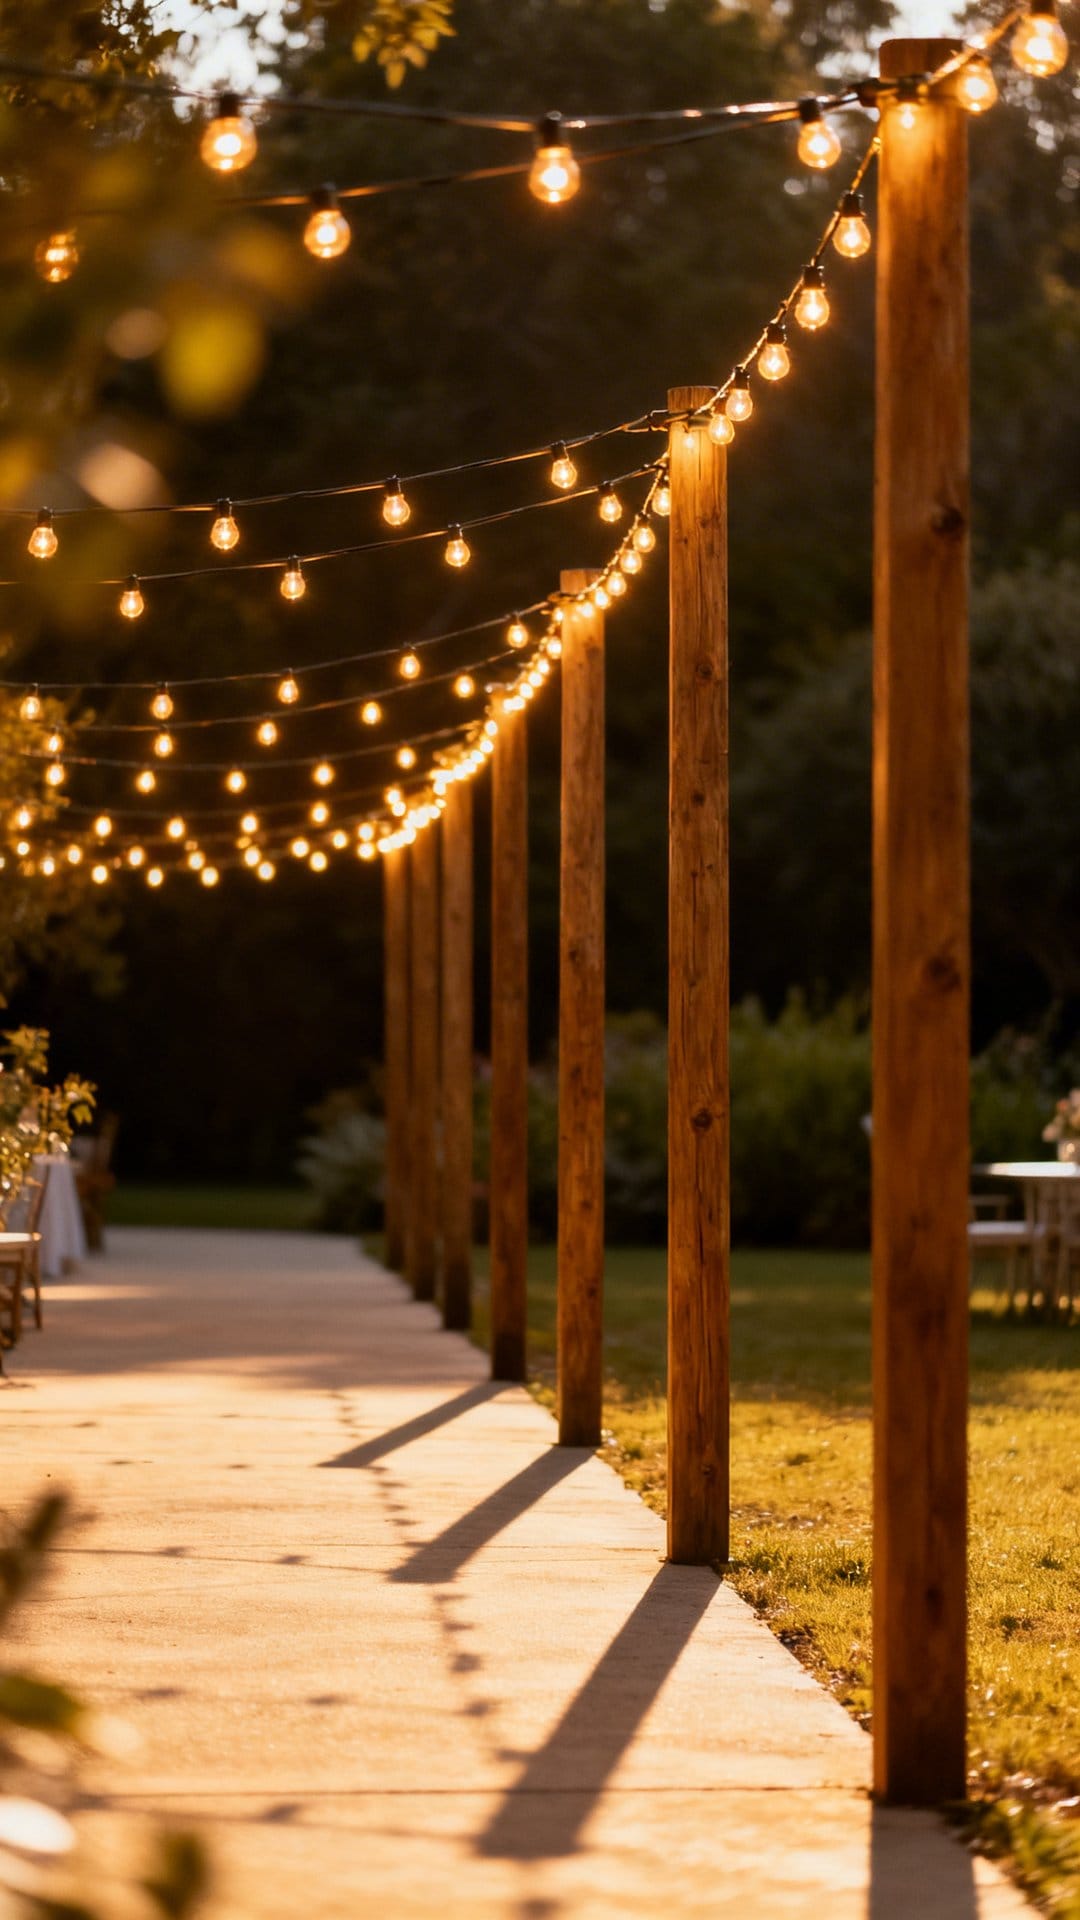
Set metal poles at even intervals along a garden path and swag lights between them to create a lit avenue that guides guests from the gate to the front door or from the house to the fire pit. It sets an atmosphere before anyone sits down.
Poles with ground spikes install in minutes and leave no permanent marks in the ground, good for renters and good for anyone who wants to reconfigure seasonally. Space them 6 to 8 feet apart for a relaxed, generous swag. Closer spacing tightens the look and raises the cost.
Key Design Elements
- Space poles 6–8 feet apart for a relaxed swag with natural visual rhythm.
- Use ground spike poles for a tool-free install that leaves no permanent damage.
- In windy areas, add a guy line from the top of each pole to a nearby stake.
- Use the same bulb style as your patio overhead to keep the whole yard feeling cohesive.
- Run a single continuous strand end-to-end rather than joining at each pole.
Ideal for garden parties and outdoor entertaining, but genuinely magical for ordinary evenings coming home.
17. Use Color-Changing LEDs For Party Mode
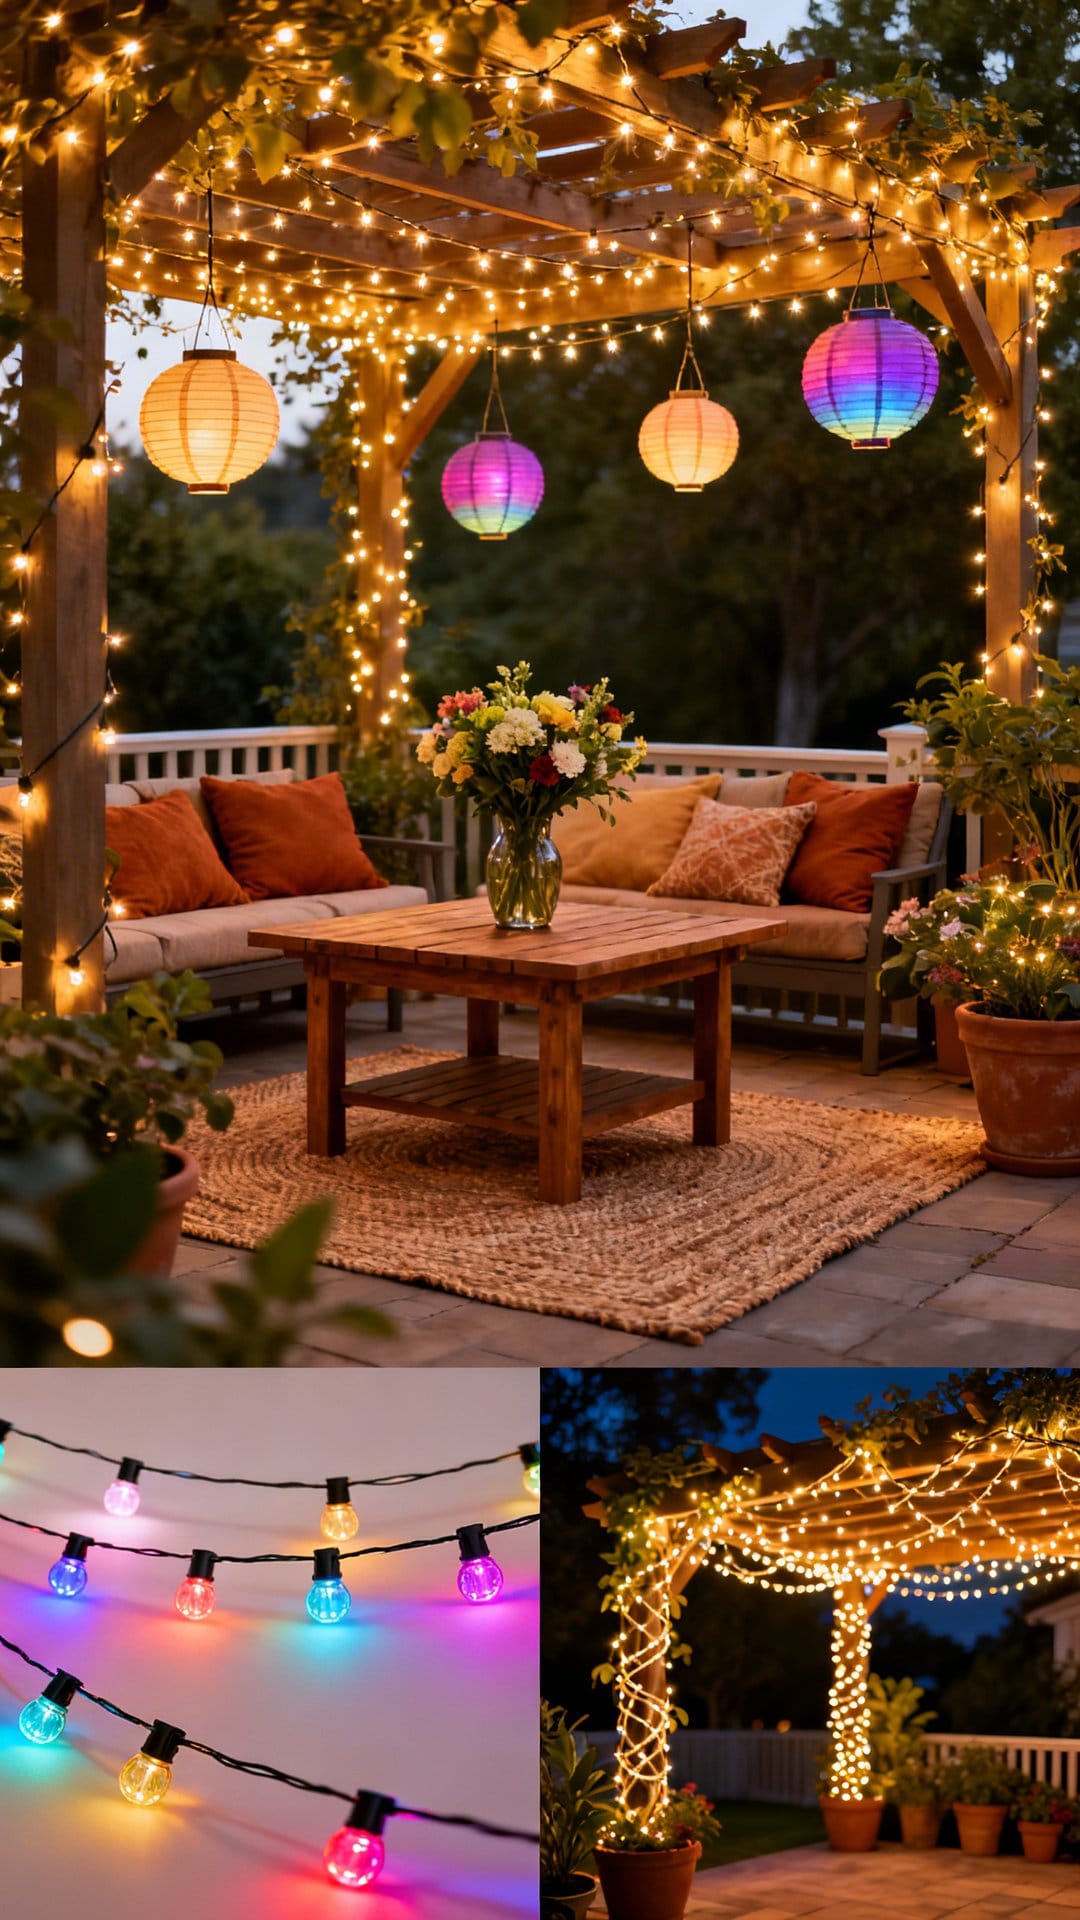
Color-changing strands let you run warm white as your everyday default and shift to full jewel tones the moment the occasion calls for it, birthday, summer party, Fourth of July, with a single tap on the remote or app.
The key to making color-changing lights feel tasteful is restraint. Most outdoor spaces look their best with a single color at a time, not a cycling rainbow. Pick one accent color per occasion and keep saturation at 70% rather than full blast.
If you already have standard warm-white strands elsewhere in the yard, color-changing lights pair best on a secondary line, above the bar cart or along a fence panel, so the warm white anchors the space and the color adds the festive layer.
Color Palette Ideas
- Set warm white (2700K mode) as the default scene for everyday evenings.
- For summer parties: soft amber or peach. For the holidays: deep red or cool blue.
- Keep saturation at 70% rather than maximum, full saturation reads as theme park, not patio.
- Sync multiple strands to the same app so color shifts happen simultaneously across the whole space.
Buy from a brand with a reliable app, cheap color-changing lights often lose sync between strands after a few weeks.
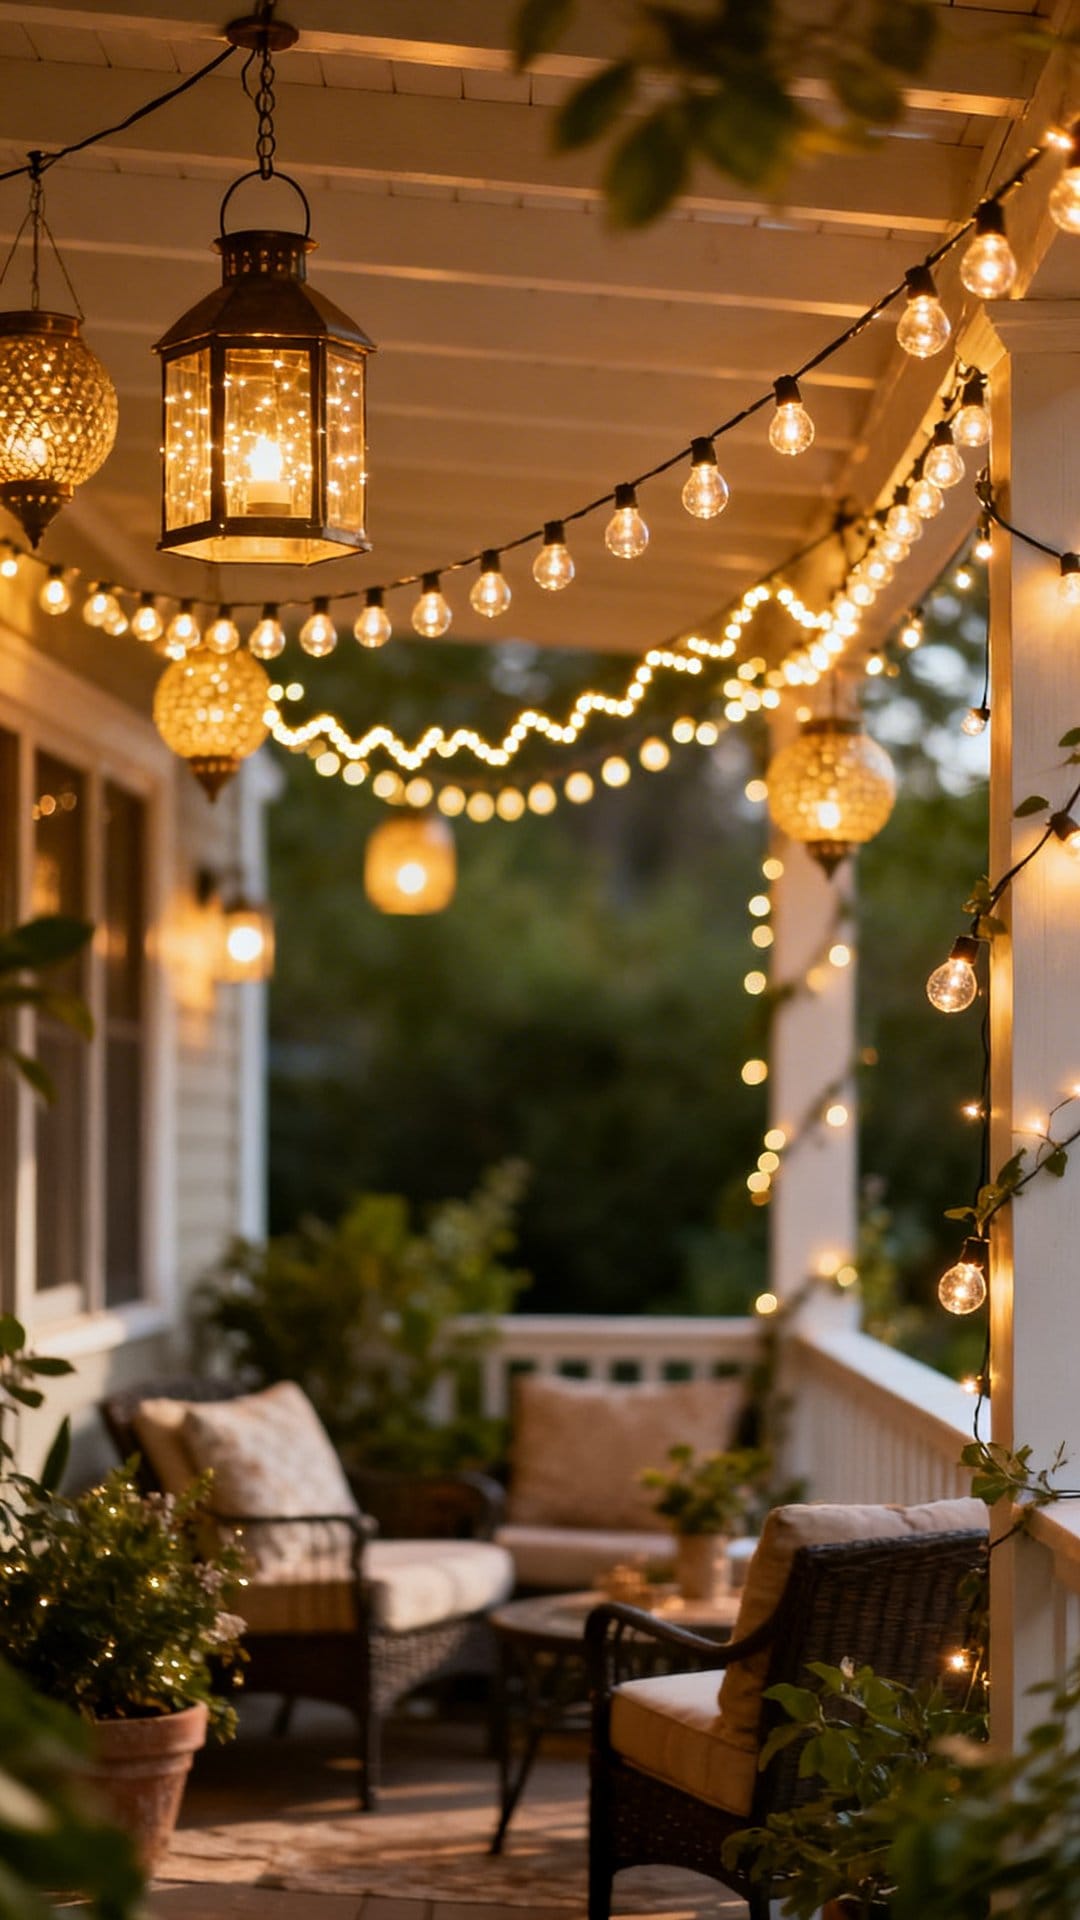
18. Layer With Lanterns And Candles For Depth
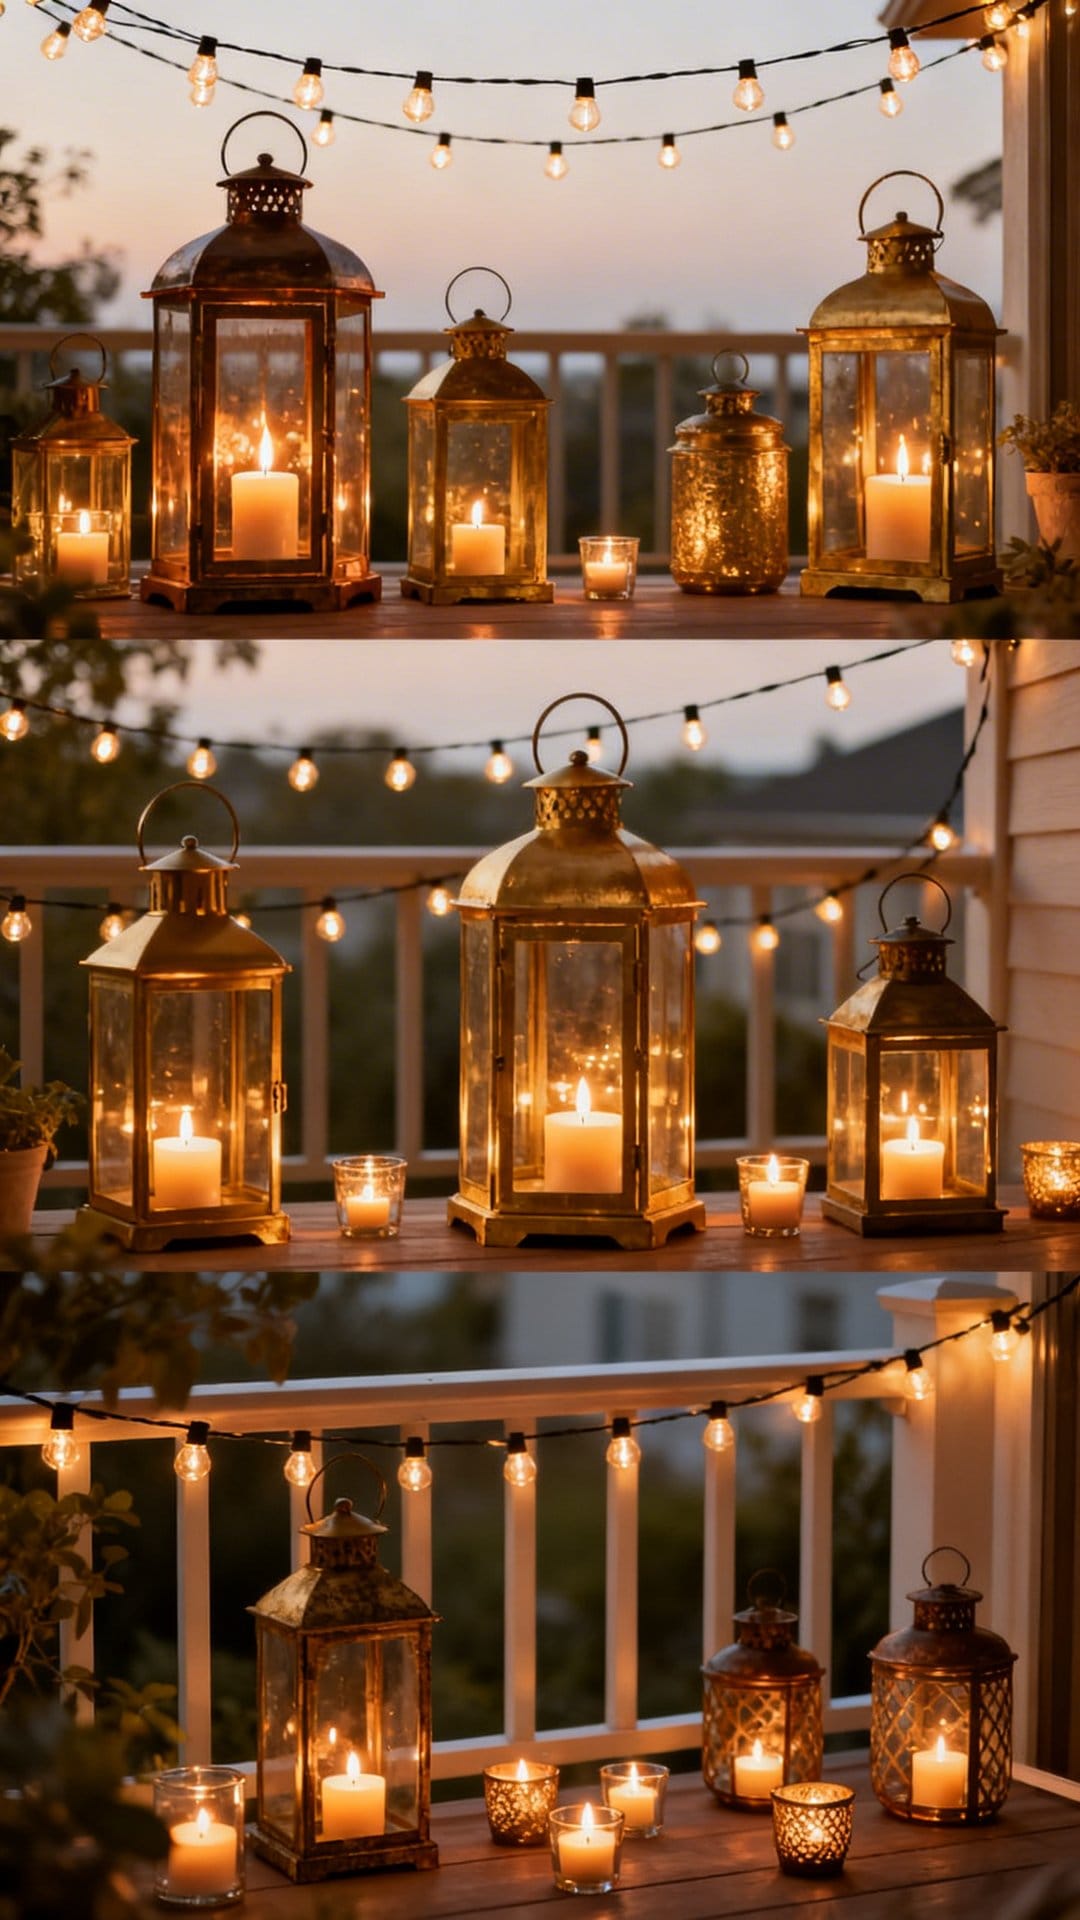
String lights handle the overhead zone well, but they leave the table and floor level in shadow. That gap is where lanterns and candles earn their place. Group them at sitting height to punch in low-level glow and create the texture of shadows that overhead light alone can never give you.
The combination of overhead string light glow and eye-level lantern warmth creates layered illumination, the kind that feels designed even when it is not. From what I've gathered, the magic number is three lanterns grouped in a cluster near the main seating area, varied in height and metal finish for interest.
Styling Notes
- Group lanterns in odd numbers near seating, three or five at varied heights reads as intentional.
- Use flameless LED pillar candles inside lanterns for safety and wind-proof reliability.
- Match the lantern metal finish to your string light hardware for visual cohesion.
- Place the tallest lantern at the back of a cluster and shortest at the front.
Best for creating a complete lighting story that feels deliberate from the moment the lights come on.
19. Hide Hardware For A Floating Effect
Conceal hooks, clip hardware, and excess cord so the bulbs appear to hover without any visible support. When the installation disappears, the light itself becomes the only thing you notice, and even a basic string of globe bulbs looks polished.
The most common hardware error is running the excess cord along the outside of a beam where it catches the eye. Tuck cord inside U-shaped clips that press flush to the wood, or tuck it behind fascia boards where only the runs of bulbs remain visible.
Decorating Details
- Paint cup hooks and eye hooks to match your trim color before installation.
- Route excess cord along beams inside flush cord clips, these hold up to 2 lbs and are nearly invisible.
- Choose black cord against dark backgrounds; white or natural copper cord against light surfaces.
- At the plug point, hide the adapter behind a planter or use an outdoor cover plate.
Use this approach when clean minimalism and warm light need to coexist without compromise.
20. Swag Lights Over A Hammock Or Daybed
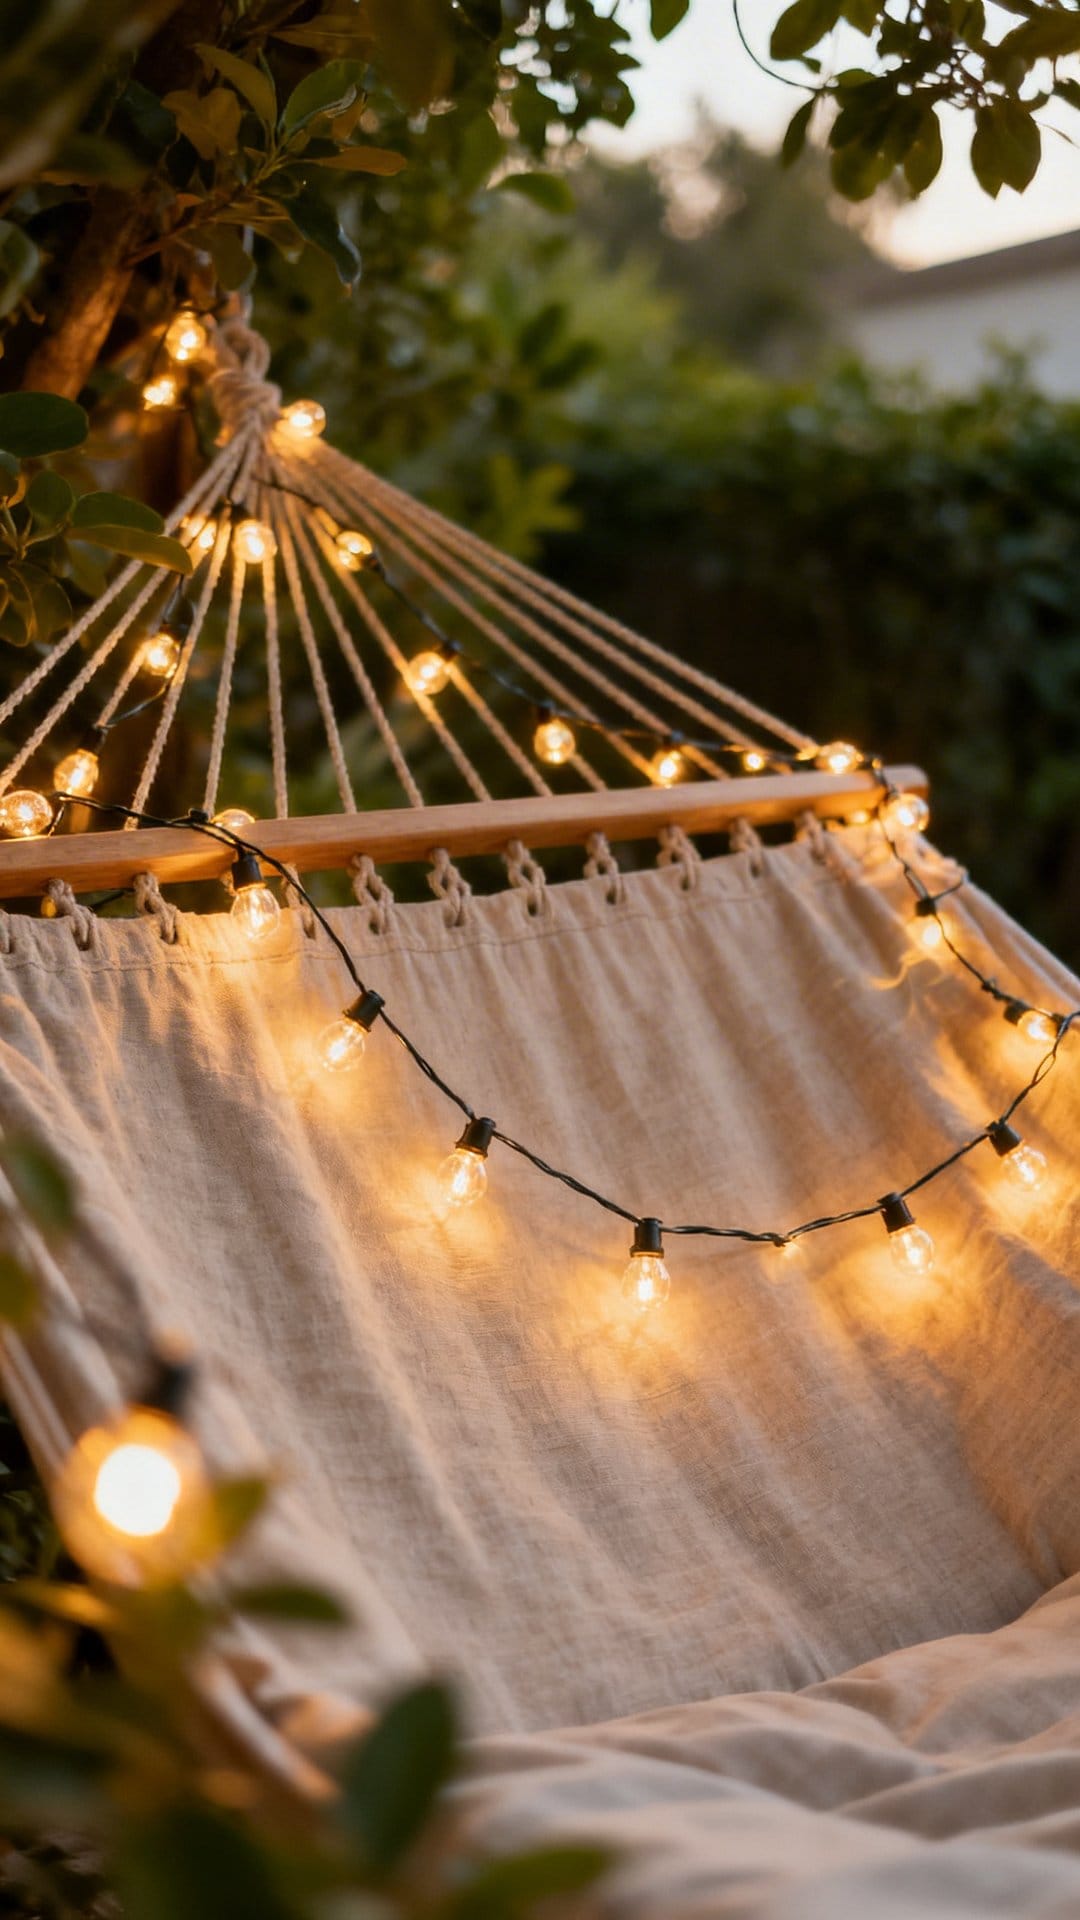
Loop two or three strands above a hammock or outdoor daybed for the coziest possible light setup. The soft overhead glow creates a reading nook quality that invites long lounging sessions, afternoon naps that stretch into evening, or late-night conversations that nobody wants to end.
Attach the strands to two fixed points, posts, a pergola beam, or a fence, positioned about 18 inches to each side of the hammock or daybed. This keeps the light centered without any strand hanging directly over a person lying down.
Layout Suggestions
- Position strand anchor points 18 inches to either side of the lounging spot, not directly above.
- Keep bulbs at least 24 inches above head level when the hammock is occupied.
- Choose low-heat LED bulbs, especially important in enclosed or canopied spots.
- Two or three parallel strands give fuller coverage than one strand run back and forth.
Perfect for solo unwinding or the kind of slow summer conversation that nobody wants to interrupt.
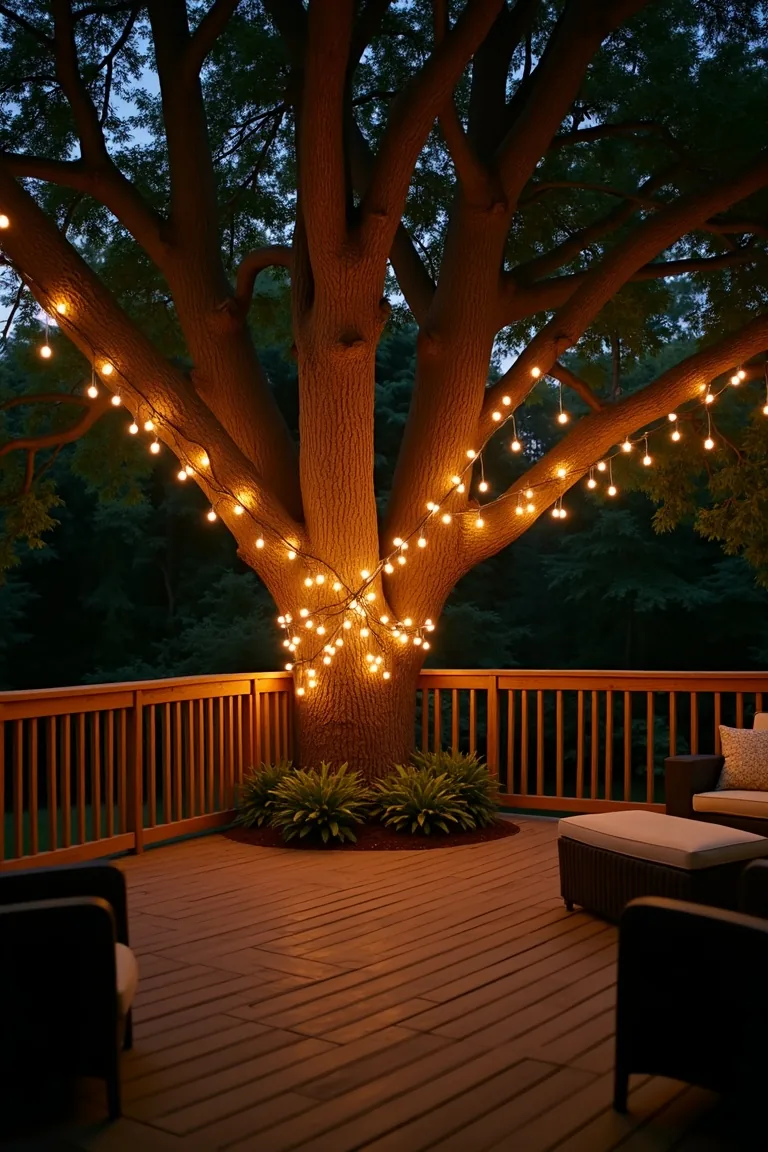
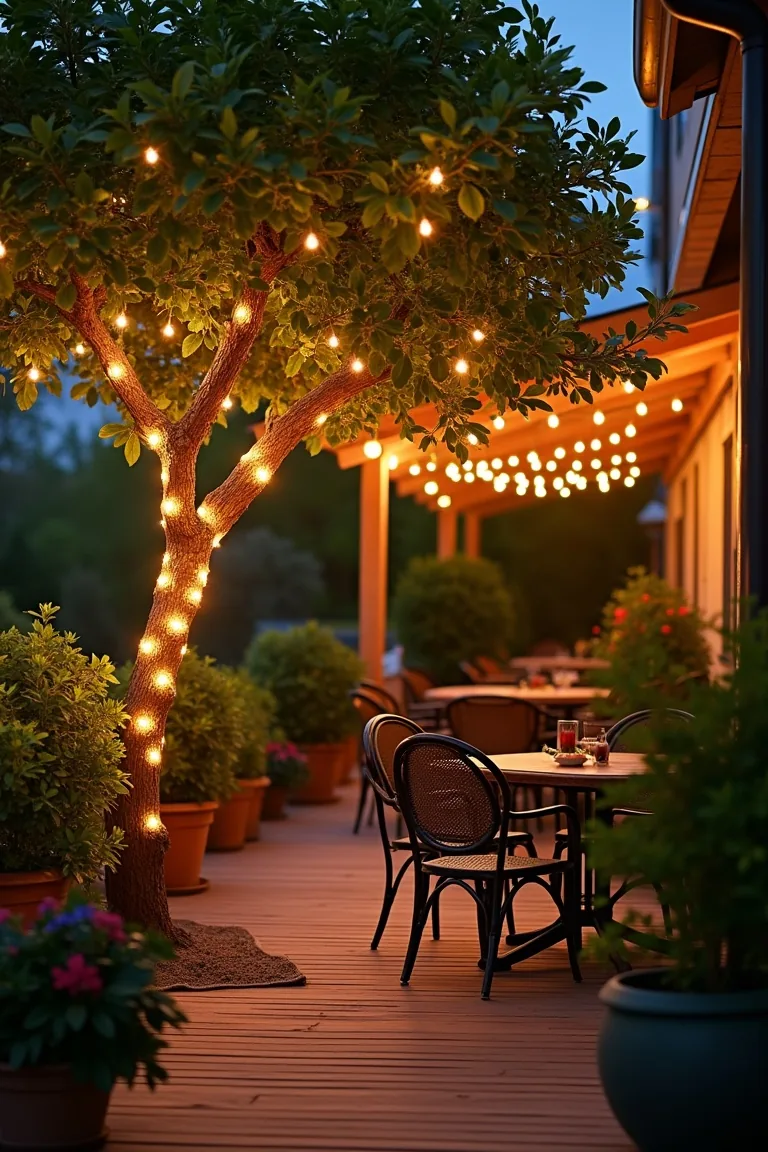
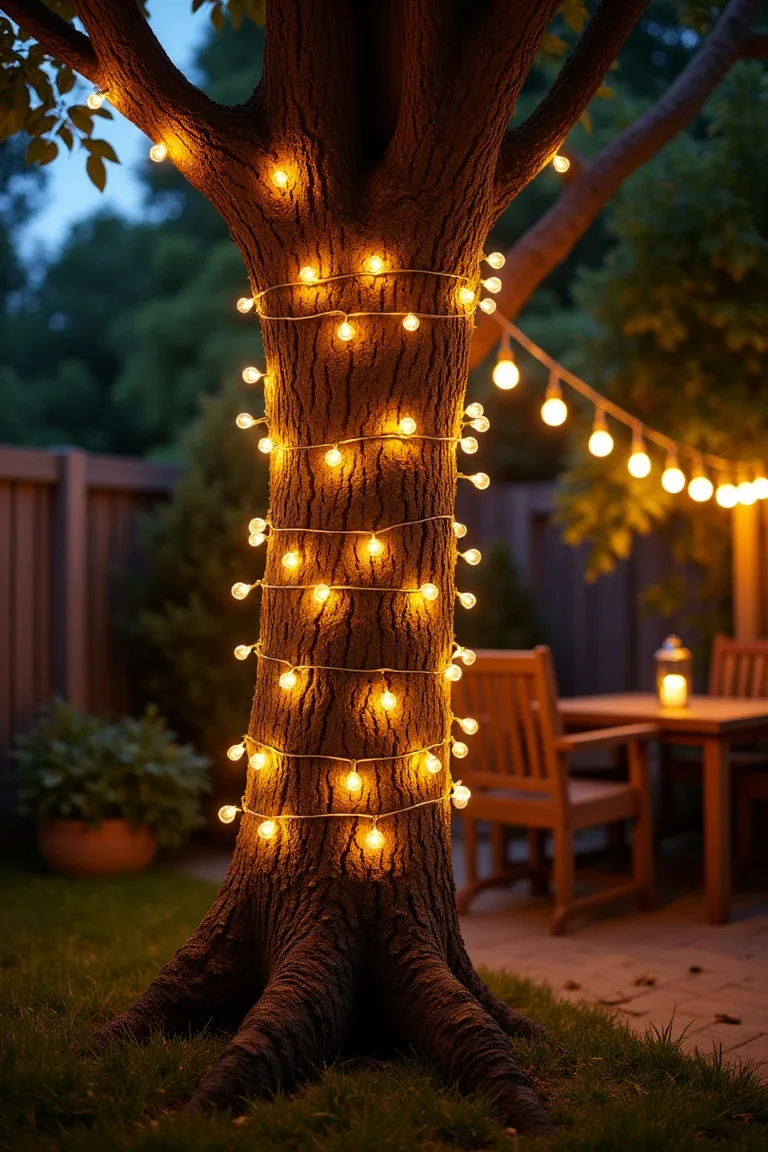
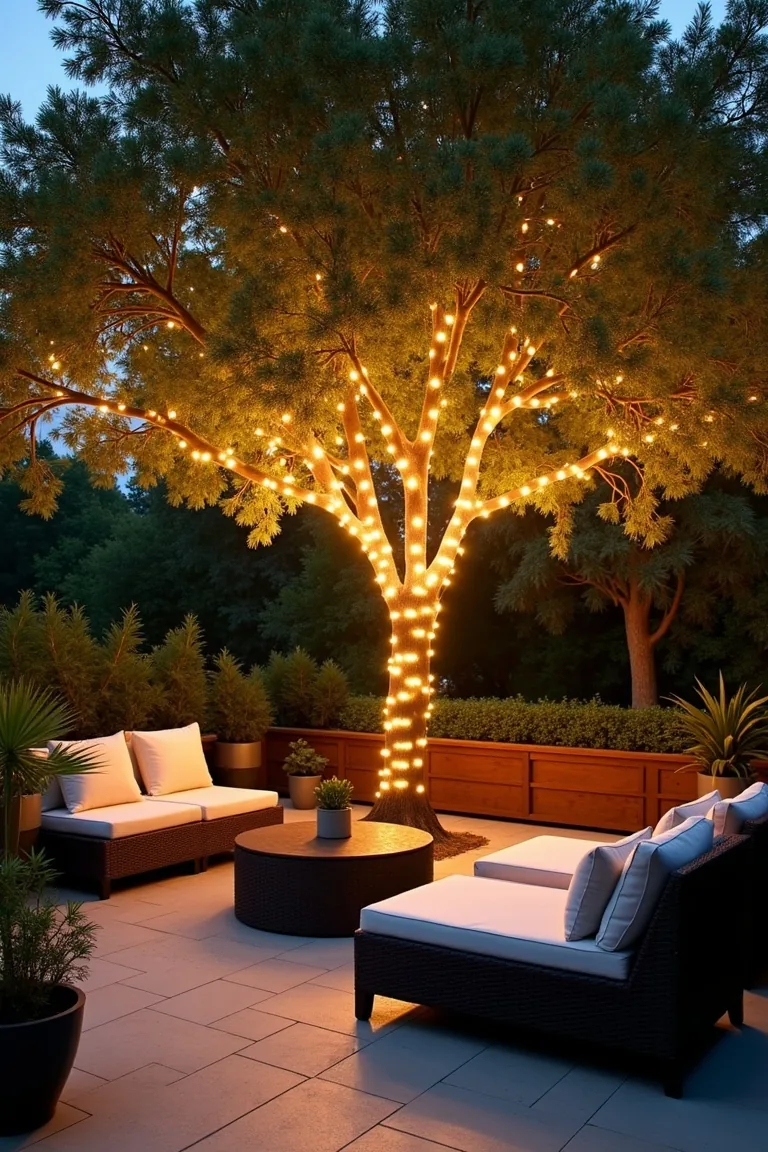
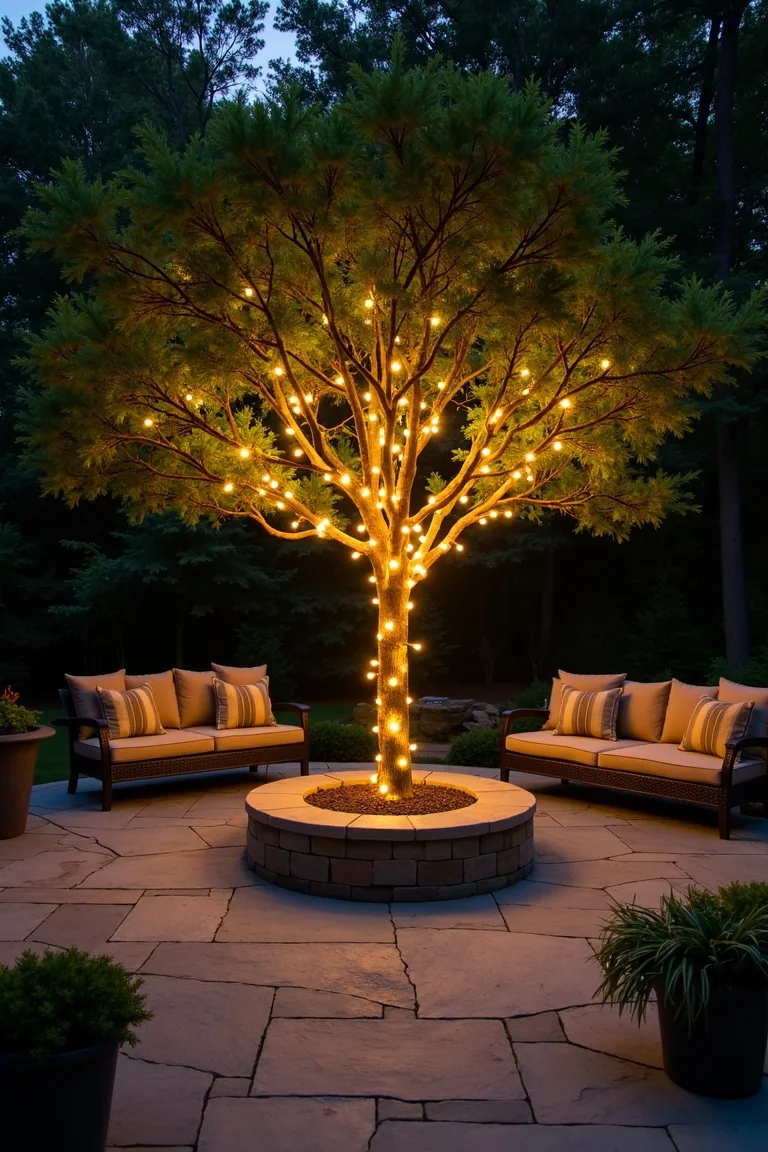
21. Surround A Tree For Enchanted Garden Feels
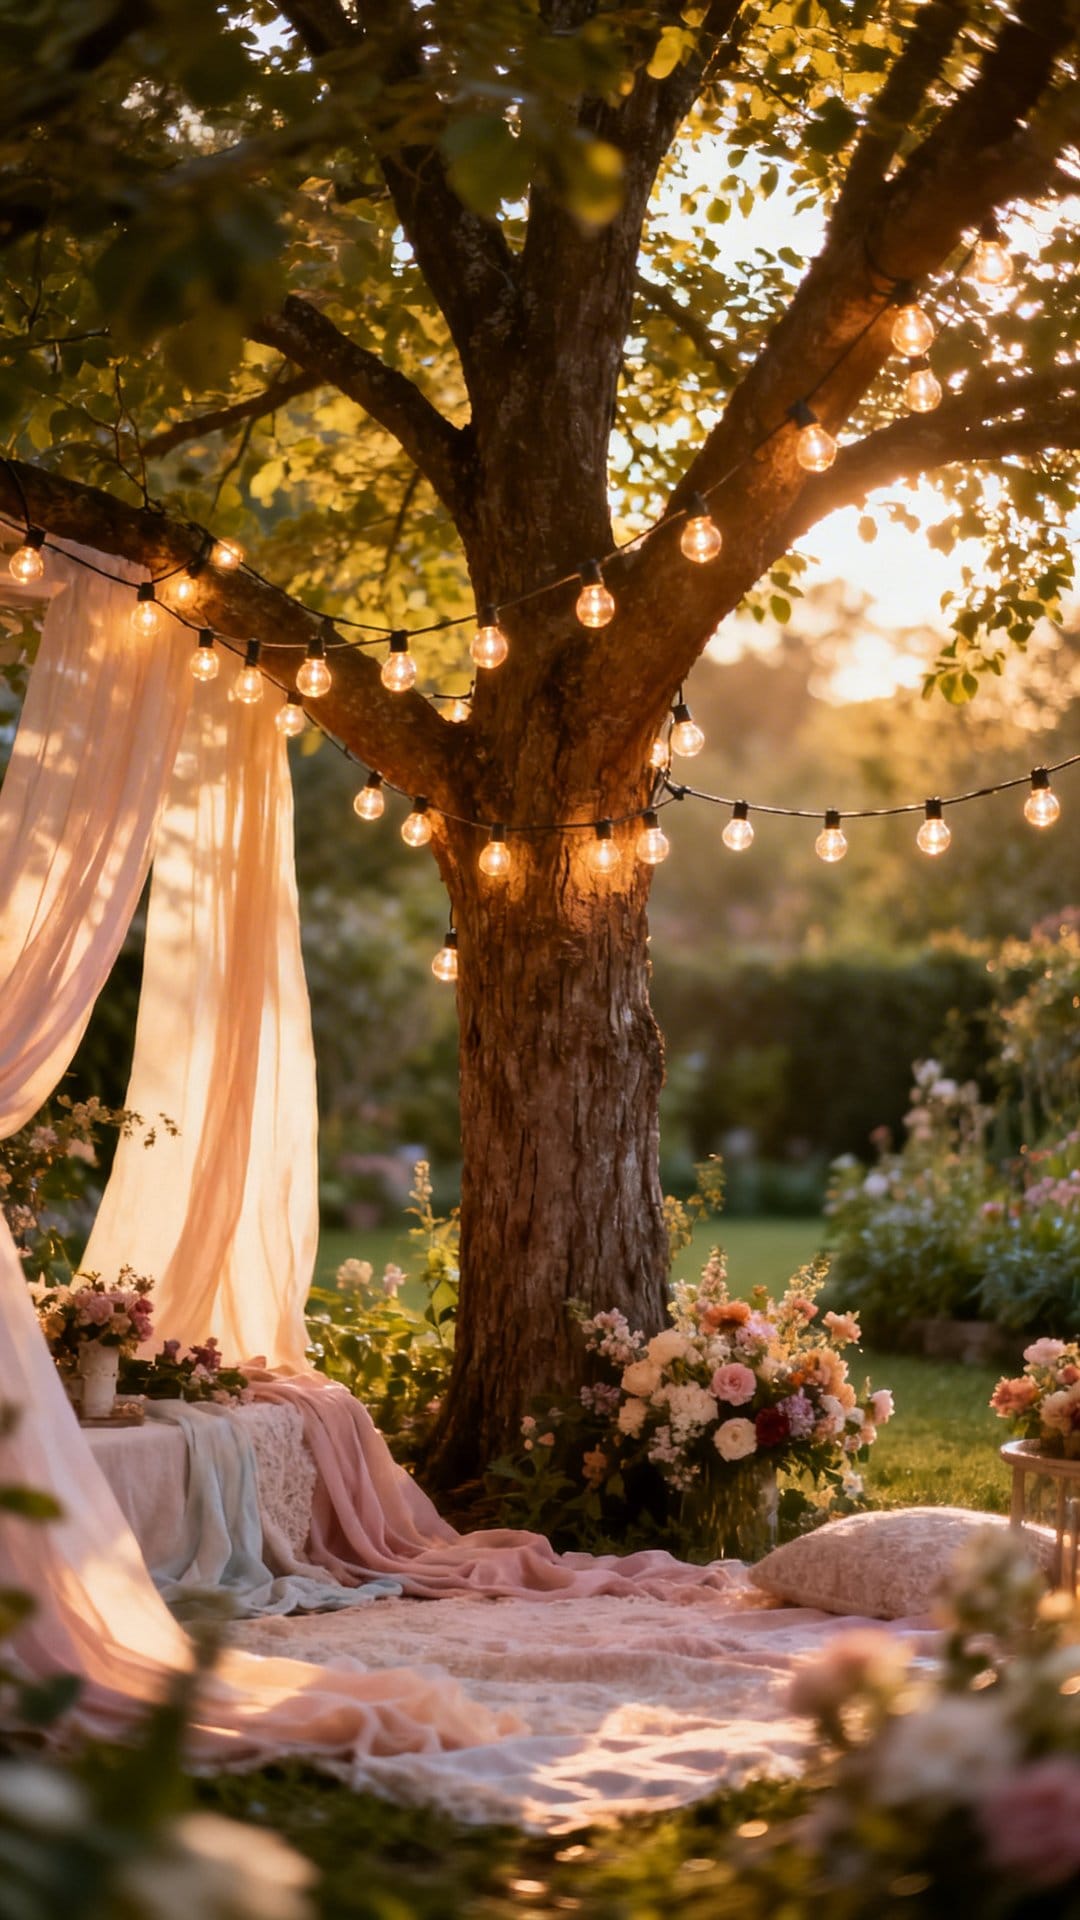
Spiral string lights up a tree trunk and extend a few strands out along the lower branches. The result turns any backyard feature tree into a glowing sculptural anchor that pulls the whole outdoor space together after dark.
Scale matters here. On a mature oak or maple, wrap three to four strands up the trunk and extend them along the five or six lowest branches. On a young ornamental tree, one strand wrapped loosely up the trunk creates enough glow without looking overdone.
Key Design Elements
- Use soft, flexible ties rather than zip ties on bark, hard ties can damage the tree over time.
- Leave 2–3 inches of slack in each spiral loop to allow for trunk growth.
- Uplight the trunk base with a small ground-stake spotlight for a dramatic layered effect.
- Remove lights seasonally to check for any binding or abrasion against the bark.
Great as a focal point near a seating area or at the end of a lit pathway.
22. Keep It Solar Where Outlets Can't Reach
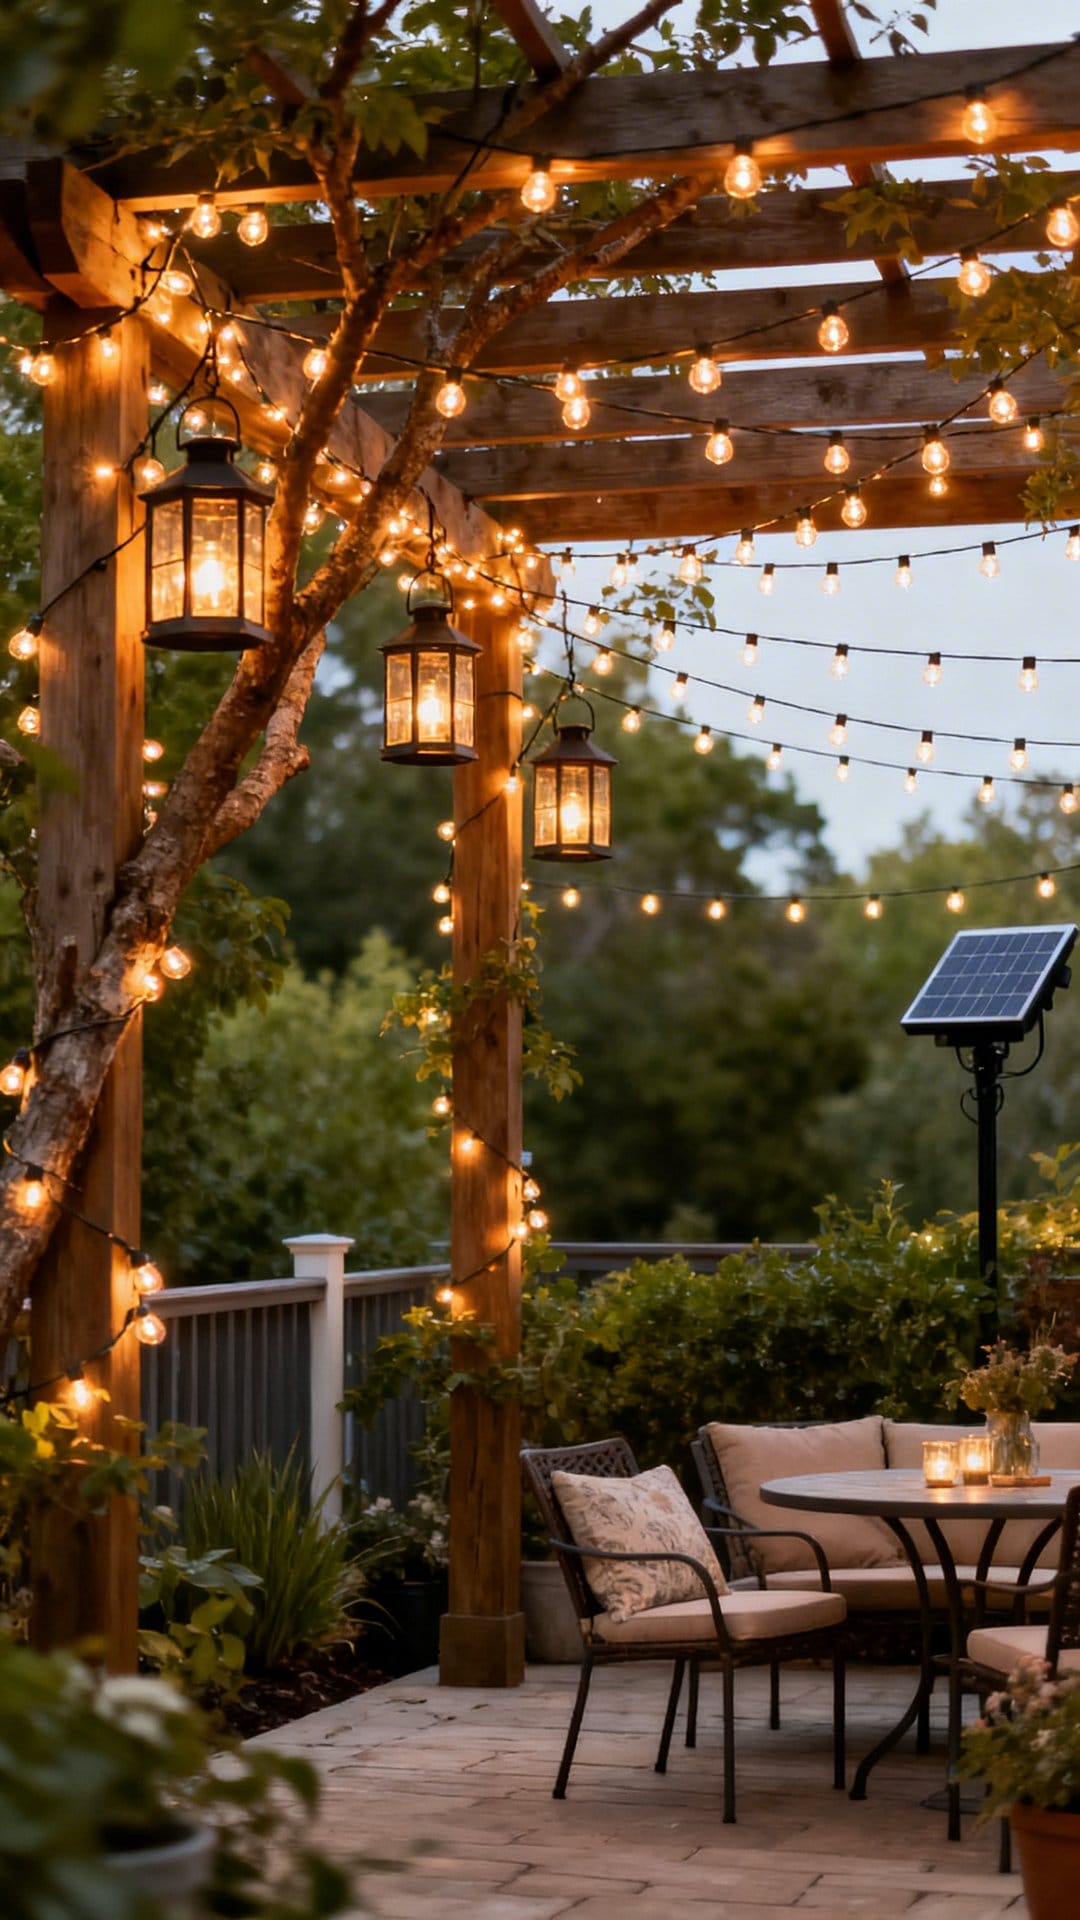
No outdoor outlet? Solar string lights solve the problem cleanly. They store energy during the day through a small panel and run for 6 to 10 hours after dark, no cords to manage, no extension leads snaking through the grass, no electrical work required.
The quality gap between good and bad solar lights is large. Cheap solar strands dim noticeably after a few weeks. Look for lights with a separate panel (not built into the strand) so you can position the panel in full sun while placing the lights in a shaded seating area. A 1200mAh battery or larger holds a full night's charge even after a cloudy day.
Styling Notes
- Mount the solar panel in full, direct sun, even partial shade cuts charge time and duration significantly.
- Choose a panel-on-separate-cable design so the lights can be in shade while the panel charges in sun.
- Match color temperature to any plug-in strands nearby: warm white solar at 2700K blends naturally.
- A 1200mAh battery gives reliable 8–10 hour runtime even after a partly cloudy day.
Solar lights make it possible to bring patio string light ideas to any corner of the yard, even spots far from the house. For a full outdoor setup on a budget, our small patio ideas on a budget guide pairs well with this approach.
Final Thoughts
These patio string light ideas are some of the few upgrades that change how a space feels as much as how it looks. Pick two or three ideas from this list, start with the easiest, and give your patio that warm glow it has been missing. The investment is small and the evenings outside become a different thing entirely.You do not need to tackle all 22 setups at once. Start with a single zigzag overhead or a perimeter outline, get comfortable with the installation, and then layer in accent pieces over time. Good outdoor lighting is built incrementally, and every step of the way the space gets noticeably better.For apartment patios and smaller outdoor spaces, our small patio decor ideas guide covers furniture and layout to pair with your new lighting setup. Take your time, enjoy the process, and let those evenings outside feel a little more magical. Happy decorating!
Frequently Asked Questions
Choose warm white bulbs in the 2700–3000K range for a soft, flattering ambiance. This color temperature mimics candlelight and works well for evening relaxation or casual gatherings.
A simple zigzag pattern across the patio provides balanced light and a relaxed, bistro feel. Keep a gentle sag between anchor points and space runs evenly to avoid dark patches.
Use eye hooks or cup hooks along eaves, beams, or sturdy posts to anchor each run. Ensure the attachments are rated for outdoor use and leave a bit of slack to reduce strain from wind or temperature changes.
Create a canopy by crisscrossing multiple strands overhead to form a light blanket. Layering strands at varying angles and heights adds depth and a twinkling, starry effect.
Yes, classic globe lights work with most aesthetics, from modern to rustic. Their rounded shape and warm glow deliver a timeless, casual vibe that complements various furniture and decor.
Solar string lights are designed for exactly this situation. A separate solar panel placed in full sun charges a battery during the day, giving 6–10 hours of light after dark with no cords or electrical work required.
You Might Also Like

Get cozy seasonal ideas in your inbox
Seasonal decor, recipes & home inspiration — straight to you. No spam, unsubscribe anytime.